DIY
Tesla Dashcam Showdown: Thinkware F770 vs. BlackVue DR650GW
They’re in every store, every restaurant, most workplaces, monitoring traffic, stashed on buses and trains, tucked up under your neighbor’s gutters, watching you work out at the gym and lurking in some places you wouldn’t even expect and their sole purpose is to record what you’re doing. Estimates vary, but the average American is captured on camera about 100 times a day. With all those lenses aimed your direction, you’d be wrong to assume you could count on any of them to protect your interests or property, even assuming you could obtain the recording without a subpoena. Given the value of our cars, the political climate and the litigious nature of modern society, many Tesla owners have shrugged their shoulders and joined in the camera arms race. Do it right and you’ll have at least one camera you can count on to be your witness– but only if you choose wisely.
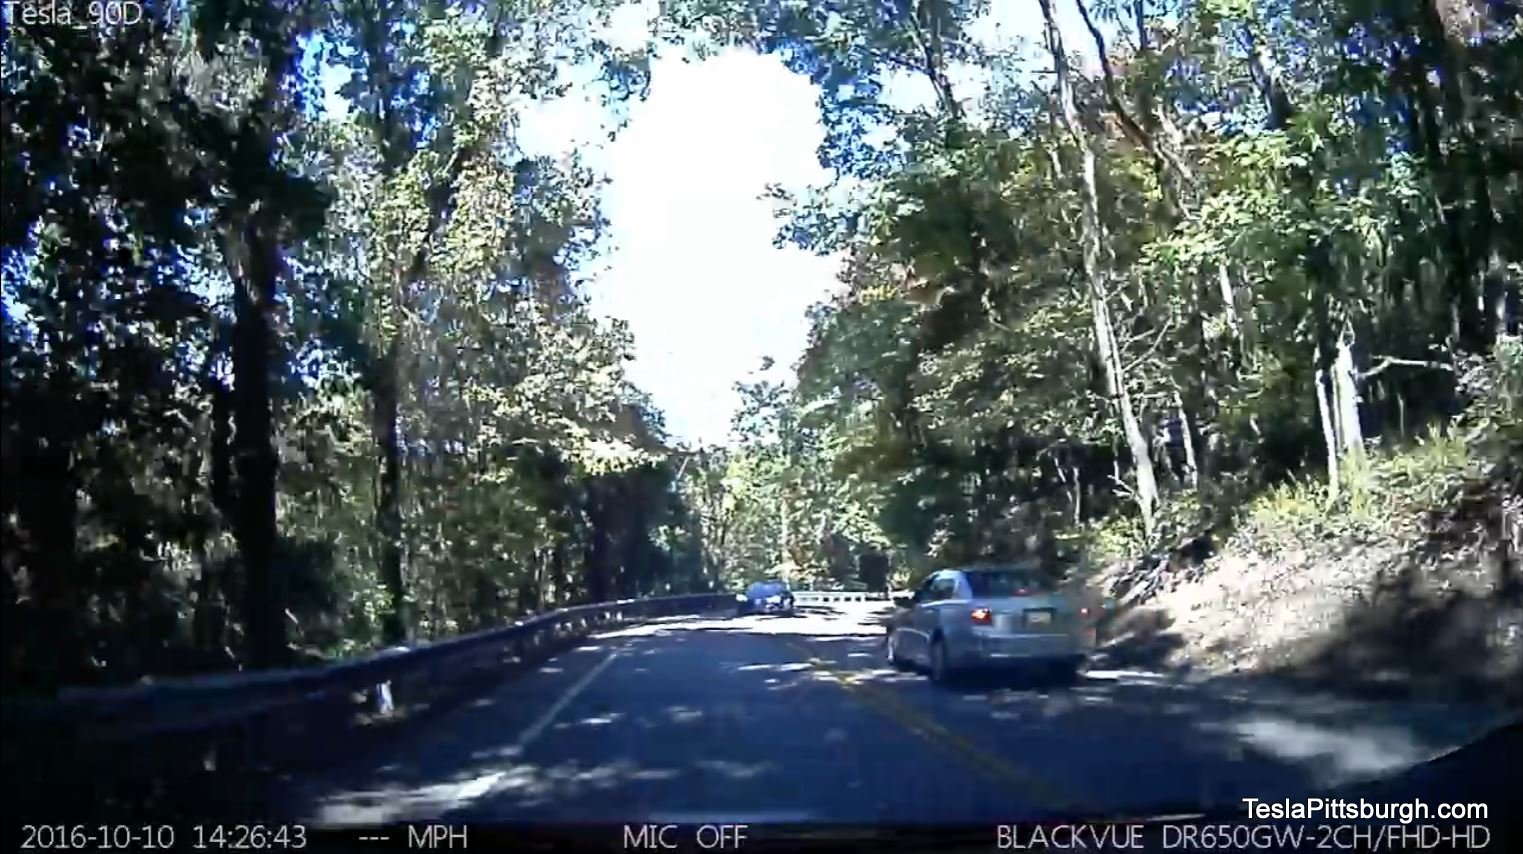
One of the most popular posts I’ve written was about my “Big Brother on the Cheap” dashcam installation. The inexpensive cameras I have used for the past few years worked well enough, but memory read/write glitches are unavoidable and they don’t focus very precisely. Tired of seeing everyone rave about their higher priced camera setups and looking for more reliability, I was curious what a little extra money would buy.
BlackVue pretty much owns the Tesla market, a level of devotion that seems well-earned, but another company is trying to fire their slingshot into Goliath and bring him down.
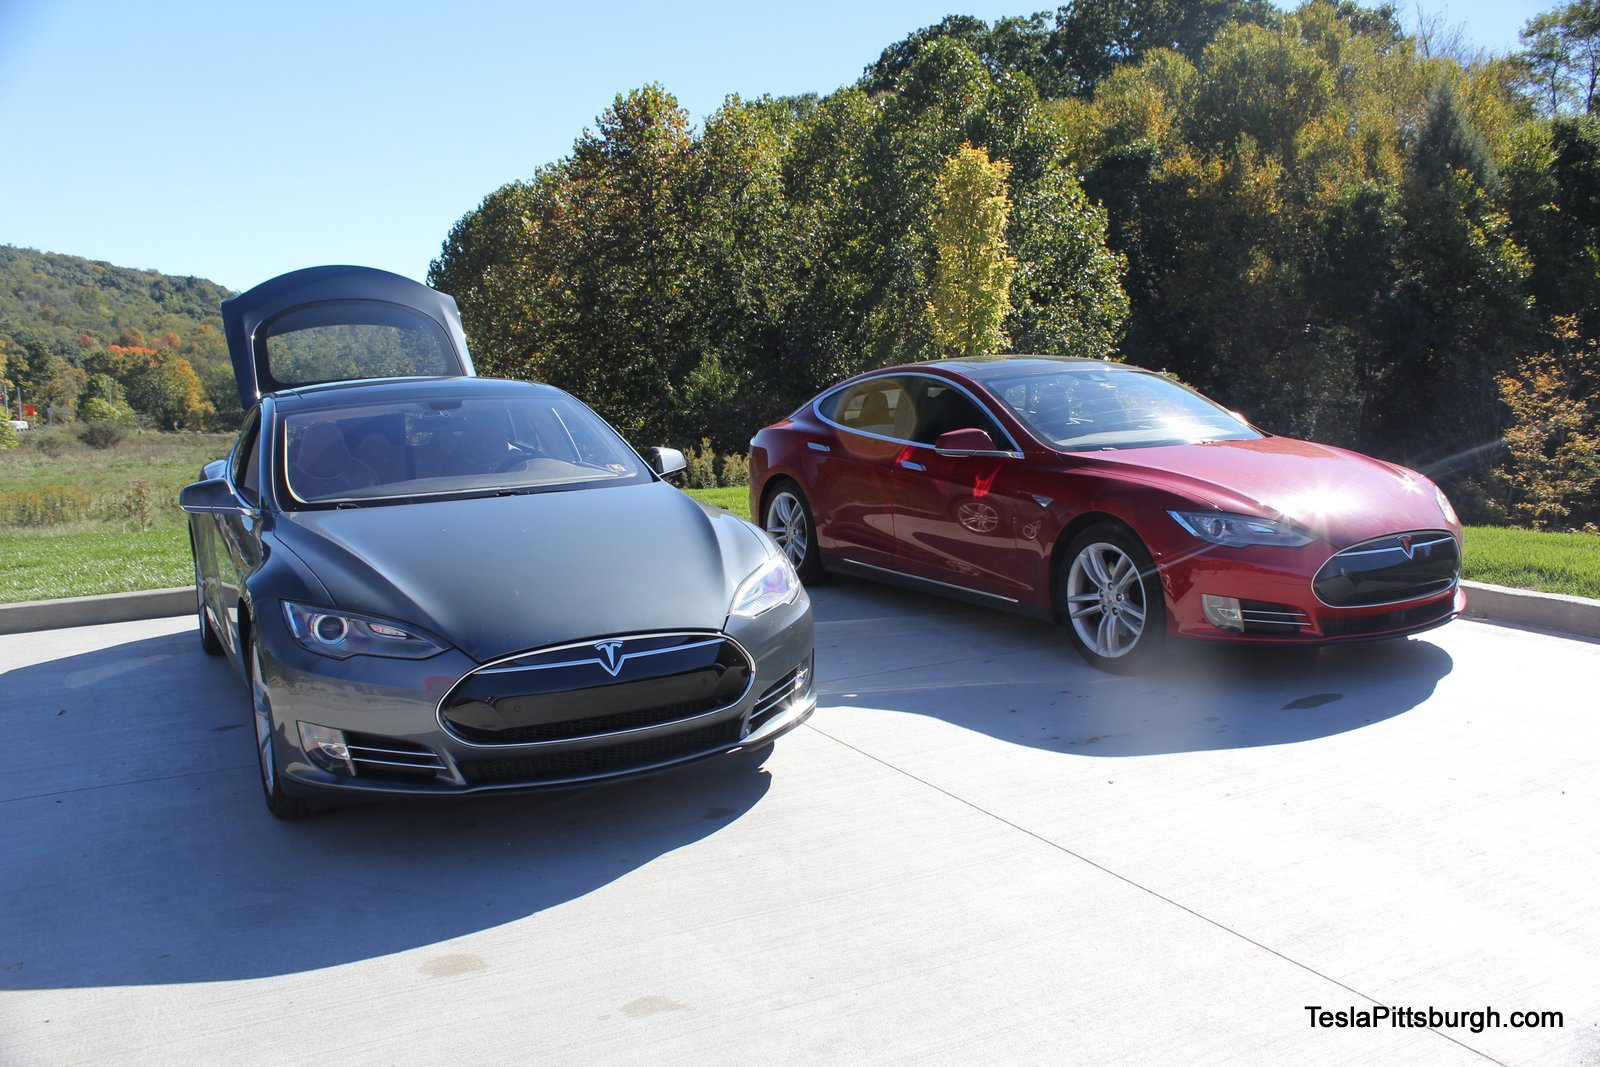
Thinkware has been gaining ground against their fellow rival from Korea and their F770 camera drops on the dashcam scene with BlackVue squarely in its sights. So I called up my friend Darren, who was willing to subject his BlackVue DR650GW to some head-to-head scrutiny.
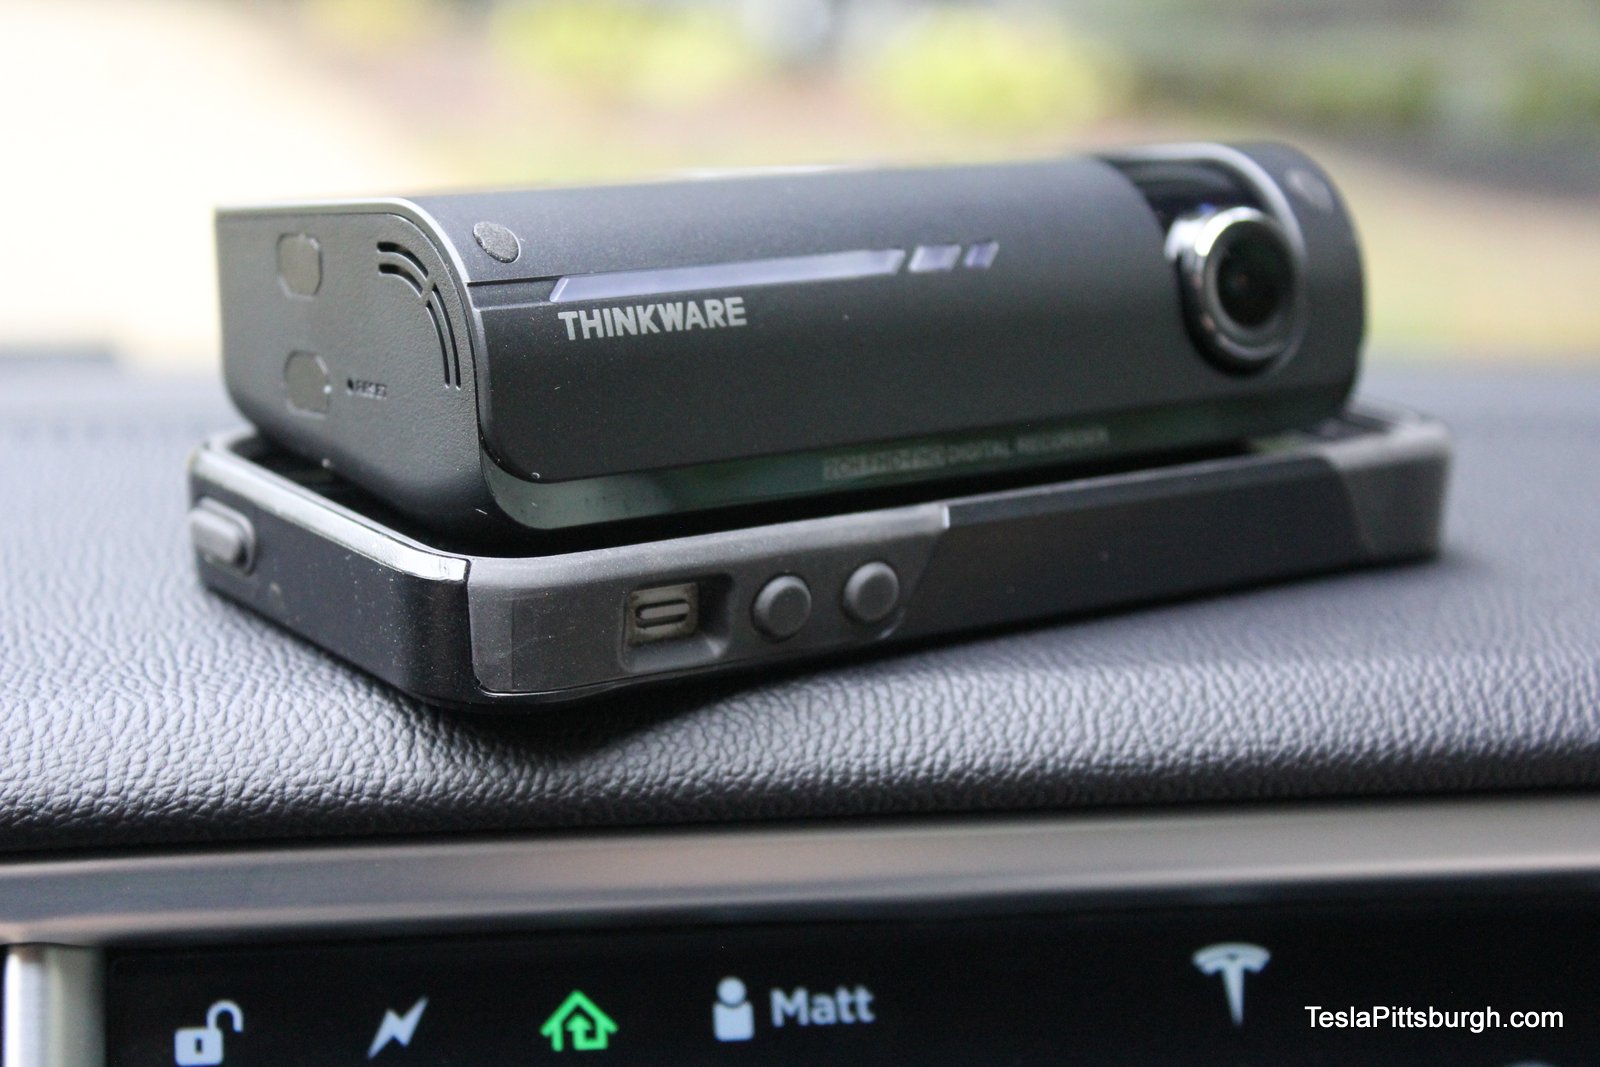
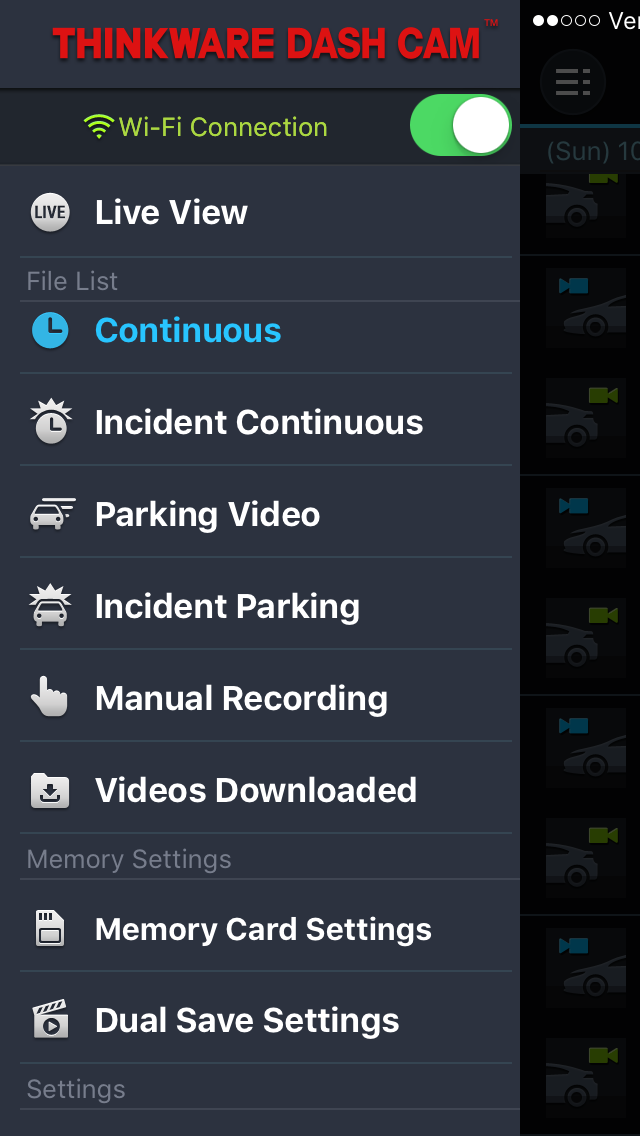
Thinkware F770 Full HD 2-Channel Dash Cam
Stepping up my dashcam game into the $300-400 league gets me a two channel setup, meaning cameras scrutinizing the road ahead AND the road behind. The BlackVue currently sells for about $50 less than the Thinkware. For the extra $50, Thinkware offers a slightly sharper and wider angle main camera (2.2 megapixels with a 140 degree field of view versus 2.0 megapixels with 129 degrees on the BlackVue), something they call “Super Night Vision” and a number of other features of varying usefulness that I’ll explain later. The Thinkware’s rear camera also matches the 2.2 megapixel specs up front, whereas the BlackVue’s rear camera is a downgraded 1.0 megapixel unit that shoots 720 horizontal lines of resolution instead of the 1080 lines of the other 3 camera units.
The spec sheets for both camera systems show a lot of overlap down their columns. They both have proprietary viewer programs, smartphone apps, GPS, shock sensors, WiFi connectivity and the ability to record for prolonged periods when the car is turned off if they are installed with continuous power. They’ll also isolate and protect recordings that are triggered or flagged by their shock sensors so that they are not inadvertently overwritten. Somewhat disturbingly, both cameras will also talk to you– and I swear it’s the same woman in both cameras. She can be a constant companion or you can toggle a few things here and there on both cameras to shut her up. Your choice.
You can buy just the forward facing camera for both systems to save on costs, but adding the rear camera could provide you with essential views if you’re rear-ended– especially if your locale requires a front license plate. At the very least, it may provide confirmation later that your brakes were engaged as the glow from the brake lights is visible at night and sometimes even in daylight.
Installation
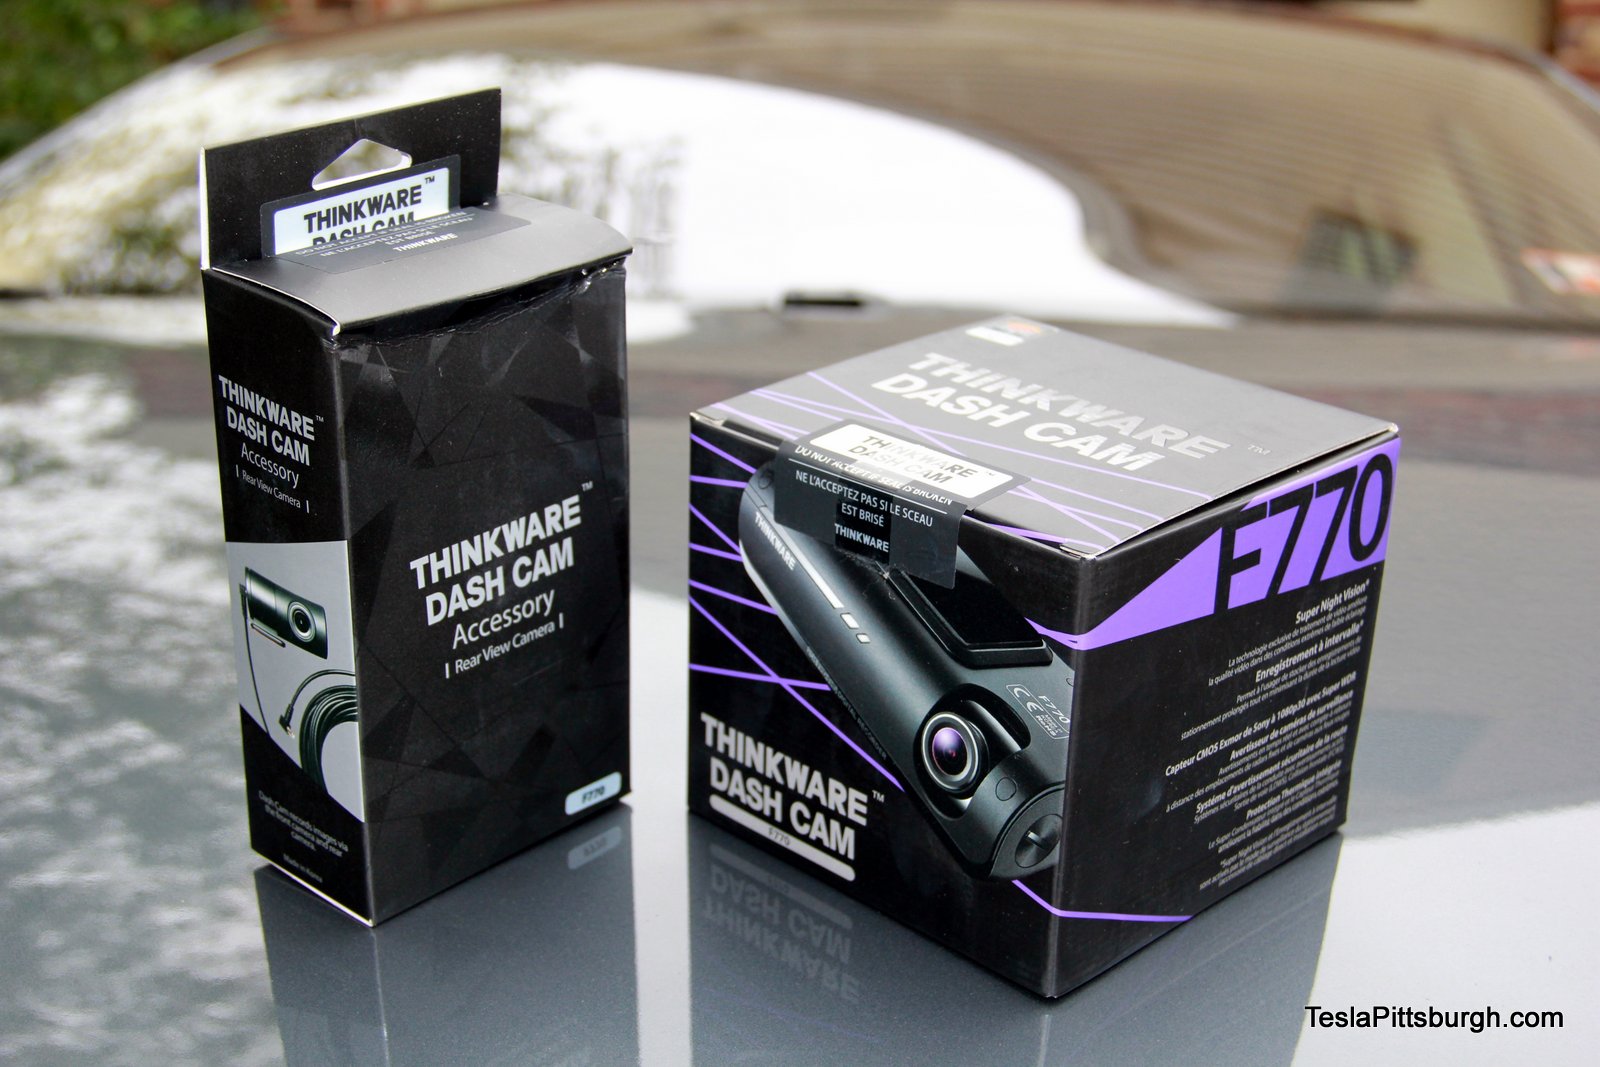
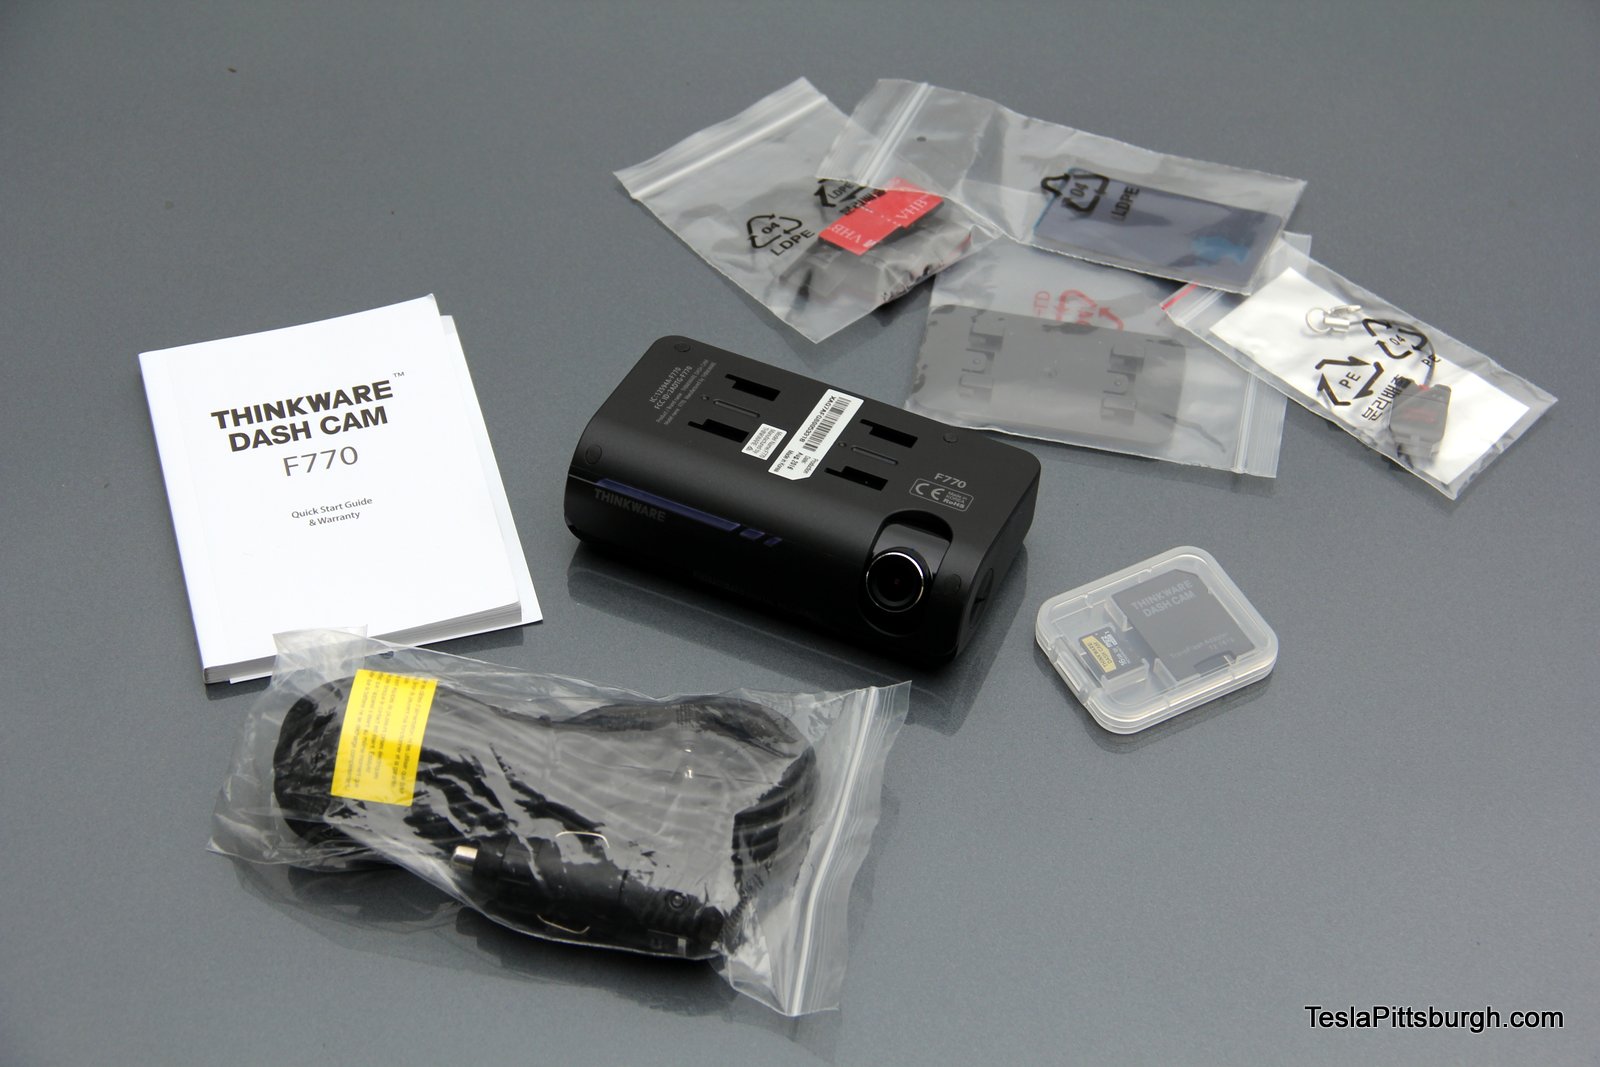
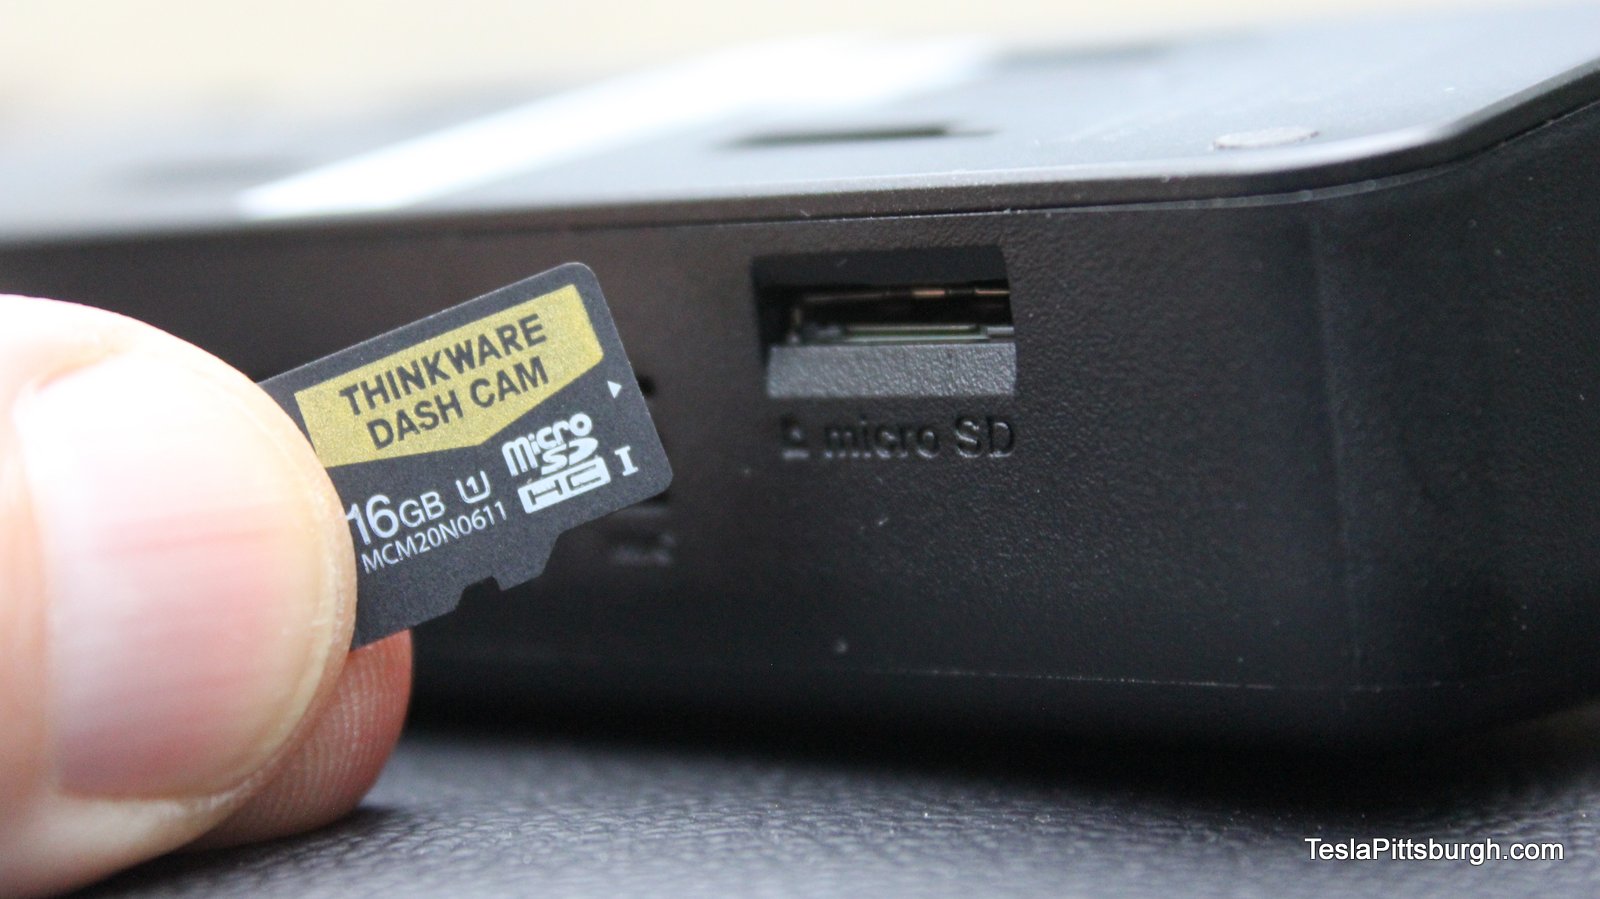
The Thinkware F770 arrived in two different boxes. The larger box contained the front camera, power cord and some other mounting hardware. A microSD card was supplied, removing any concerns about compatibility. You can pay more to get larger cards, extending the amount of time before the camera overwrites your video files, but for most people a 16 GB card will provide you with plenty of recording time. The box for the rear camera add-on kit is mostly filled with cabling to get power and signal all the way to the back of the vehicle– and I had a lot leftover, so even larger vehicles should have plenty.
The biggest challenge of any dashcam installation is getting power to the camera and routing the cables. Previously, I just used double-sided tape to secure the cables to the top of windshield until I could stash the cable behind a trim panel. For this installation, I decided that a better camera deserved a higher level of effort to hide the cables. Having done both, the additional effort isn’t significant and worth the extra time, despite the sweating and swearing it may require. You can see the whole process in the video embedded at the end of the article.
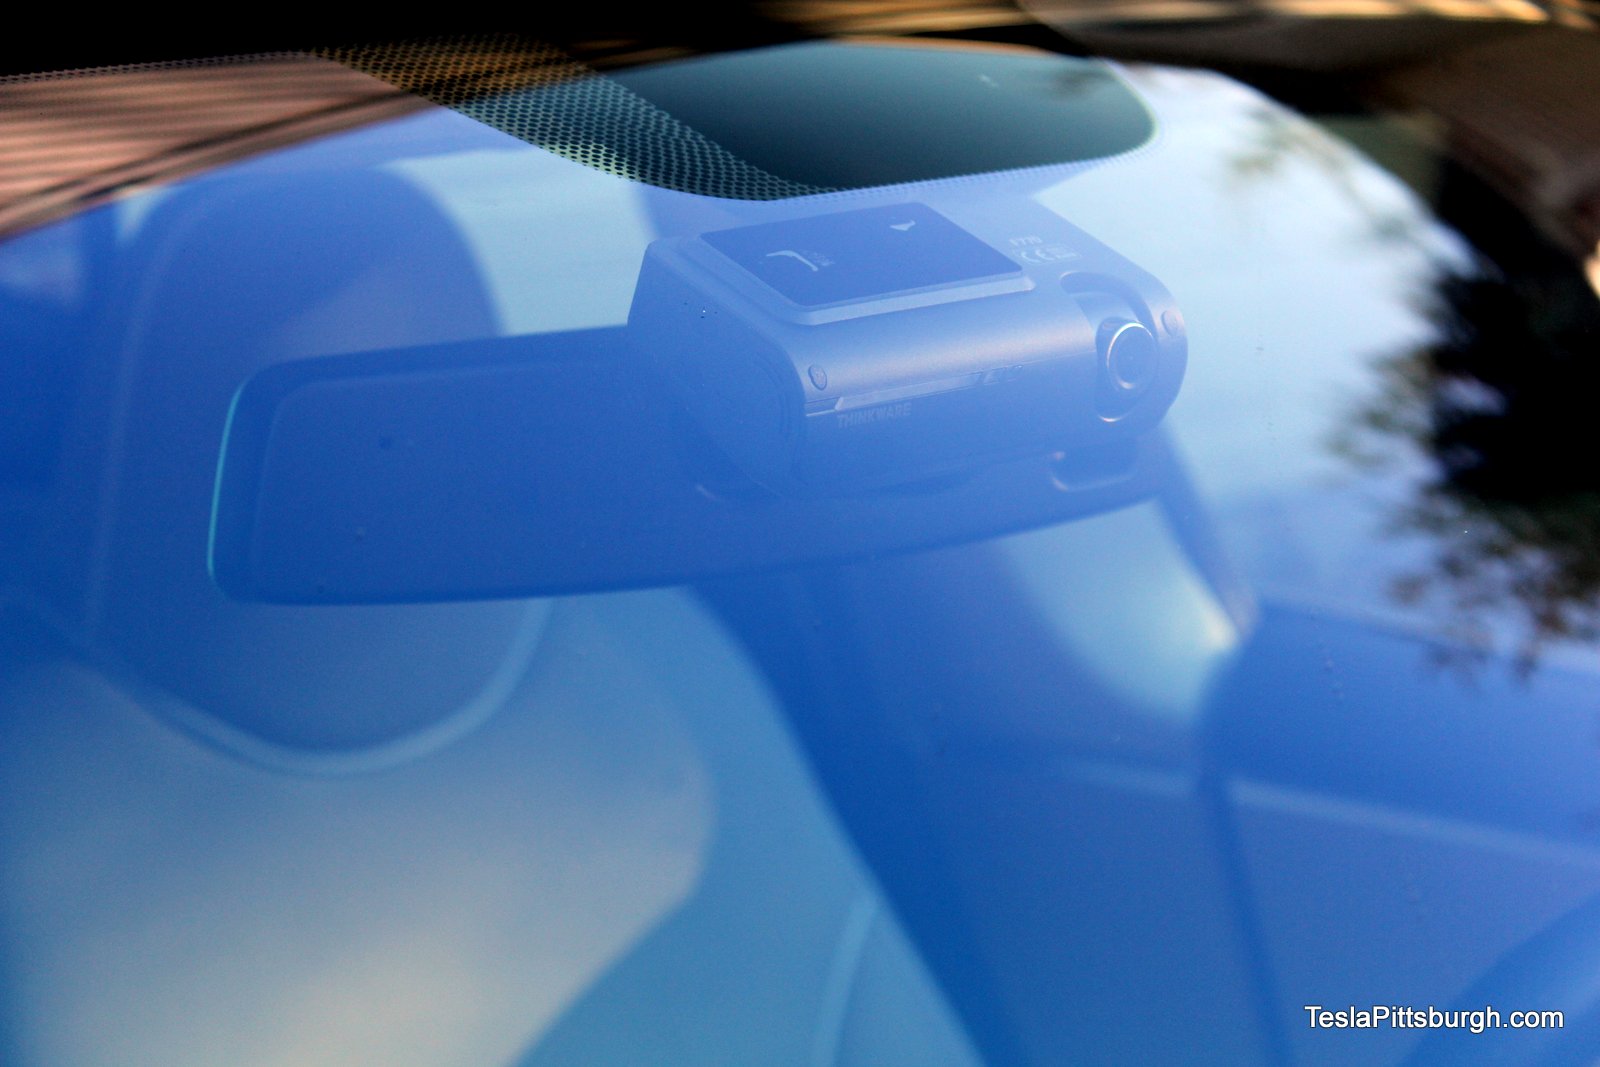
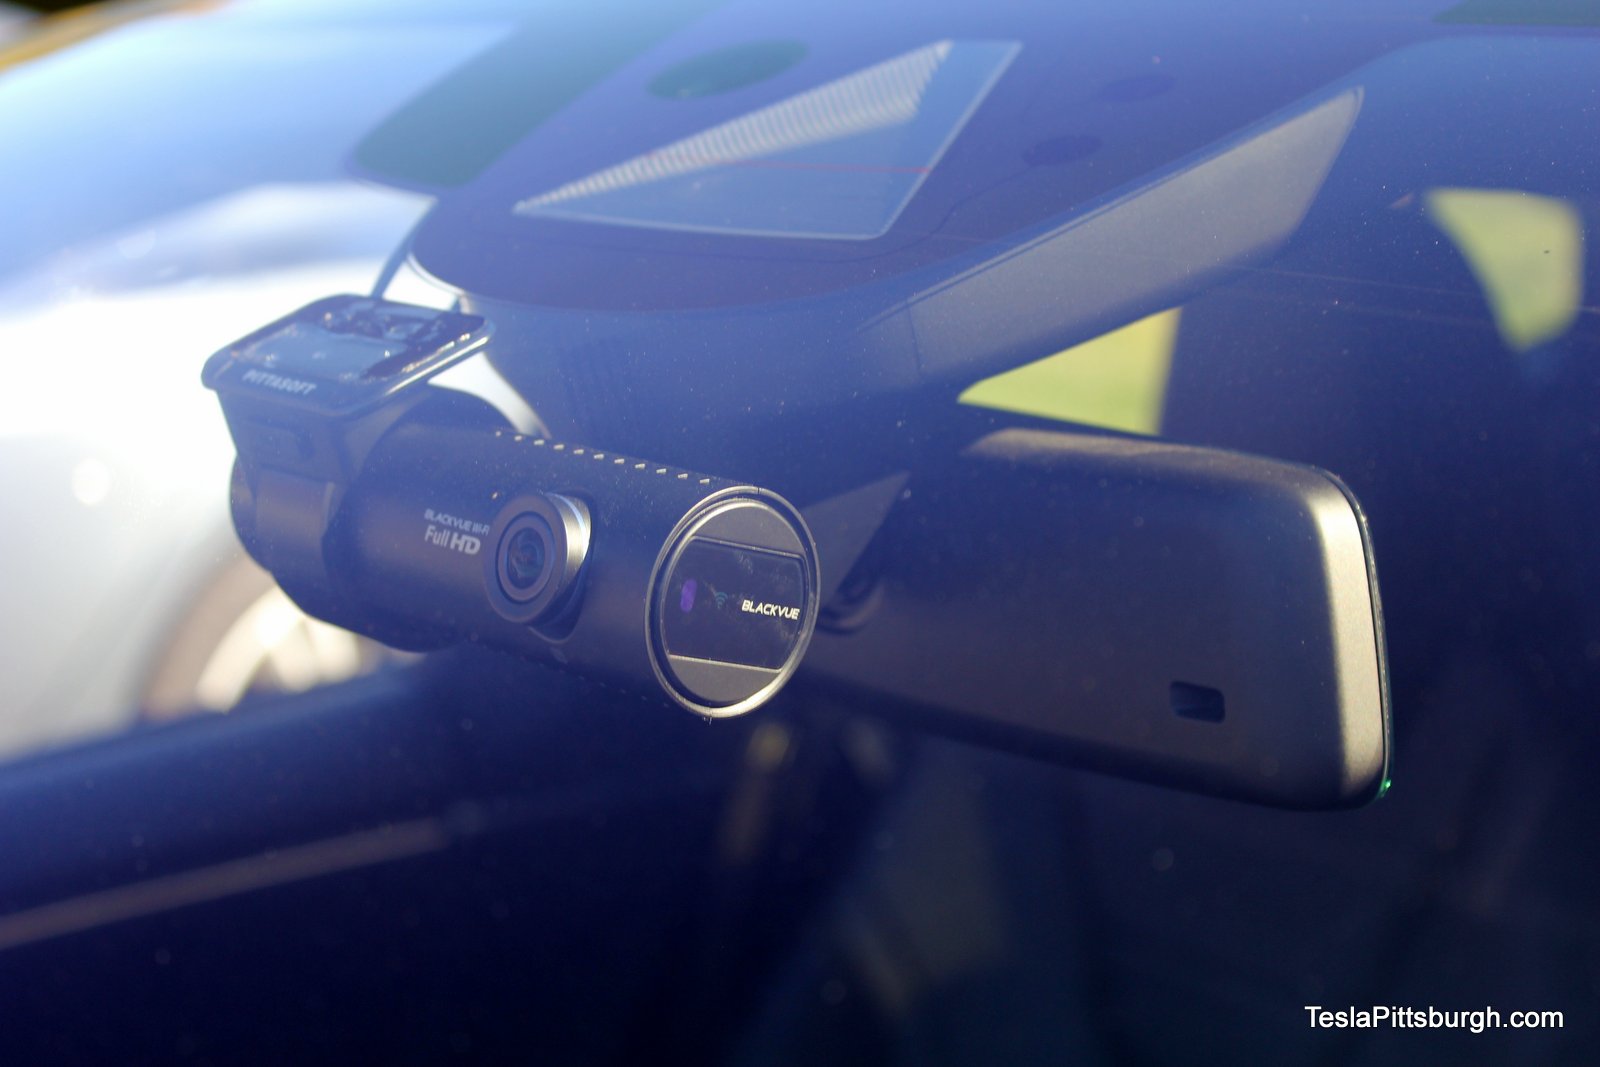
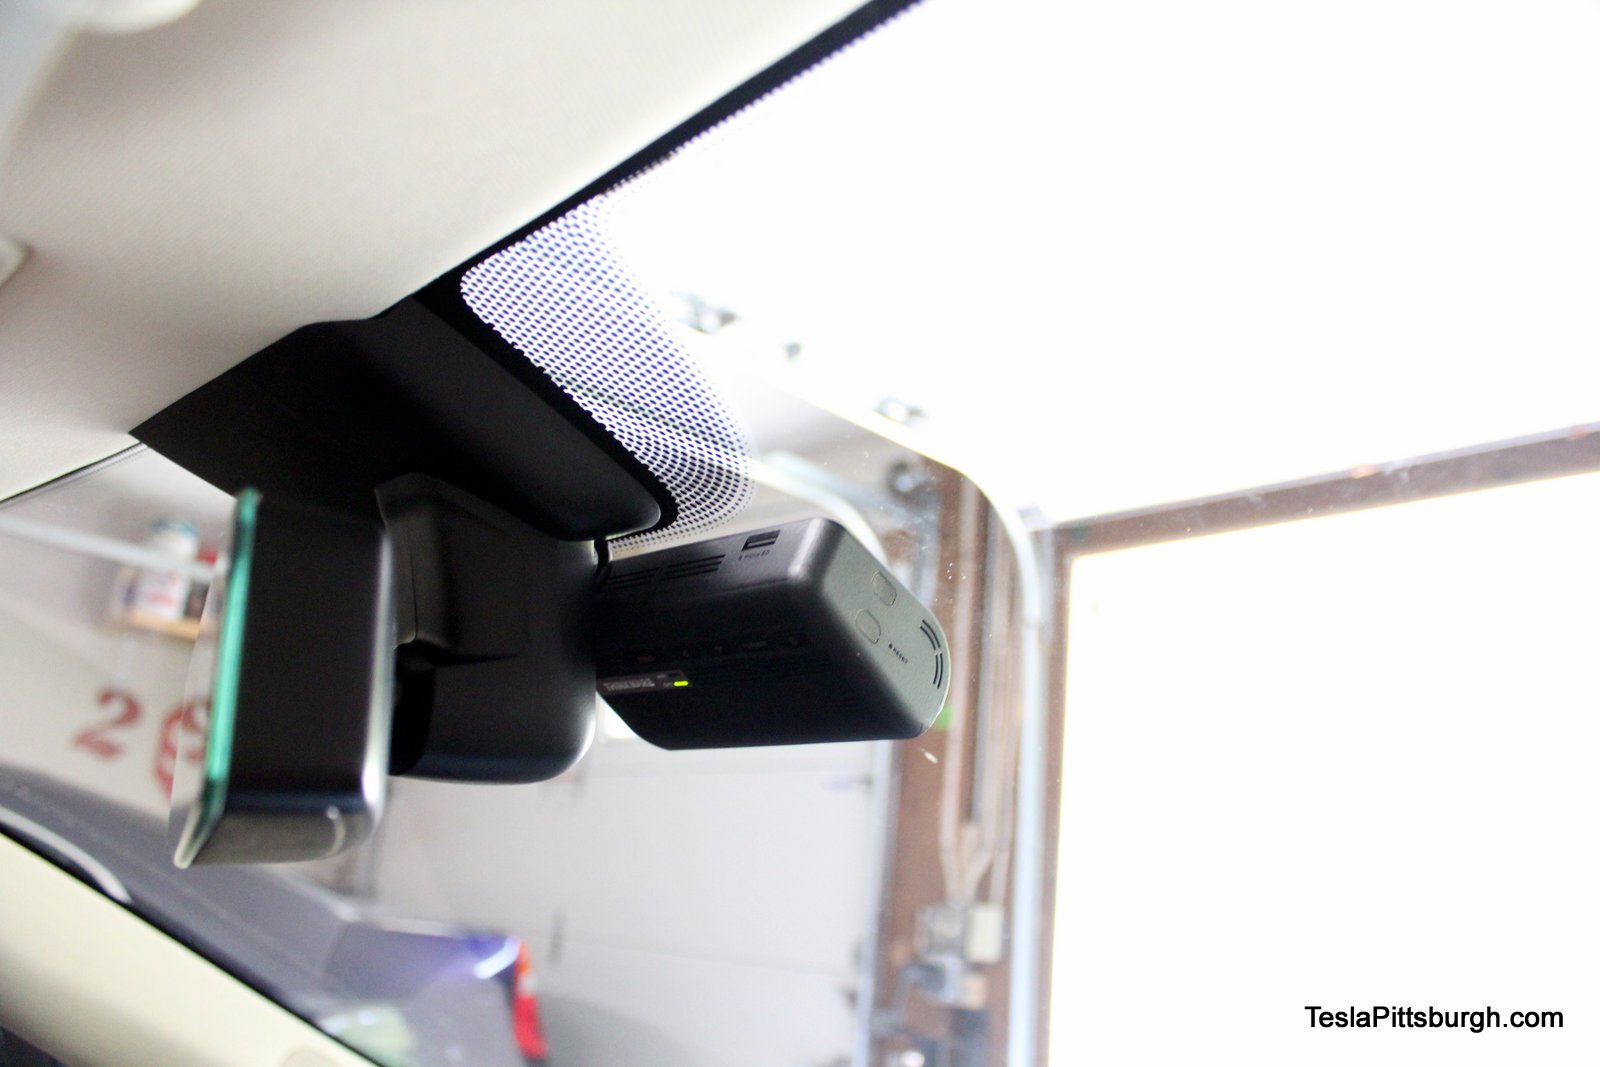
After I carefully cleaned the windshield, I attached the camera to its mounting plate. It fits very tightly to the plate with no wobble. The plate stays on the windshield but the camera can be snapped and slid off easily. Once I lined up the camera, I nervously smooshed it into place using the provided 3M tape. If you mess up, replacement tape is cheap to get. There is a “Live View” option using the phone app that can help you position the camera, but I just attached it to the mounting bracket and eyeballed it very carefully while laying upside down with my head on the dashboard. It’s a new yoga move that I call: Downward Driver.
The end of the power cable that plugs into the camera is much smaller than the 12 volt end, so you’ll be running the cable up to the camera instead of down to the power outlet. My camera is actually plugged into a power hub I’ve installed to the underside of the passenger seat. That gives me an additional 12 volt outlet and more USB charging ports for the backseat creatures I’ve come to think of as “my children.” From there the cable passes easily under the floor rail for the seat and winds up through various trim panels and weather stripping to the top of the A-pillar.

Running cables through any car is a delicate process– made even more so in the era of side curtain airbags. The airbags in the Tesla explode downward and have tethers hidden in the headliner to maintain their positioning when they deploy. The weather stripping in the door frame doesn’t hold the cable securely enough to be a hindrance to the airbags, but spanning the distance to the middle of the car requires care to make sure the cable is on top of the airbag and out of the way.
Before making “the leap” across the top of the car, I wanted to get all the access points opened up. A little gentle “choking” motion on the rearview mirror housing rocked it free enough that I could see the metal bracket holding it to the glass. Tesla has thoughtfully left a slot at the leading edge of the rearview mirror housing so it will sit flush to the glass even with the extra cables exiting it. The microphone panel in the roof flips down with a gentle tug. Some Teslas have continuous power available behind that panel, but mine does not.

To fish the cable through I needed something firm but non-marring. After rejecting several other ideas, I settled on a firm plastic hoop that– in a prior life– was inside a canvas lawn waste bag that has since disintegrated. My pack-rat ways paid off again! I sharpened one end of the hoop then used its natural bend to “jump” the airbag. Once I worked it all the way to the other side of the car and out the rearview mirror housing, I attached the power cable to the other end and just pulled the hoop the rest of the way through, dragging the cable with it. Start the wrong way and it’s like getting a colonoscopy through your mouth; you’ll get there, but it’ll be a lot longer and harder trip full of regrets.
My car has a panoramic roof, so installing the rear camera was pretty easy. I used the same hoop to penetrate from the headliner to the hatch area and tucked all the cabling into the generous gap between the headliner and the pano roof opening. Most of the extra cable I coiled up and stashed in the black trim panel that stretches between the two pieces of pano glass. Trim panels on the hatch itself pop out easily and I stashed a little extra cable there too, after notching the panel so the wire could get to the camera. It was here that I made my biggest stupid mistake. Take heed, DIYers!
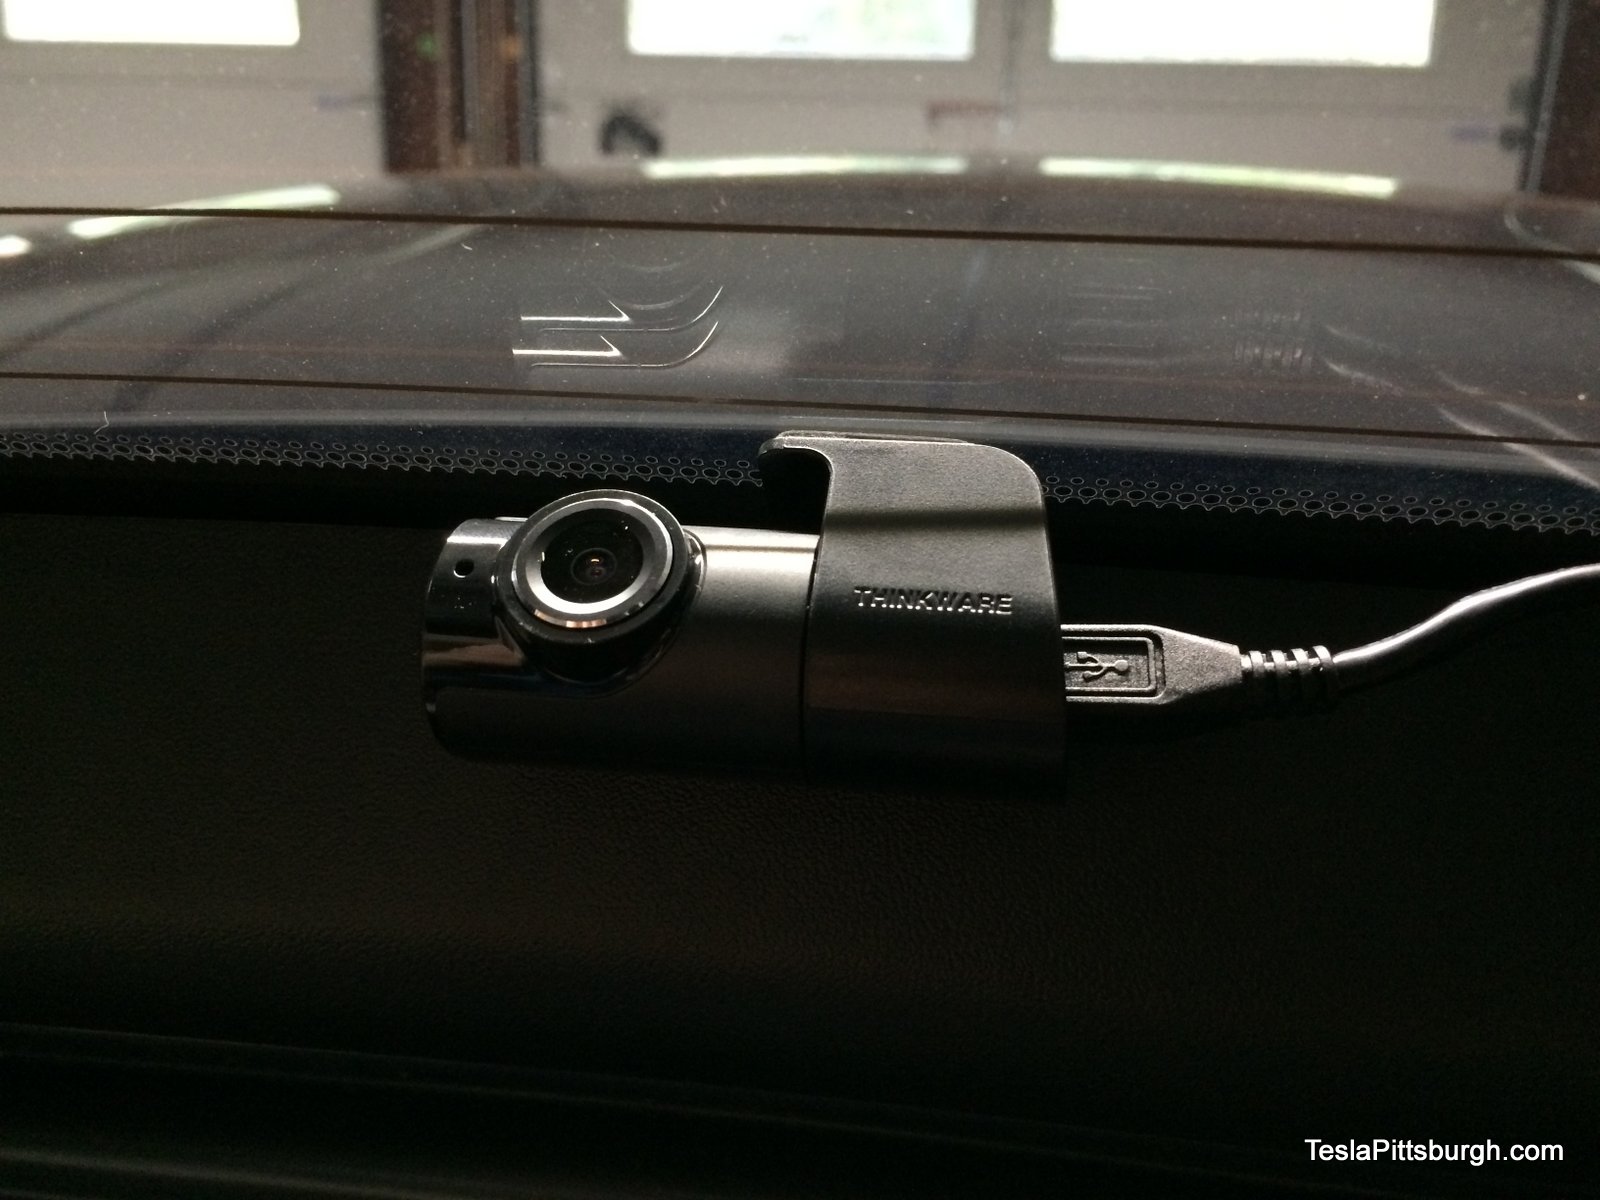
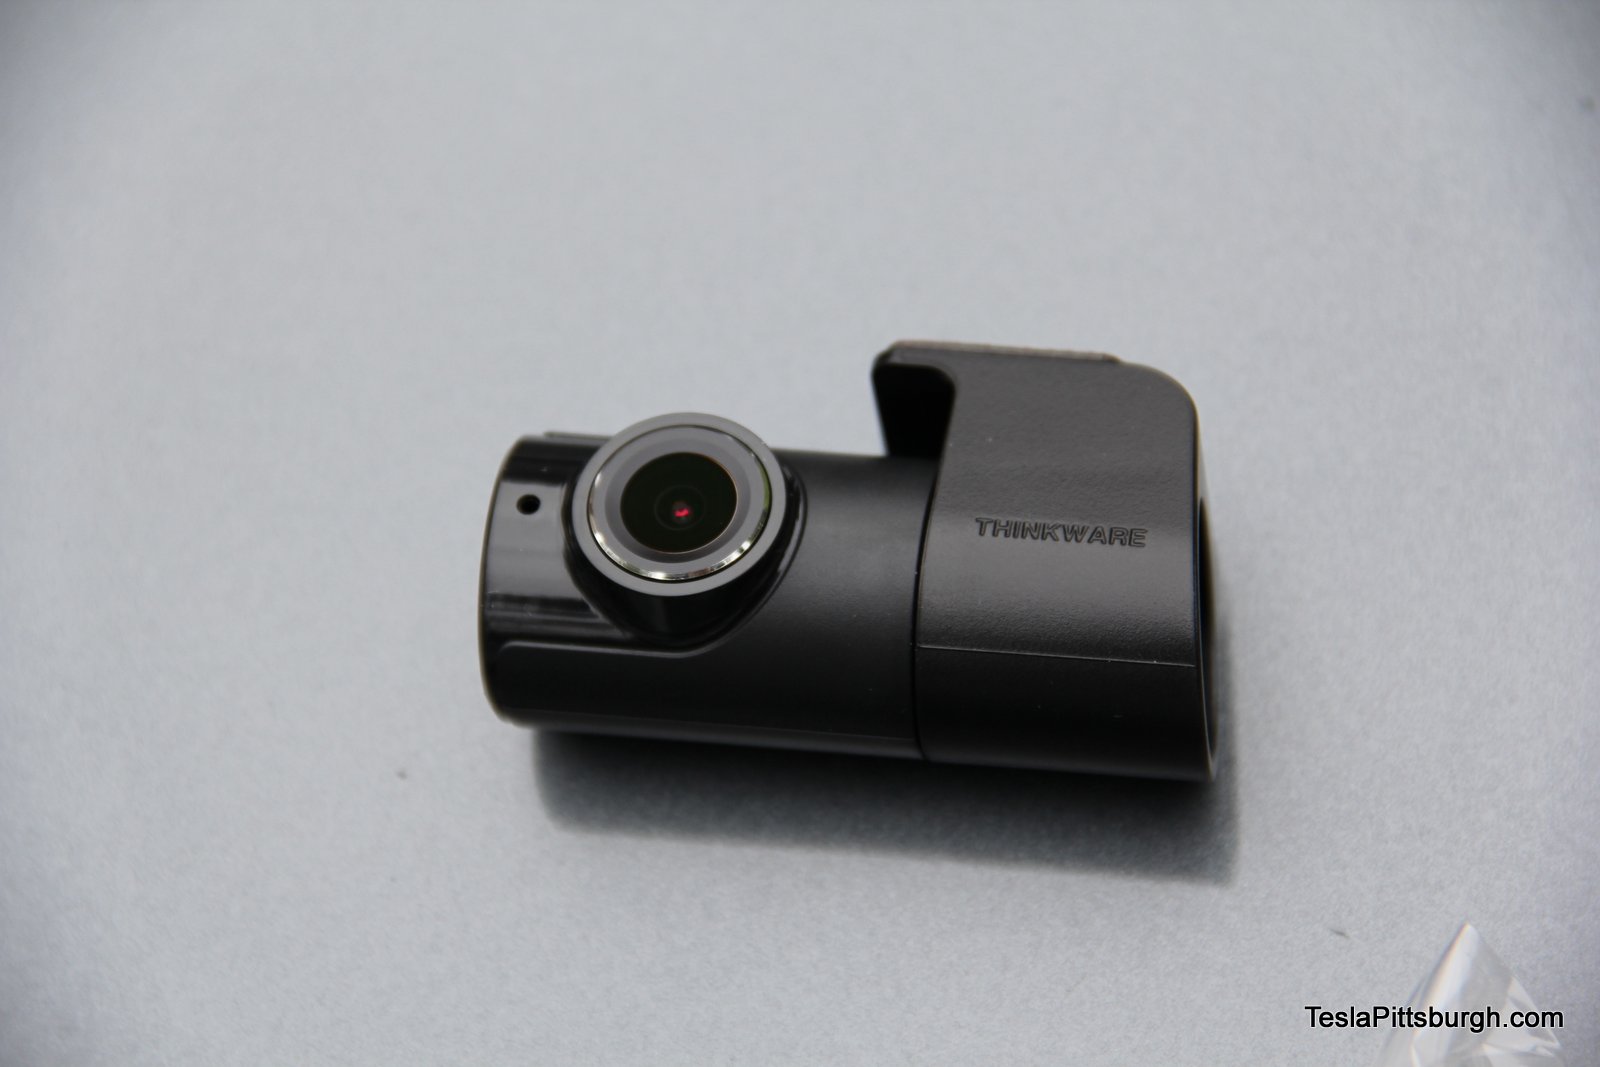
Thinkware has a history of tripping up camera installers and it’s easy to see why– because I screwed it up too. The camera has the company name molded into the plastic and has the usual stickers on the back of it… but they’re all APPARENTLY upside down. So if you neglect to check the “Live View” function on the app before mounting the camera, you WILL mount it upside down. Like I did. Like MANY people have done with other Thinkware products. Totally a dumb and preventable mistake on my part– but it was facilitated by Thinkware branding the camera upside down, which is where most of my swearing came from. Note also that if this were a BlackVue camera, you could just flip the image using their desktop viewer, but Thinkware– despite knowing this is an ongoing problem— still doesn’t have this option in their viewer. Seriously, Thinkware, WHAT. THE. HELL?? Fortunately, a few bucks to buy more mounting tape will eventually solve this problem, but I didn’t wait to do that for this review so you will notice that my rear camera images have been flipped for easier viewing.
THINKWARE vs BlackVue
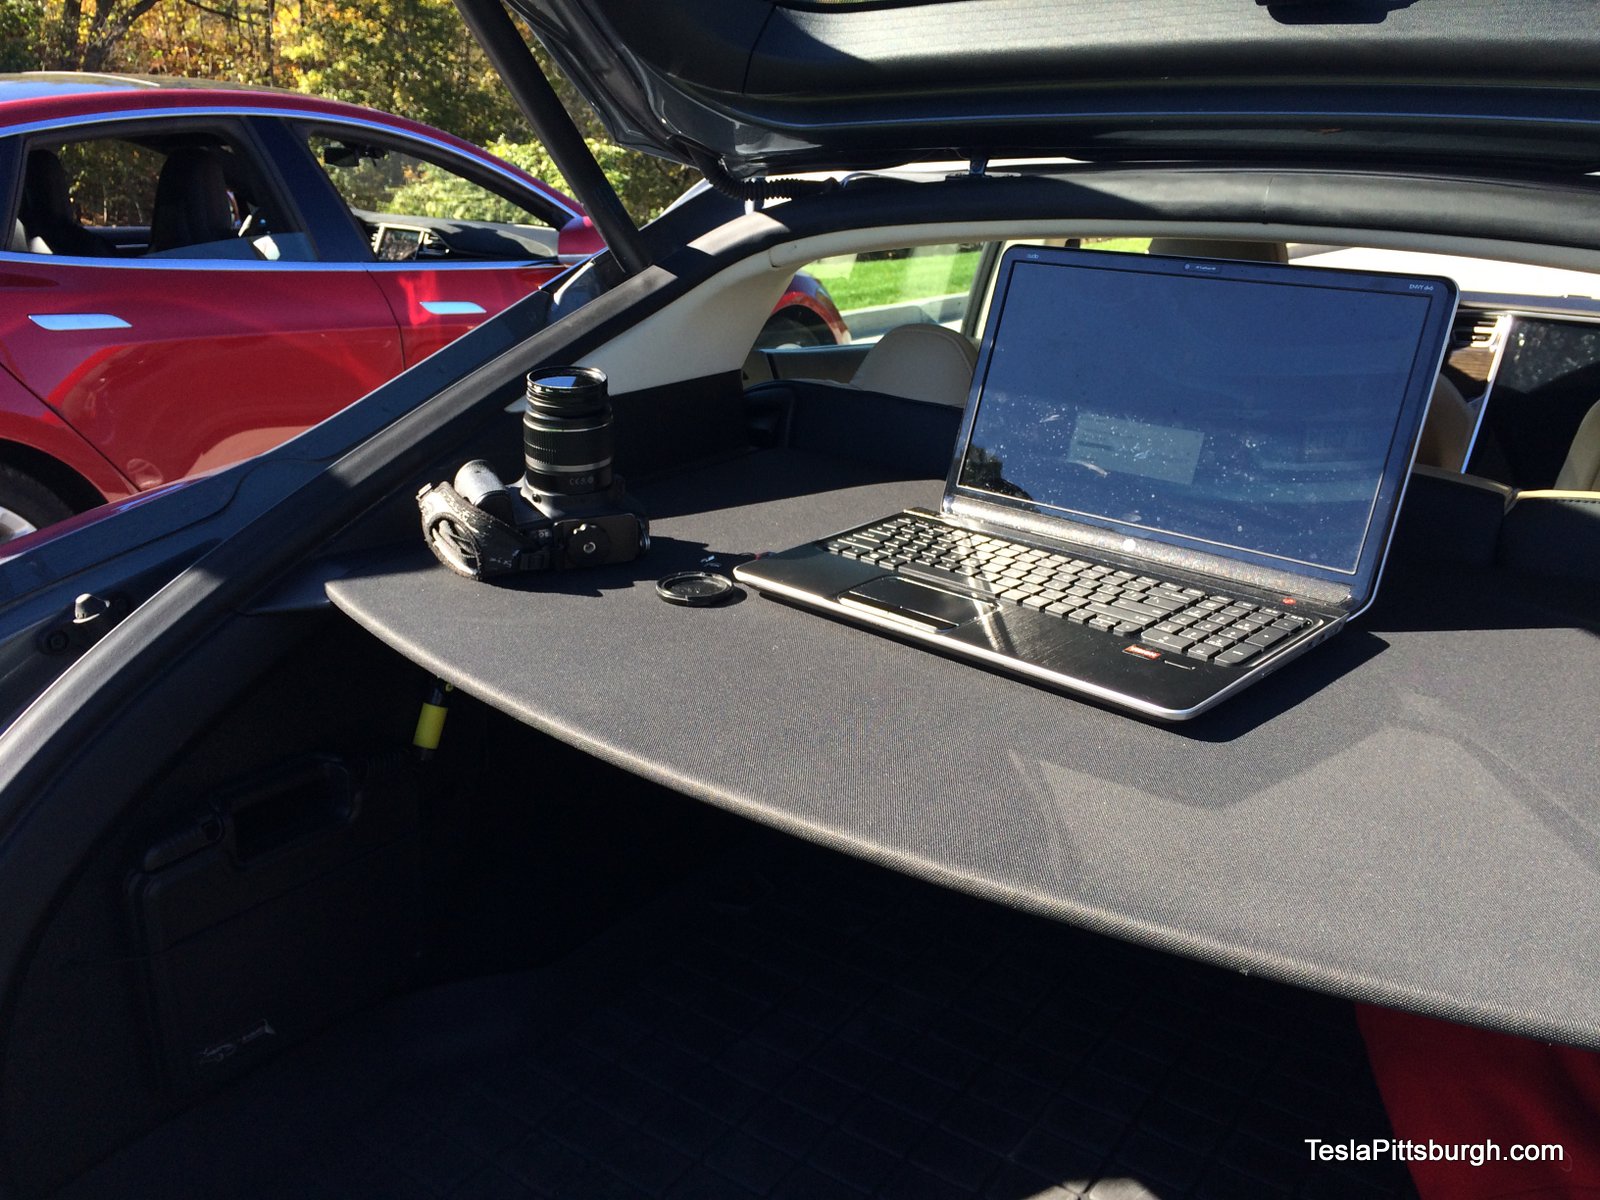
With the cameras mounted and tested, it was time to see what they could do. Darren and I compared our installation process (they’re basically the same) and then planned a couple test routes that would put the cameras through their paces. The goal was to put both cars on the same roads at the same time so as to eliminate as many variables as possible. Both cameras were on their default image settings and I’ve tried to preserve their video quality through the editing process to the best of my ability.
Daytime Comparison
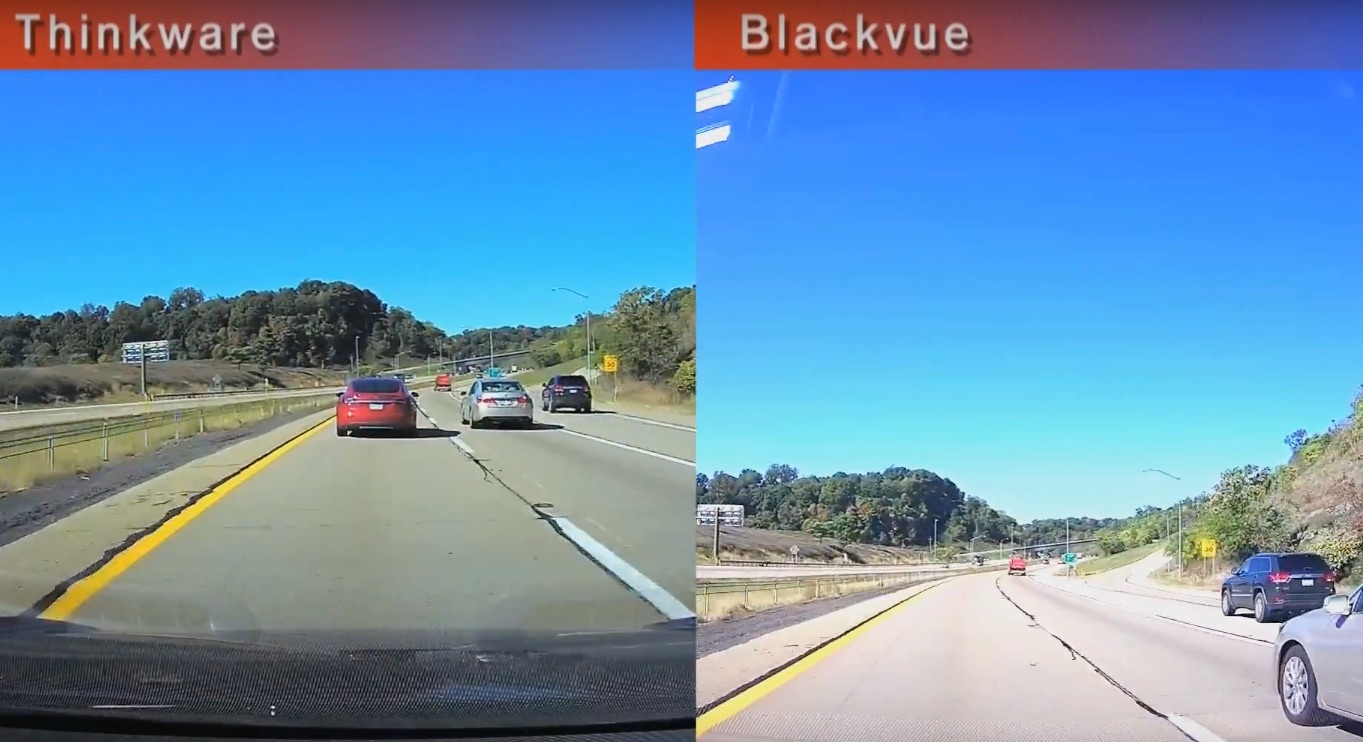
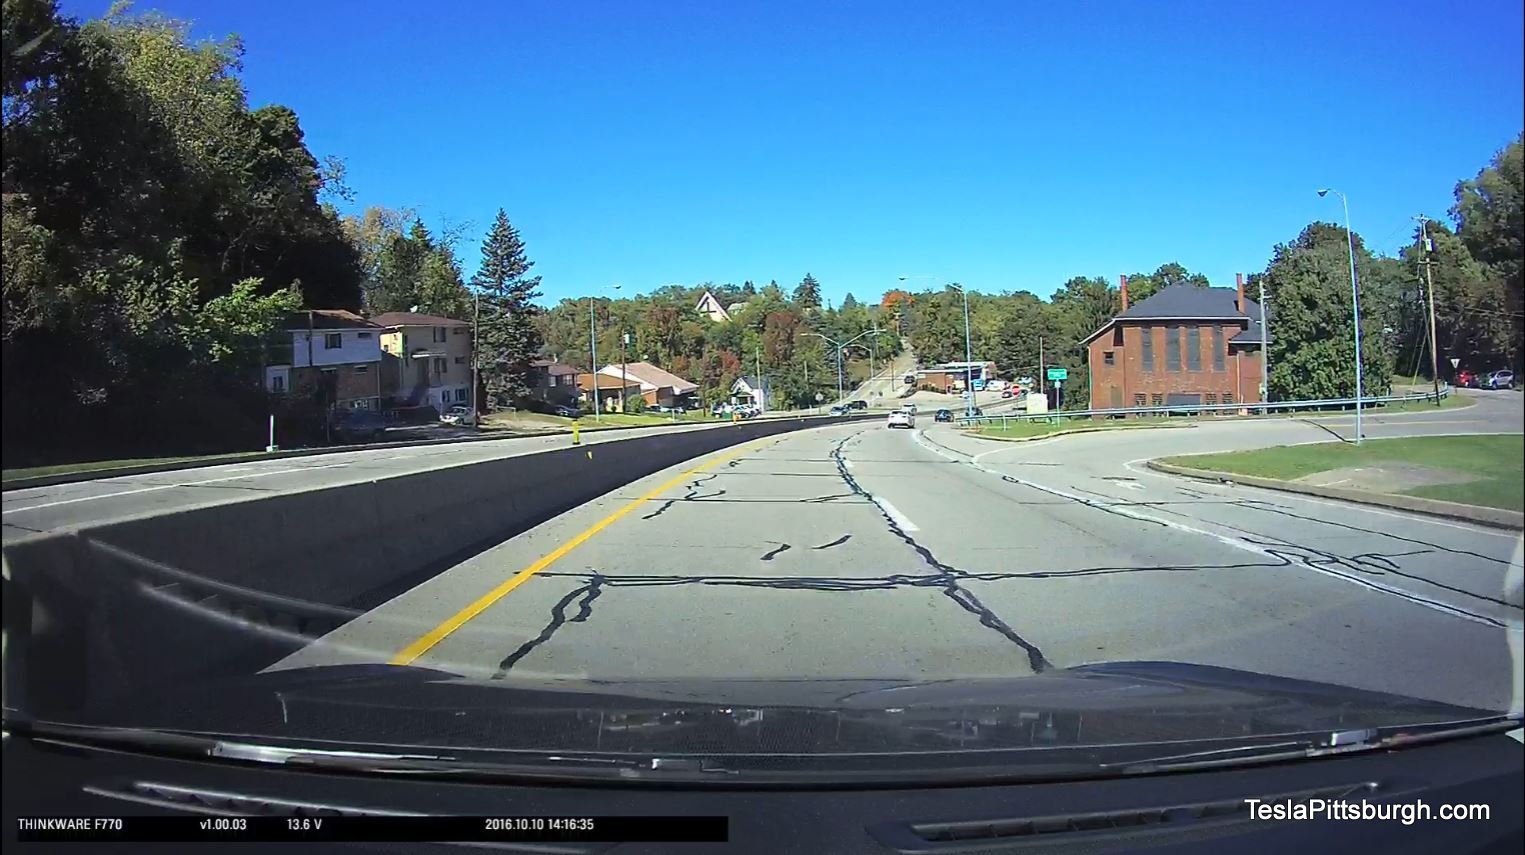
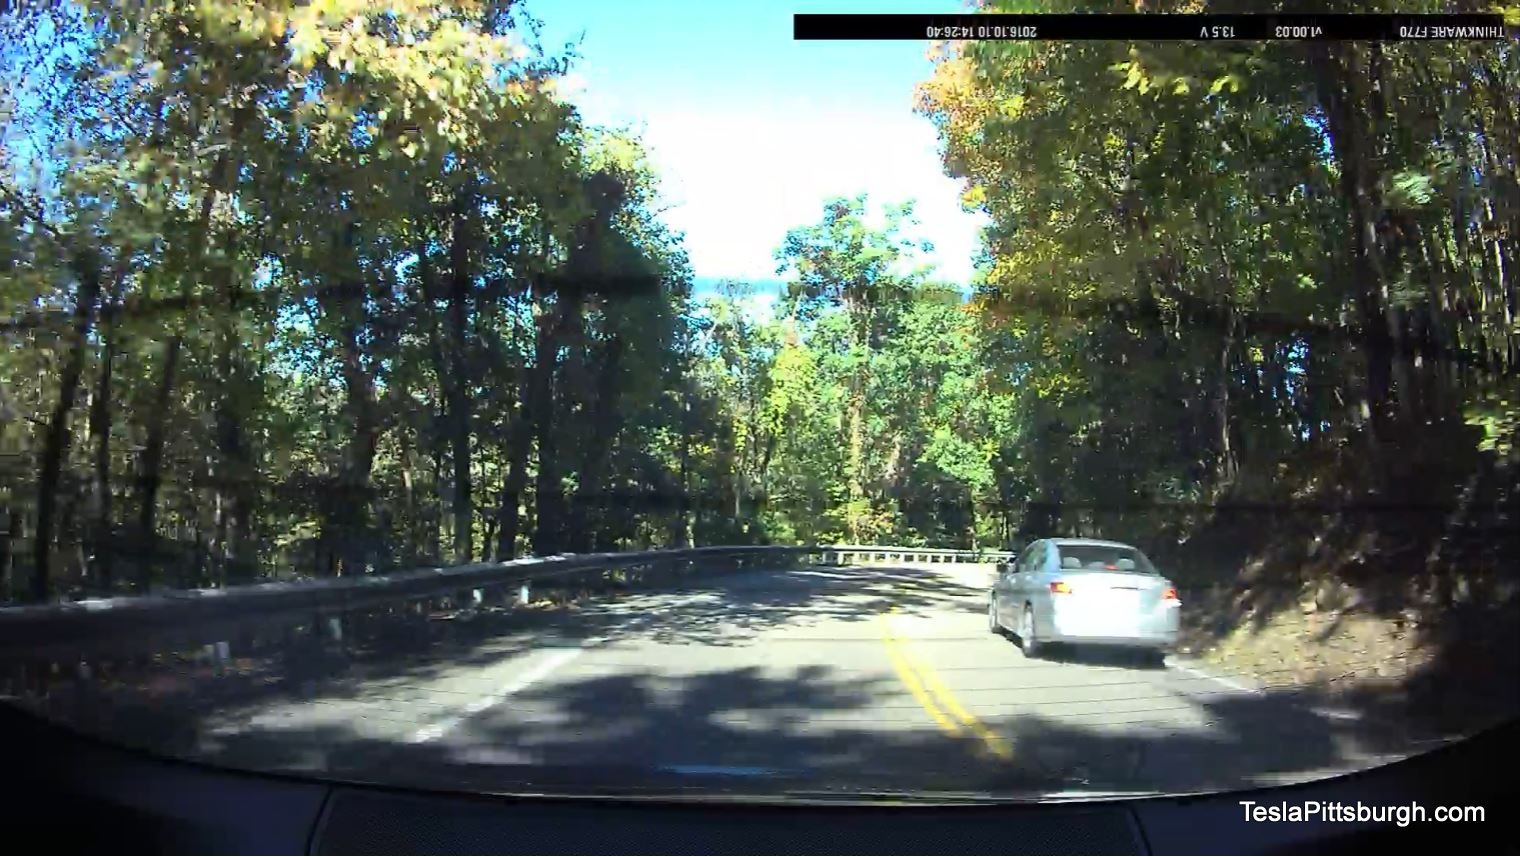
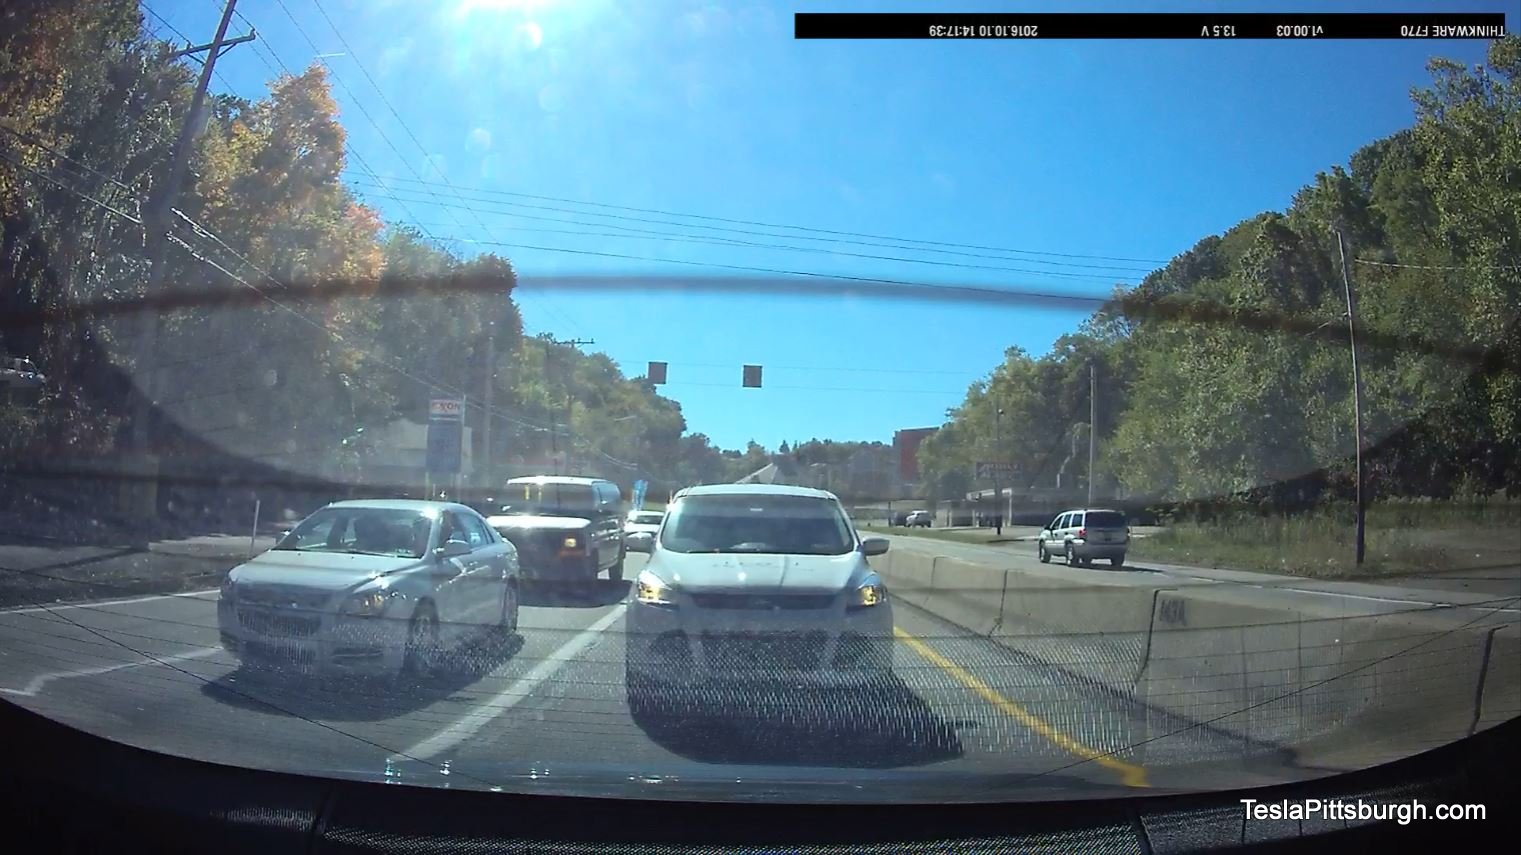
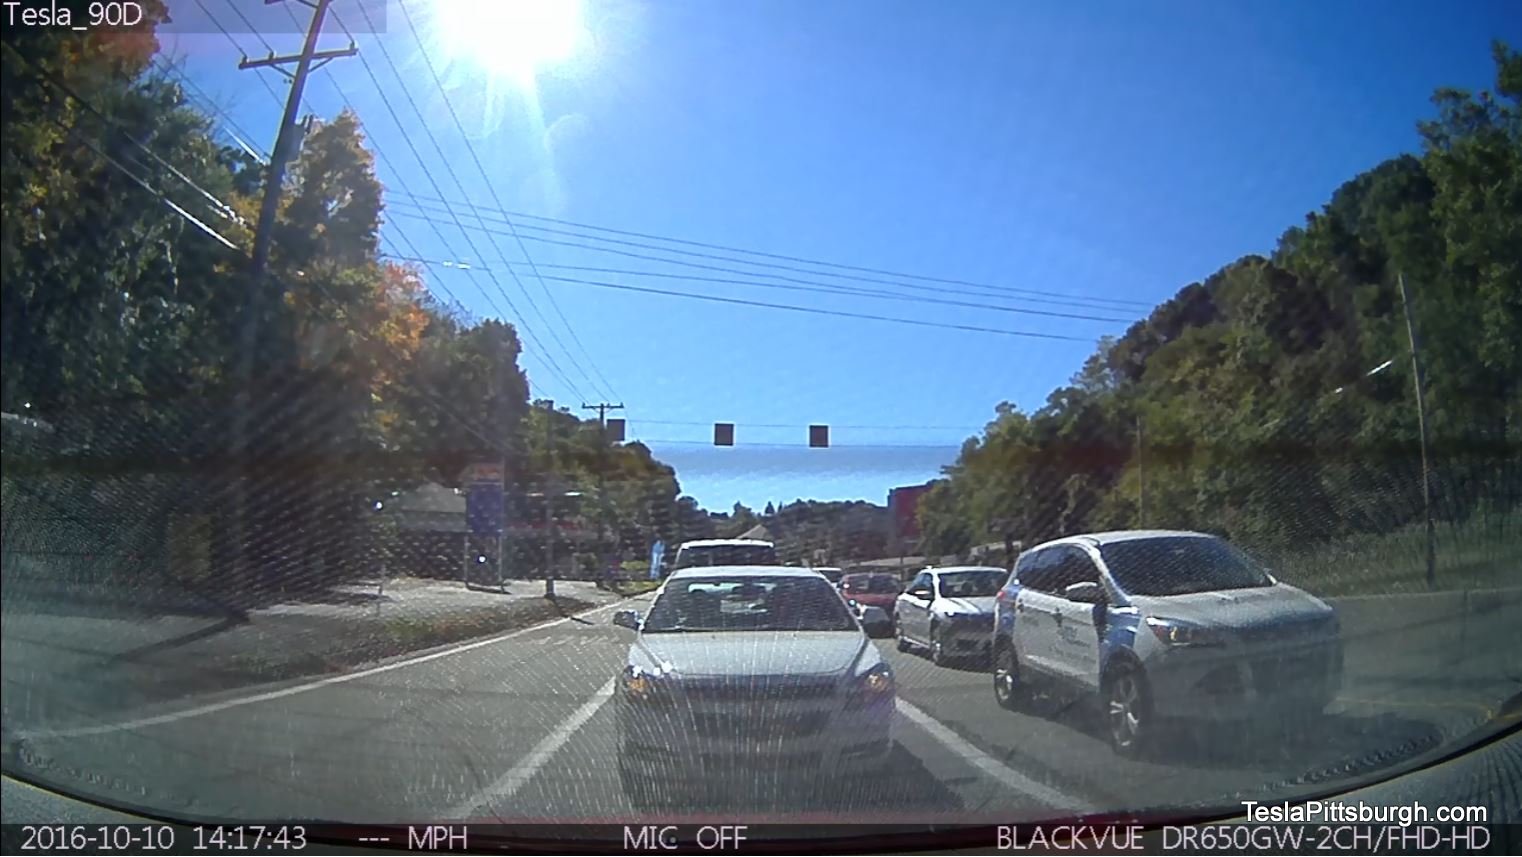
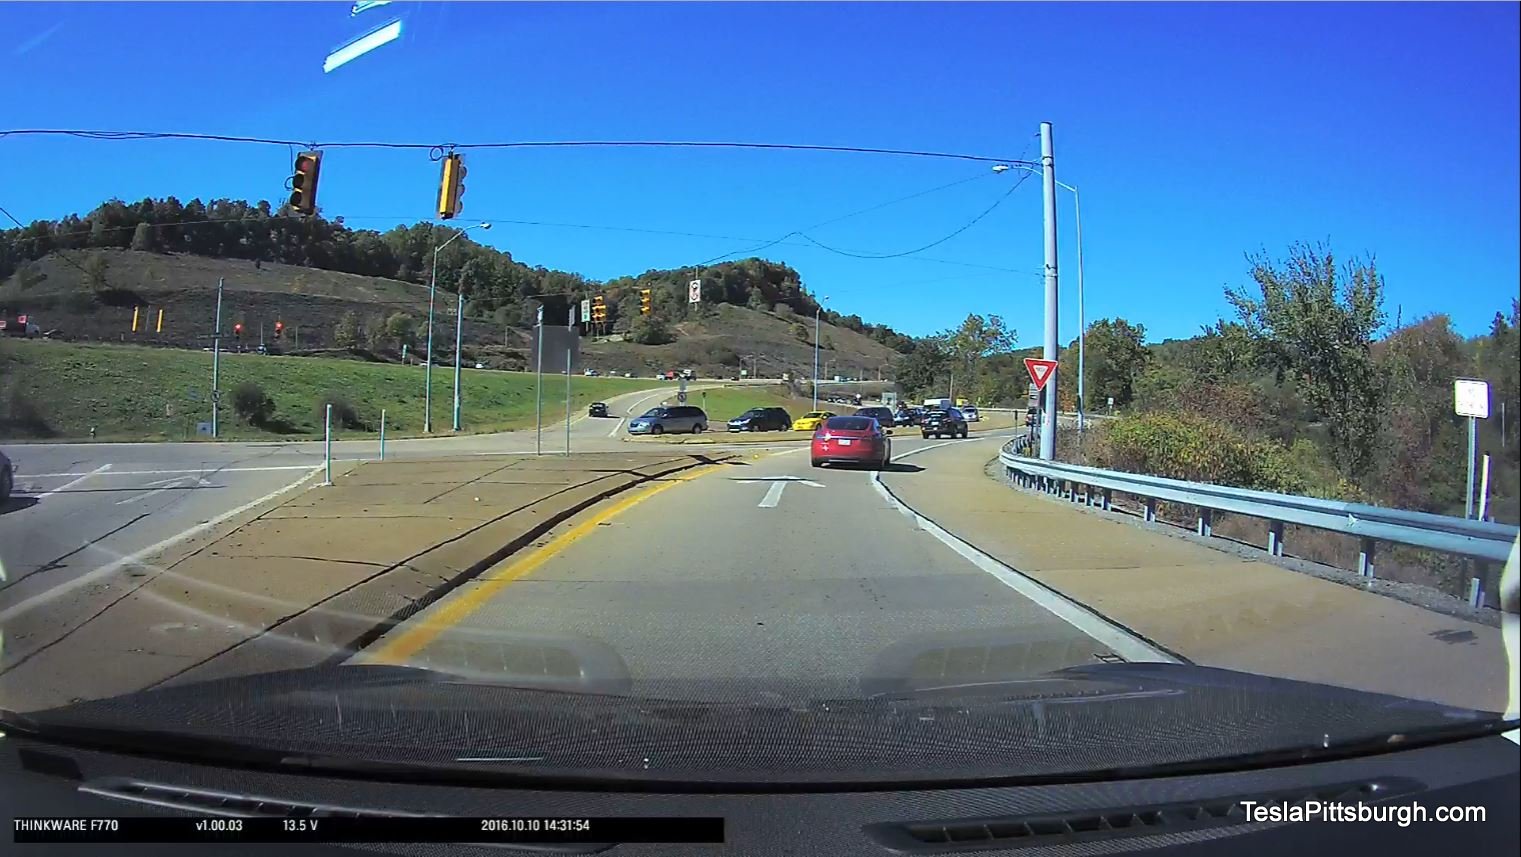
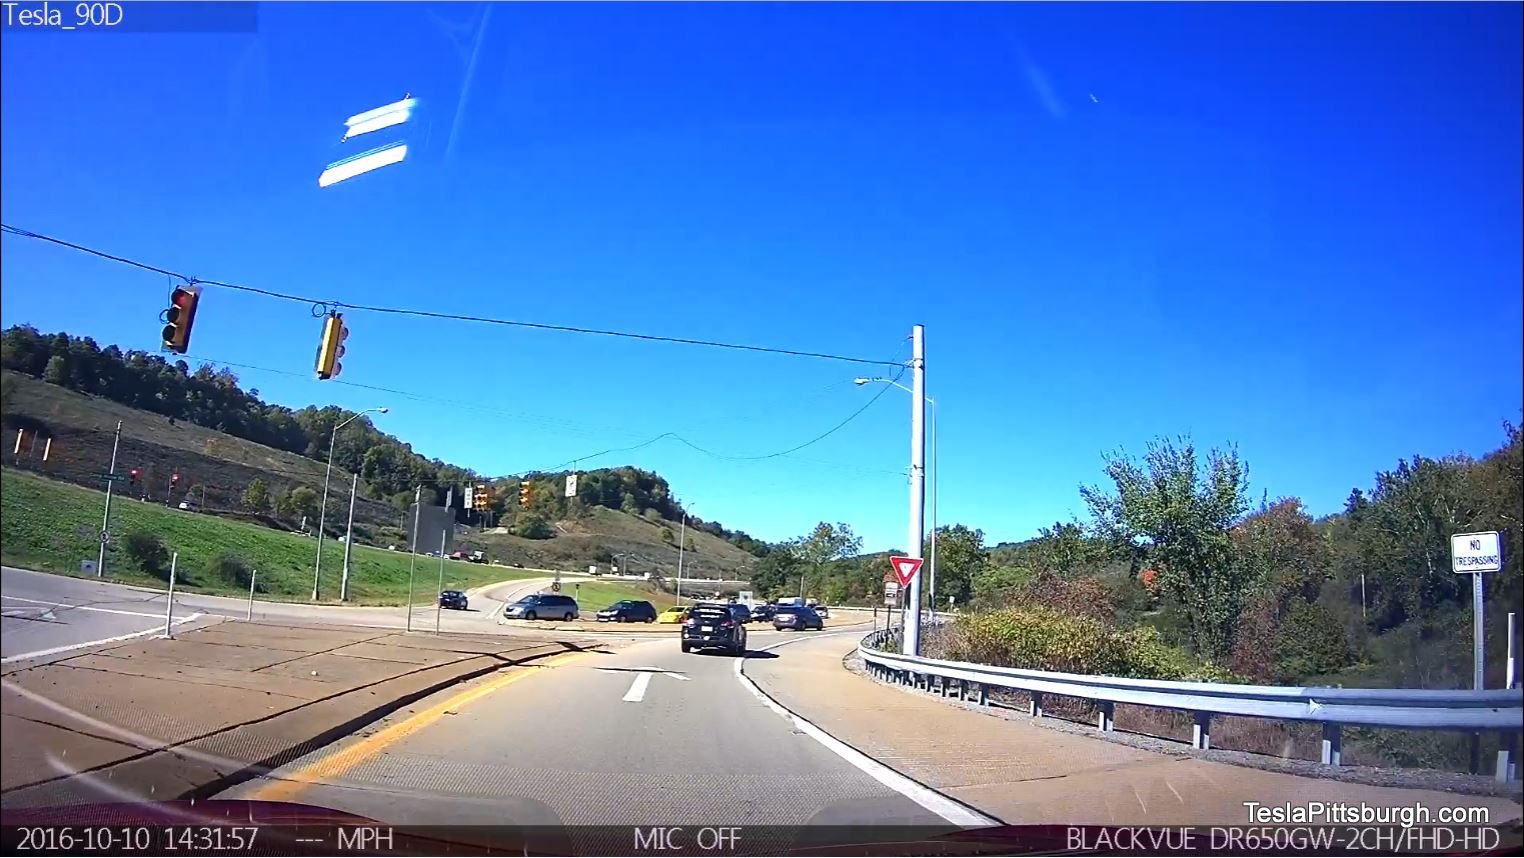
It’s hard to account for the slight variations between how the cameras are mounted, but the Thinkware definitely shows its slightly wider angle. Both cameras captured our sunny drives well, but both also shared some weak areas. We started out in a suburban shopping district then made our way on a tight two-lane up one of our major highways.
Thinkware F770 daylight
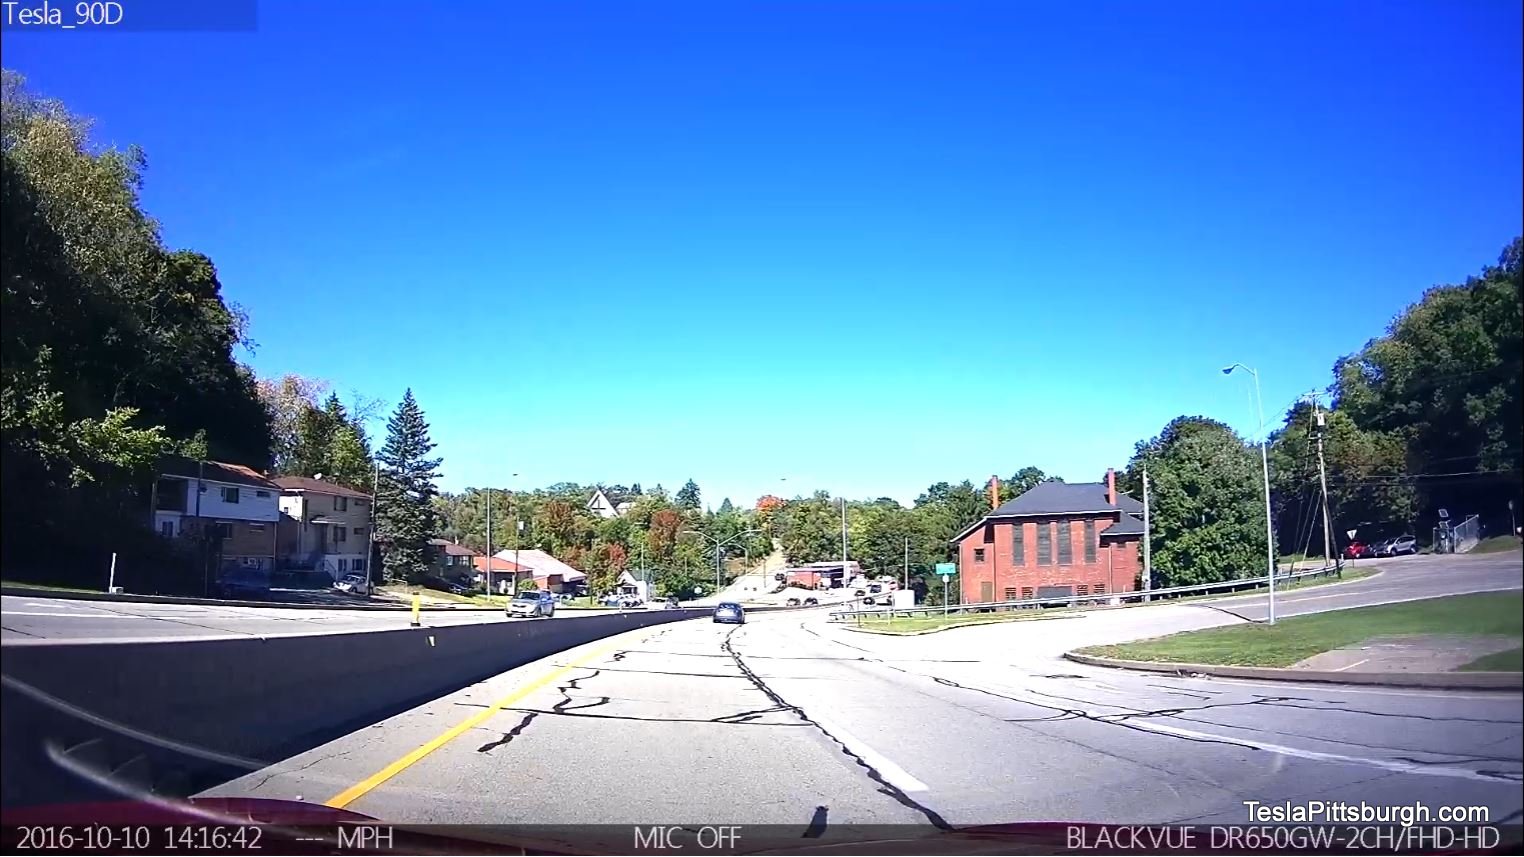
BlackVue DR650GW daylight
With six-lanes of traffic in a dense commercial district, the wider angle of the Thinkware is more noticeable. Choreographing our moves to best mimic the same shots was tricky, but both cameras did well here. It seems like the Thinkware gives a better representation of where the car is in its lane, with more of the fenders and windshield pillars in view, but the difference is so slight that there’s no clear victory for either camera.

Thinkware F770 shadows
BlackVue DR650GW shadows
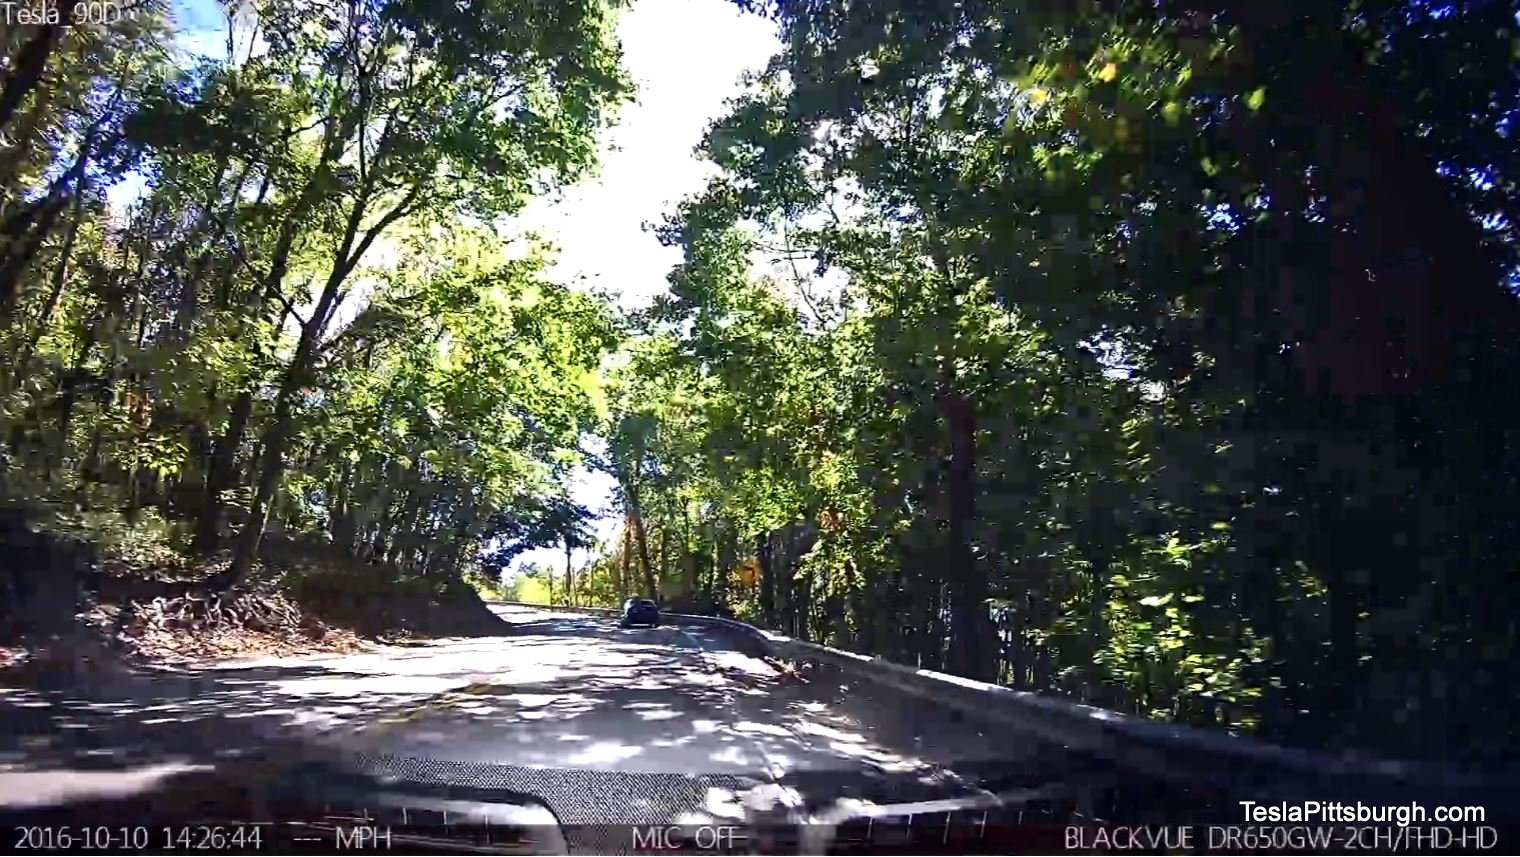
When we drove up a curving hillside road with brightly dappled sunlight in the early afternoon, neither camera could cope with the strobe-like lighting changes. The clear images we expected turned into the chunky blurs familiar to anyone who’s seen satellite television on a stormy day. The BlackVue’s image degraded to a greater degree and was especially mottled in sections where the shade was darkest. The leaves were just starting to change colors and the Thinkware preserved the bright greens and was able to discern the spreading yellow at the treetops better than the paler BlackVue.
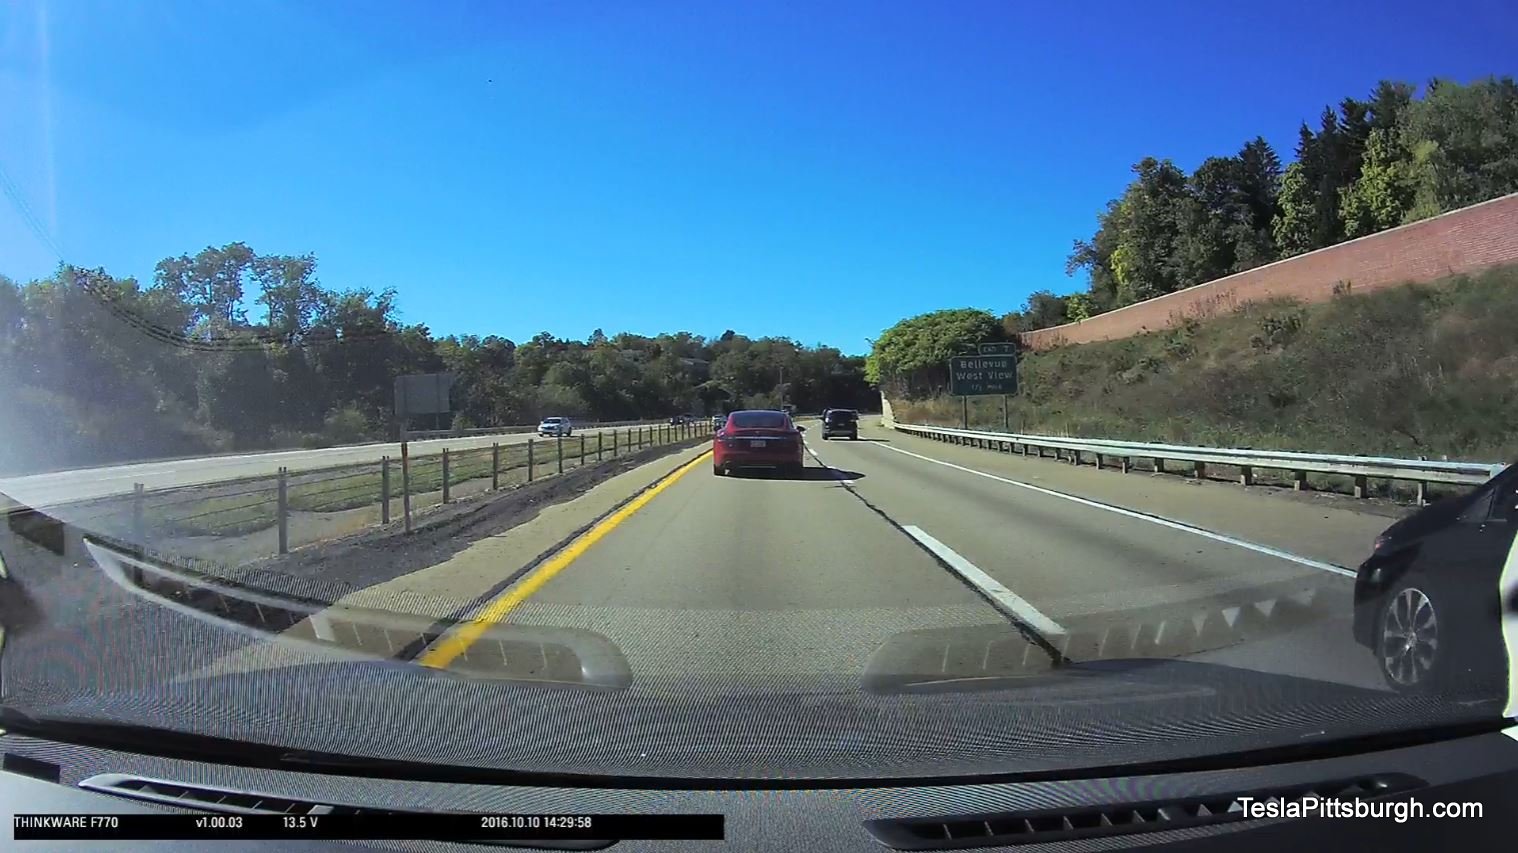
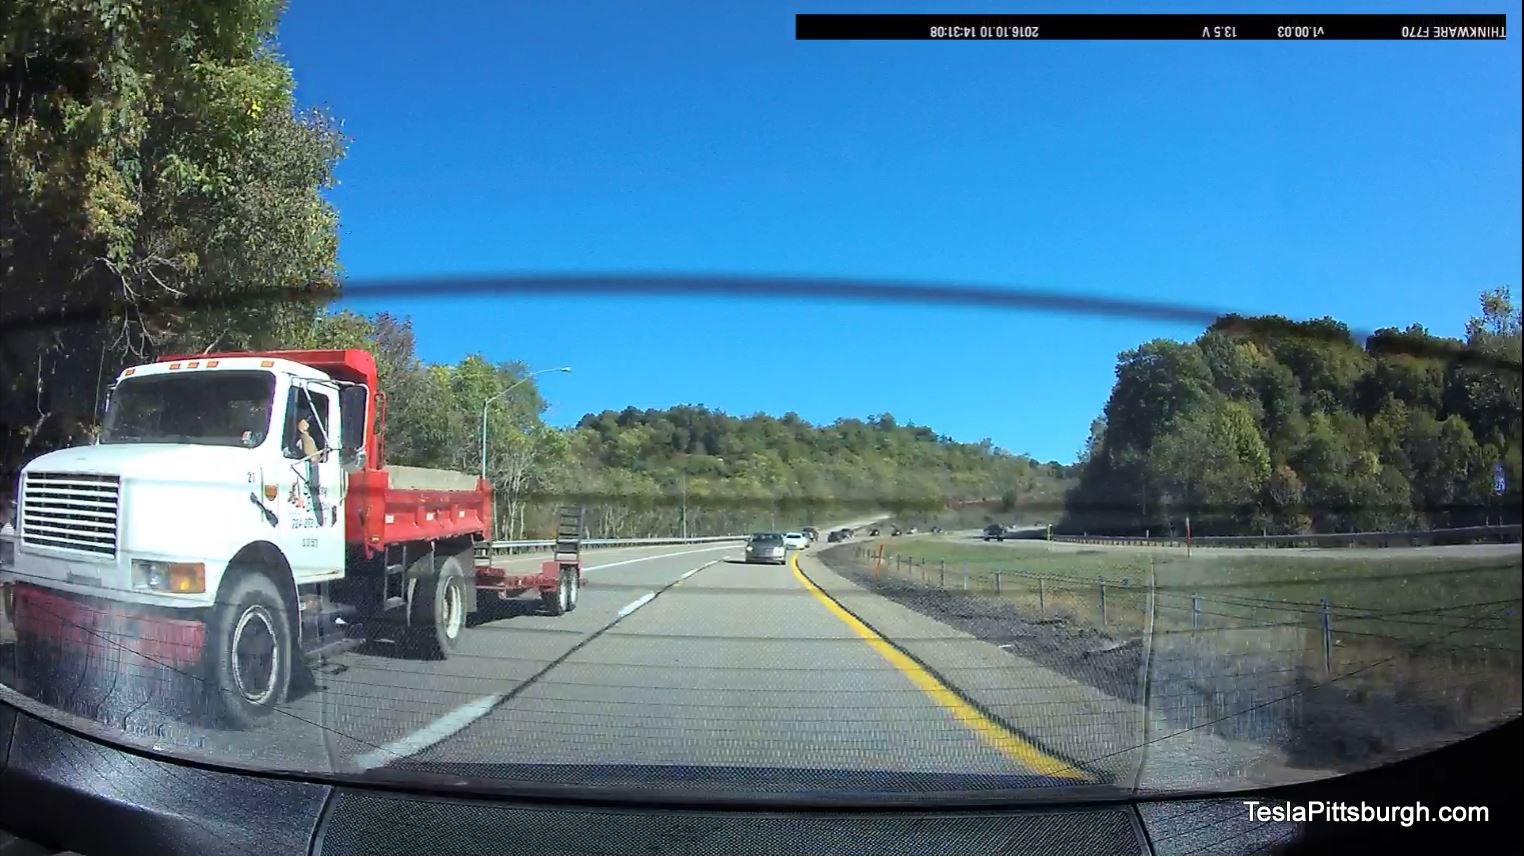
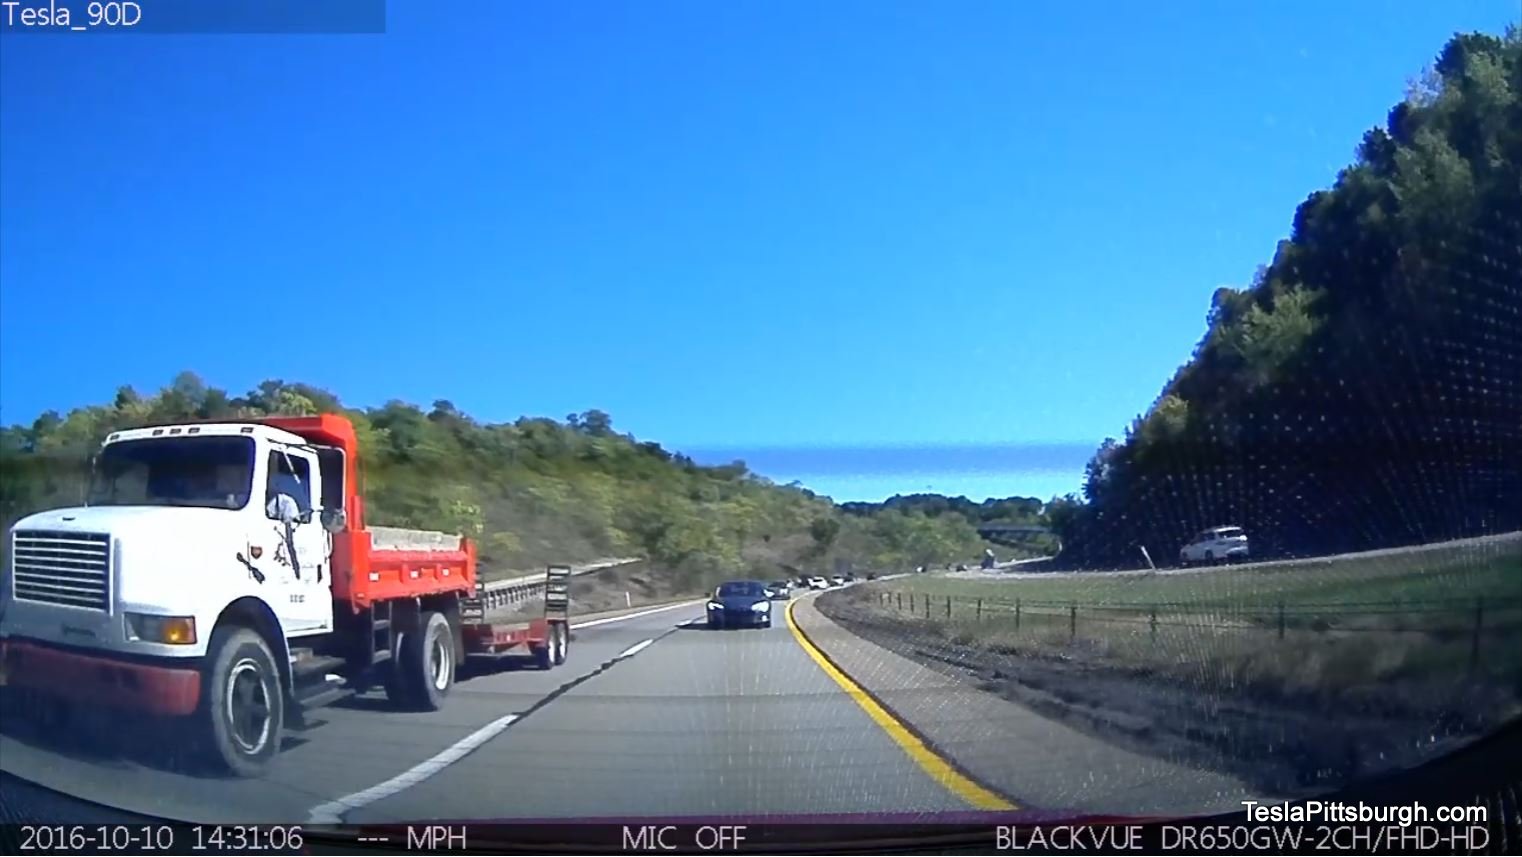
Thinkware F770 daylight freeway
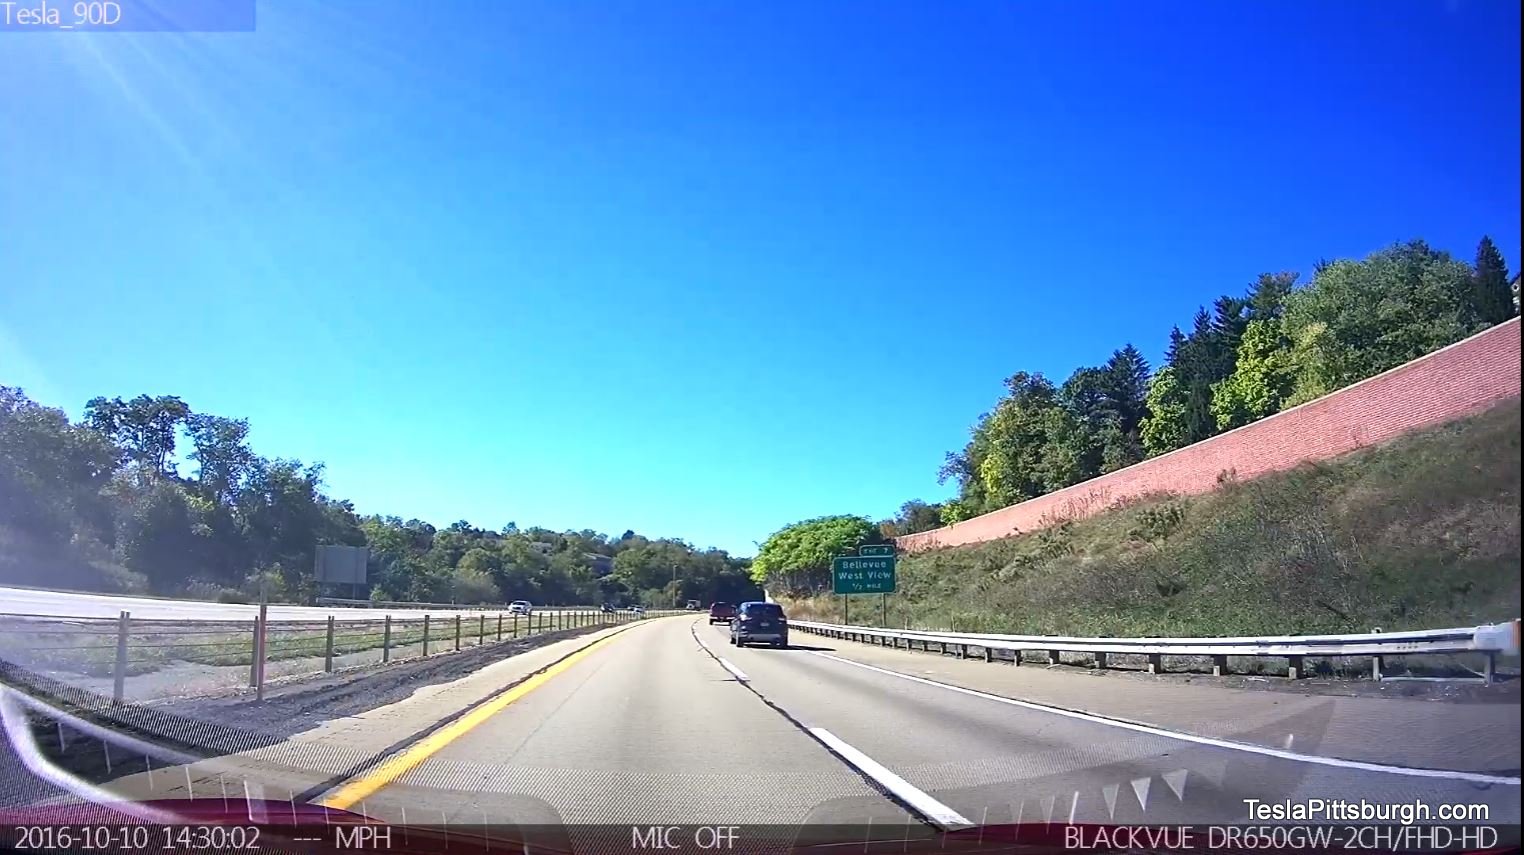
BlackVue DR650GW daylight freeway
On highway sections, there was no significant difference between the shutter speeds of the cameras. Both would blur when the image was frozen, but the readability of license plates on other vehicles was comparable. The BlackVue does seem to have a greater problem catching dark text on white backgrounds, at least in the bright sunshine we had for the test drive, allowing the white to “bloom” and obscure the text. Some signs and markings on commercial vehicles were also harder to read than on the Thinkware, but license plate fonts are chunky enough that there isn’t a clear advantage despite that.
Thinkware F770 rear camera
BlackVue DR650GW rear camera
Looking at the rear cameras, the Thinkware also has a wider angle on the back and the depth of focus is deeper– even the defroster lines had a sharper edge. This results in a little more distortion side to side, but the tradeoff is probably worth it. Pennsylvania doesn’t require front license plates and trying to read the receding plates as oncoming traffic went by was beyond the ability of both cameras for the most part; they’re just moving too fast. The lower resolution of the BlackVue camera is definitely noticeable, particularly in changing light conditions like our sun-dappled road.
Nighttime Comparison
Going into this review, the expectation was for the Thinkware to best the BlackVue in night time performance. Well, it does– and pretty easily– but there is some personal preference to consider and your driving routine might make a difference too.
Like the daylight test drive, the night trip featured highways, two-lanes and a commercial district. If you’re using either cameras for overnight parking security, you can probably extrapolate from the video we captured on this drive.

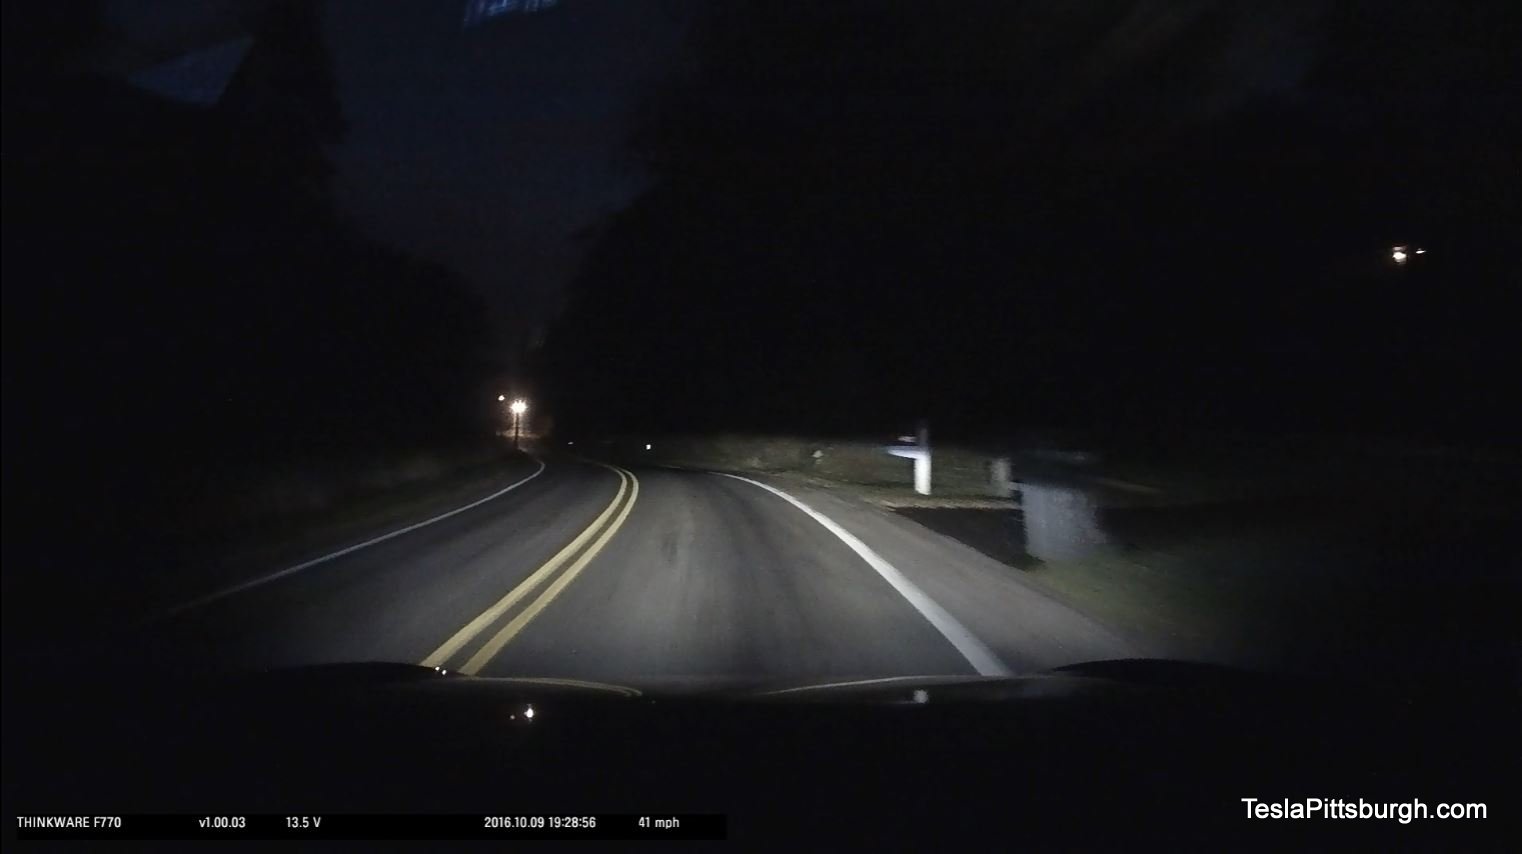
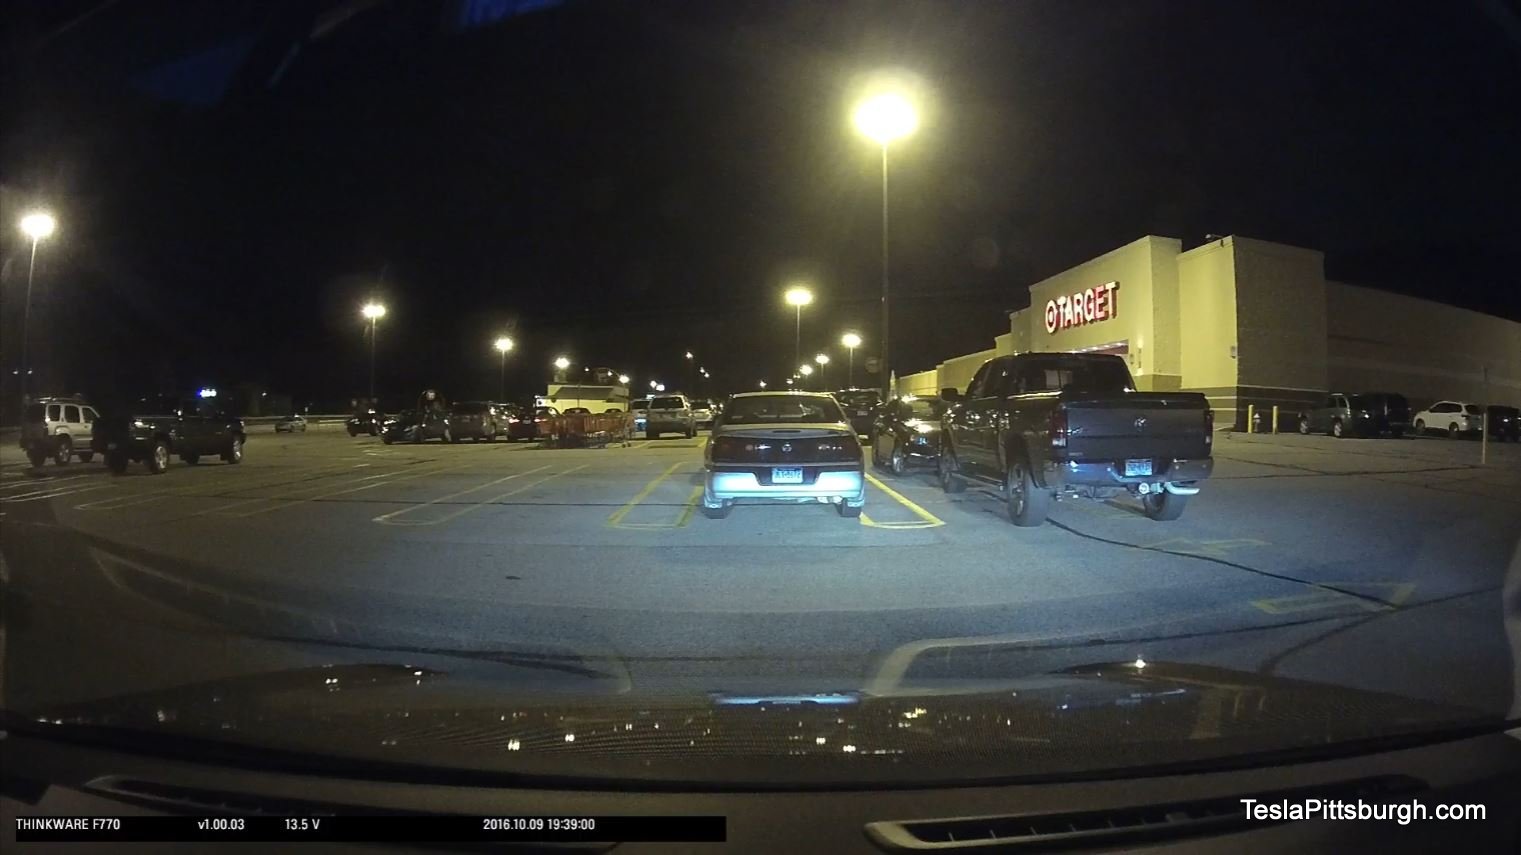
Thinkware F770 night
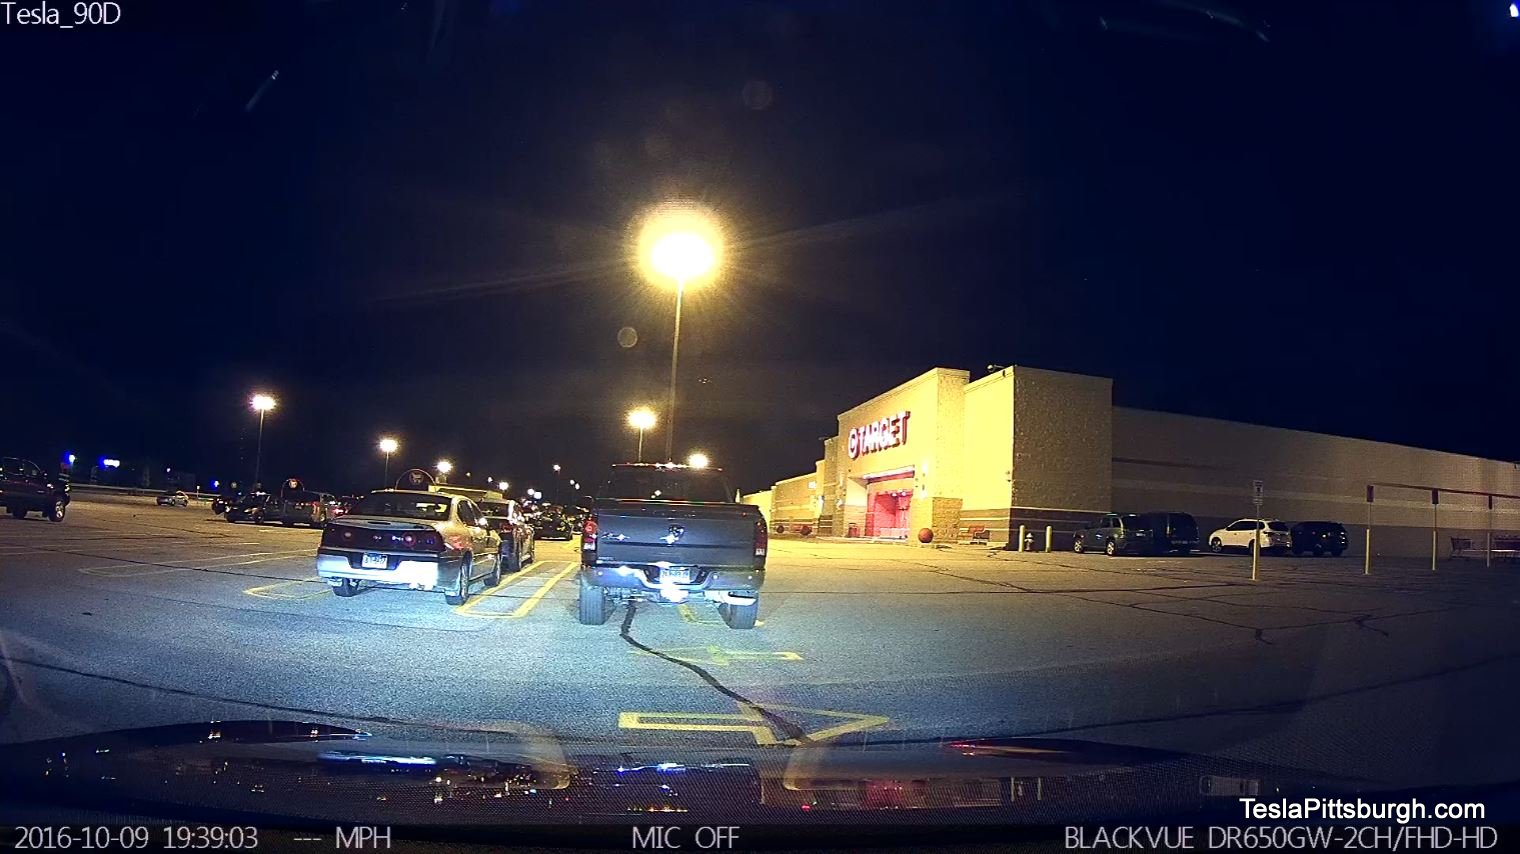
BlackVue DR650GW night
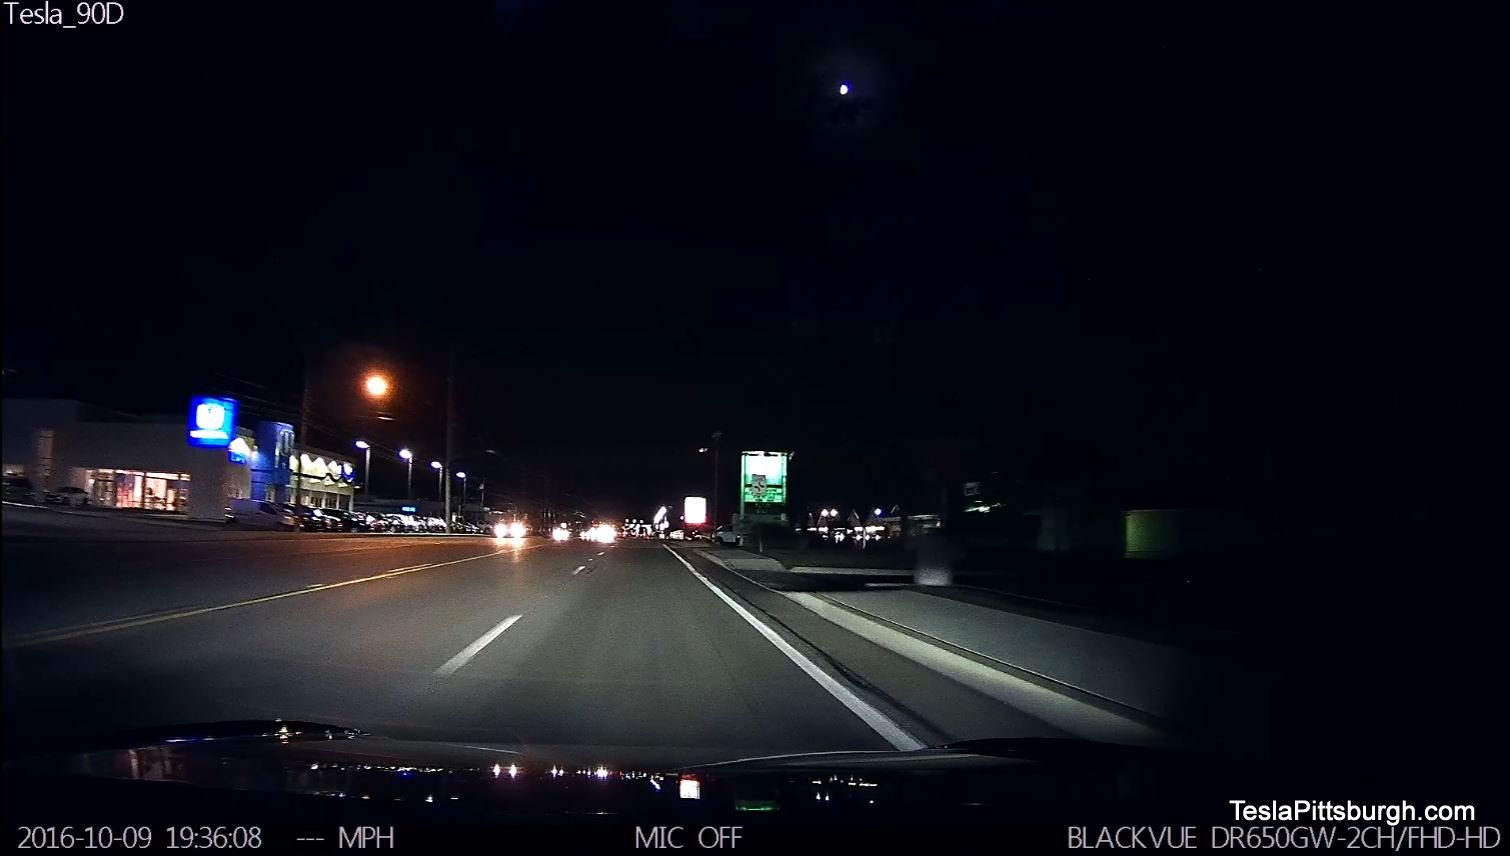
In the commercial corridor, the cameras were pretty evenly matched. The streetlights provided enough ambient light to generate clear video on both cameras. The Thinkware ends up looking a little washed out but the overall image is much brighter and, I would say, truer to life. The BlackVue camera is more easily dazzled by the bright lights from store signs and parking lots.
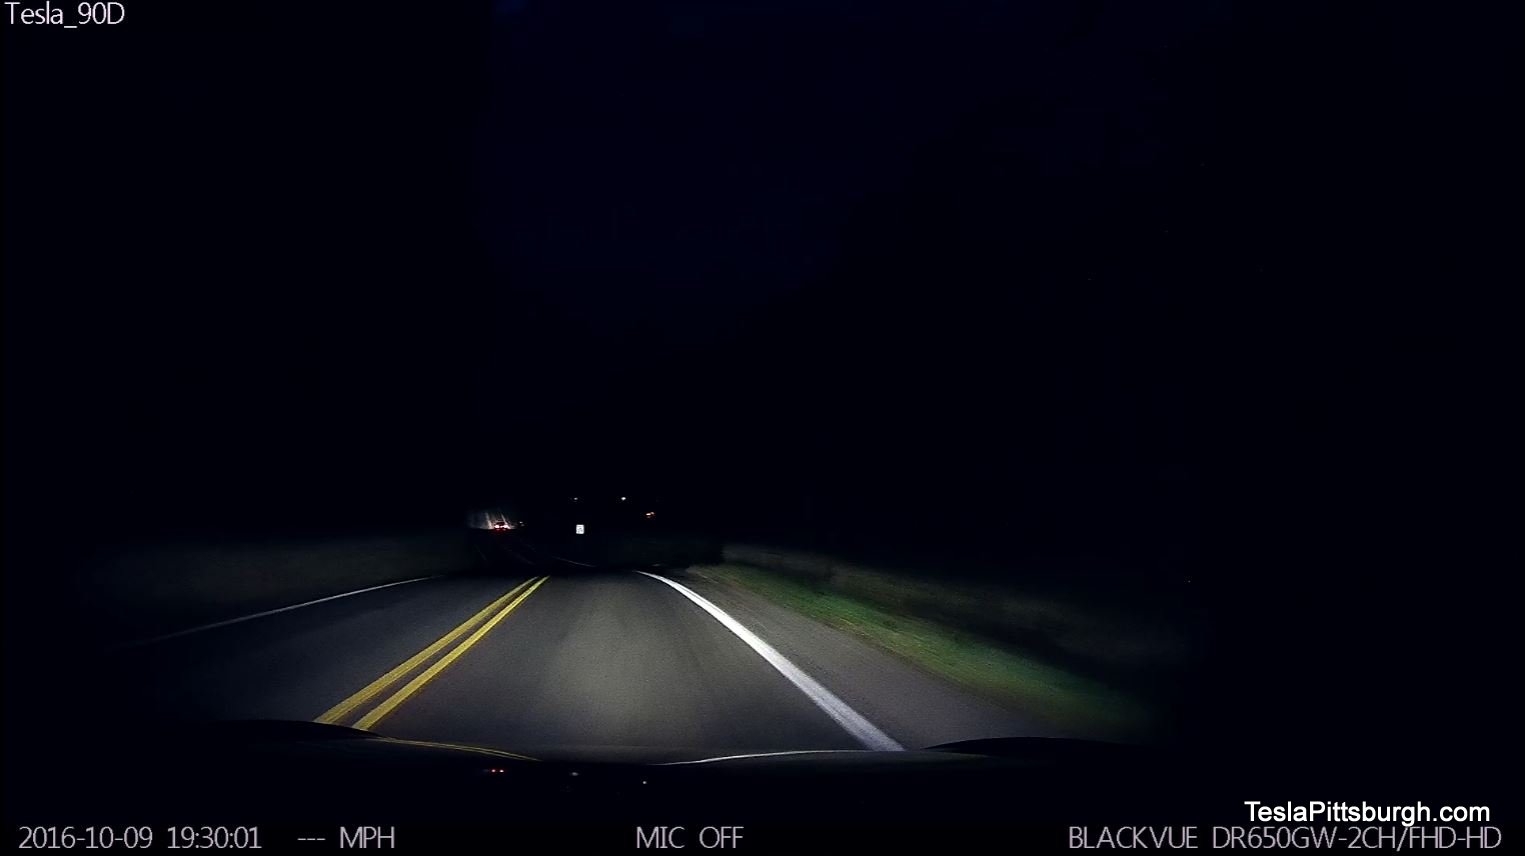
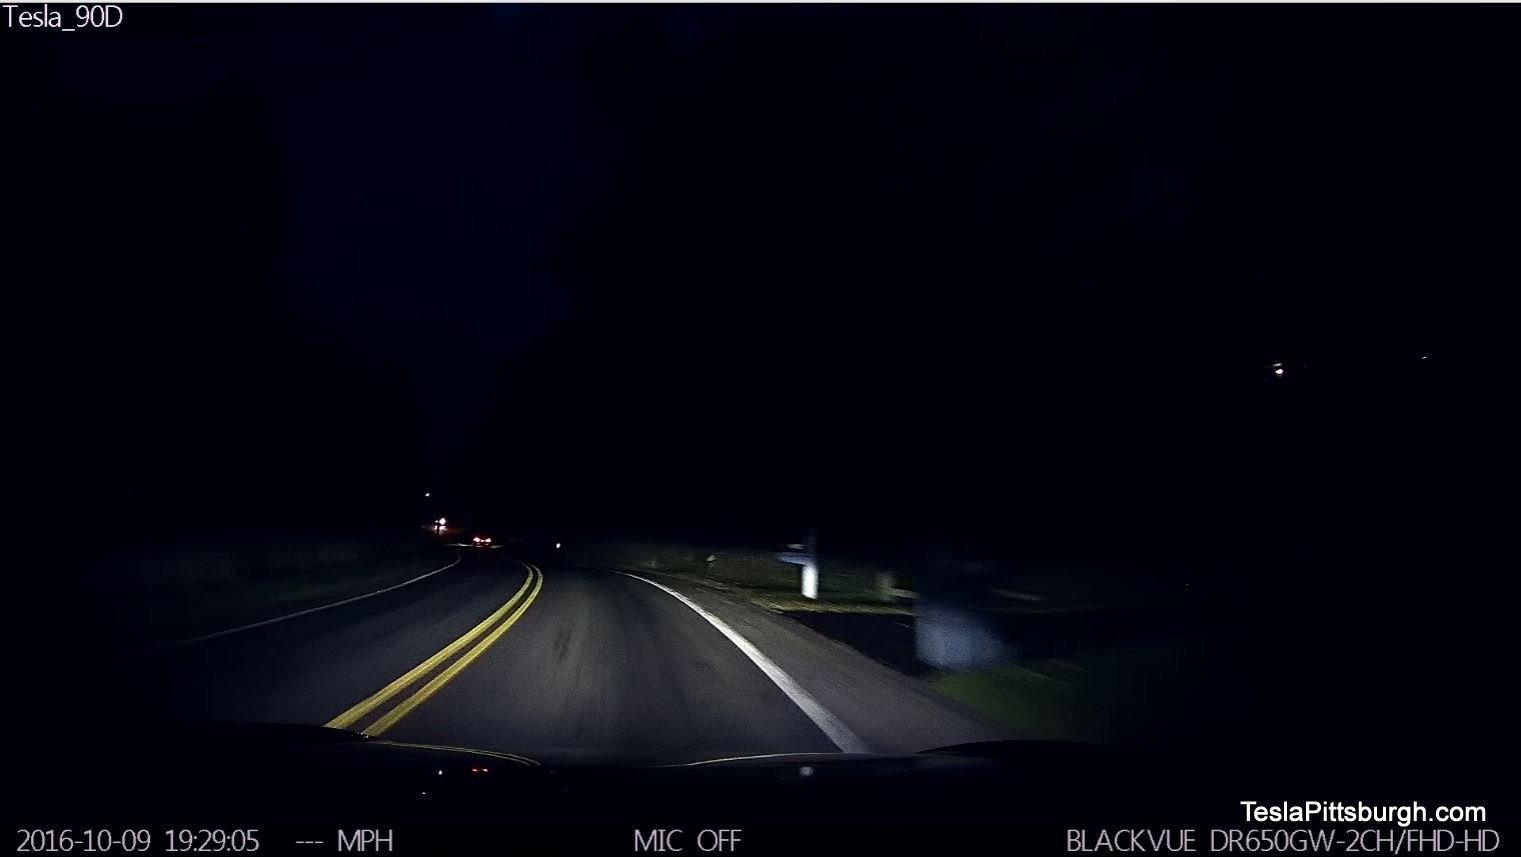
Thinkware F770 dark road
BlackVue DR650GW dark road
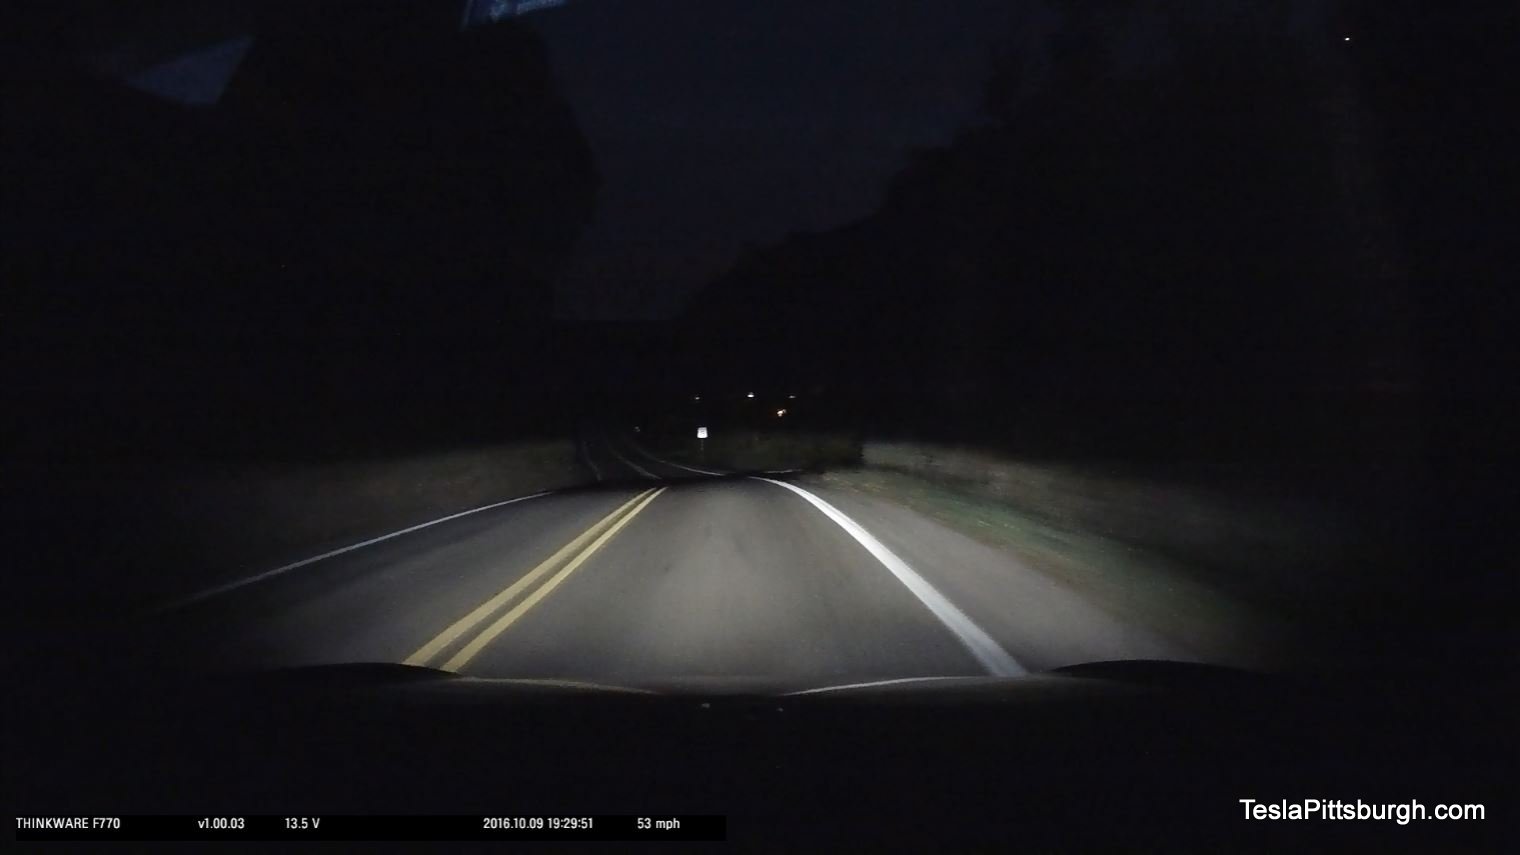
Admittedly concerned about the wildlife carnage we’ve seen on our rural two-lane roads, we headed out hoping NOT to catch a deer in our headlights. Fortunately, no animals were harmed in the making of this review! Unfortunately, it wasn’t until later that I realized Darren’s Autopilot-equipped car was automatically turning on the high beams when we had some distance between us, rendering about half of the video inconclusive. Damn you, Autopilot! Of the portions where I could confirm we were both using equal headlight power, the performances were both good.
Thinkware F770 dark road peripheral
BlackVue DR650GW dark road peripheral
The BlackVue– weirdly, compared to its daylight quality– seems to boost saturation and contrast in an attempt to make a better image. It does improve the overall visibility of the road itself, but everything else becomes dark shapes moving by on the periphery of the headlights’ sweep. Anything crossing or falling out of the beams disappears into the void as far as the BlackVue is concerned. The Thinkware still looks washed out in comparison but is again more of a match to what the human eye sees, picking up roadside trees and garbage cans more clearly even as they pass out of the headlights’ beams.
BlackVue DR650GW clouds
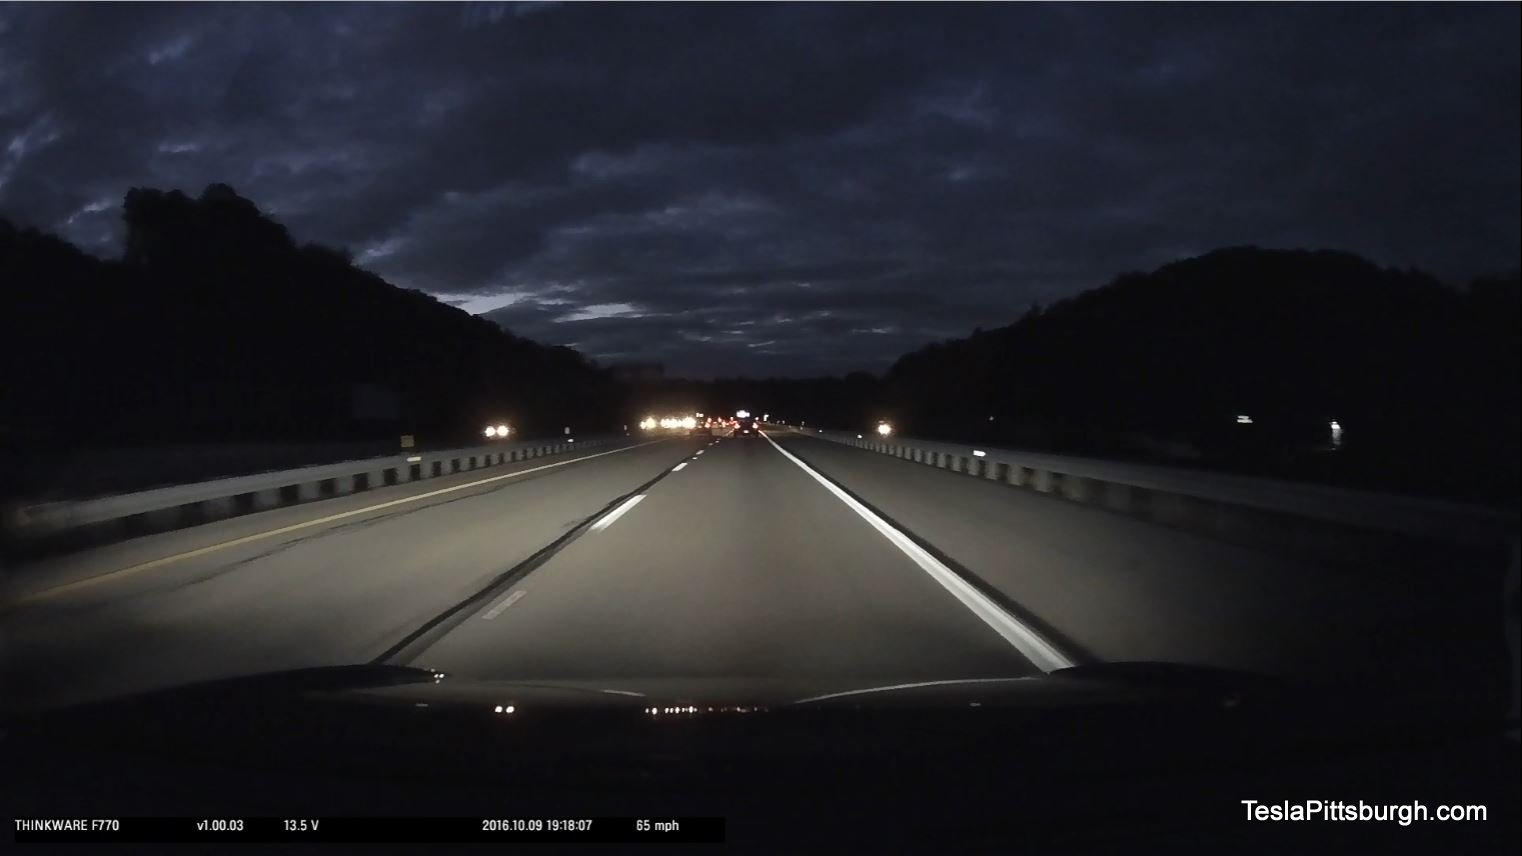
Back on the highway, both cameras played to type. The road markings were oversaturated with high contrast on the BlackVue; the Thinkware offered a brighter but a more grey view of the world. Neither camera had trouble coping with high speed or was particularly thrown off by bright oncoming headlights, though the “dazzle” was still more prominent on the BlackVue. Even surrounded by traffic, the Thinkware still delivered a realistic view that included clear differences between the dark sky, the dark trees and the brightly lit roadway below.
Rear cameras performed similarly to their daylight tests. The Thinkware essentially duplicates the view out back and compensates well for headlights, whereas the BlackVue became extremely dark and mottled; more easily confused by cluttered images and complex landscapes.
Thinkware F770
BlackVue DR650GW
Parking Mode
Darren and I both opted not to molest our Tesla’s electrical connections too much, so neither of us have the parking mode enabled. There are a number of ways to access continuous 12 volt power if you desire to have the camera recording all the time.
Once enabled, the Thinkware will transition to a time-lapse mode when parked. This results in a dramatic increase in recording time (16 times longer) that won’t overwrite the SD card as frequently. The BlackVue will record in real time, but offers the ability to access the camera’s live feed remotely if it can connect to the internet through WiFi. It can even send push notifications to your phone if the motion or impact sensors are triggered. While that seems like a great selling point at first glance, I think the usefulness is overstated unless you have hardwired a WiFi hotspot into the car. For those that have, the BlackVue will upload events right up into the cloud, which is pretty handy. Otherwise, who is going to take the time to configure a WiFi connection every time you park, assuming any is available in the first place?
If your home parking situation is that unsafe, you might be better off investing in a good fence! Likewise, since the video is recorded in real time there is a good chance that long-term parking will overwrite files before your return, as opposed to Thinkware’s smaller time-lapse files. Is that significant when both cameras have shock sensors and separate incident recording folders? Probably not, so I’m personally not putting much emphasis on this mode.
Physical Controls
If you cringed at the slightly larger size of the Thinkware, you’re making a big mistake. The BlackVue isn’t really that much different in size (the barrel shape is deceptive) and both hide easily behind the rearview mirror. Thinkware makes use of its square shape to offer multiple controls right on the bottom of the camera. One touch can toggle the microphone on and off, for instance. That’s handy in a state like mine where two-party consent is required– but not for conversations with law enforcement during a traffic stop. Get pulled over with a Thinkware and one tap will bear witness to your conversation. Some BlackVue cameras offer similar functionality using a proximity sensor, but it can be finicky to use– especially compared to a simple button.
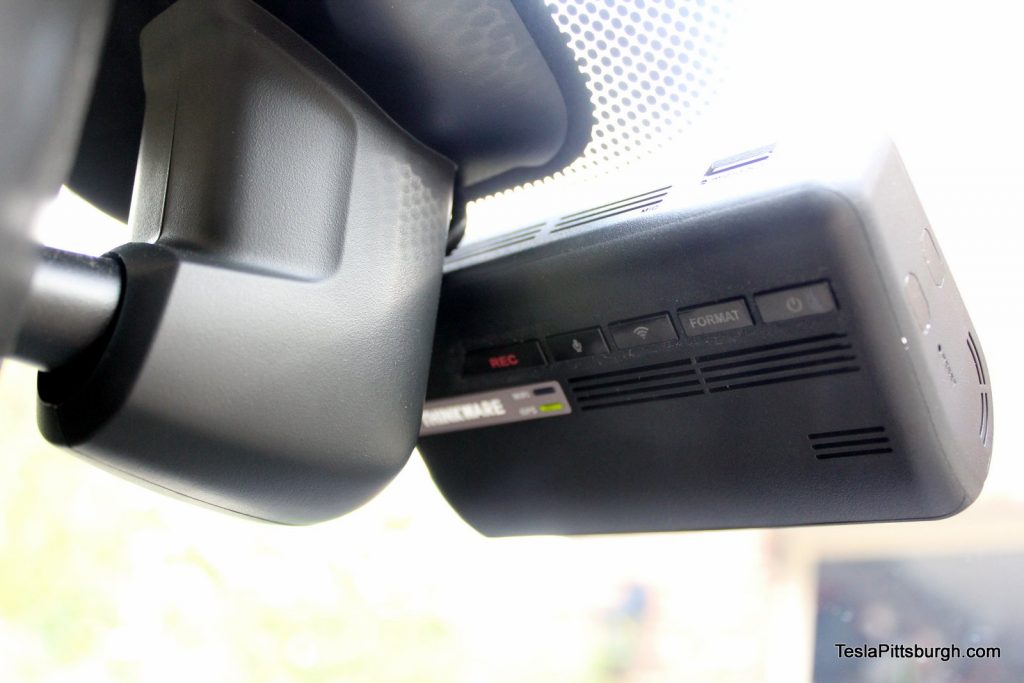

Other buttons on the Thinkware offer even broader functionality. You can toggle the WiFi connection to your phone, reformat the SD card and trigger a manual recording. Again, worth mentioning– these buttons are clearly visible and easily accessed without unmounting the unit or trying to read tiny markings. The camera will confirm everything with spoken updates and “critical” functions like reformatting the card require a distinctly prolonged press to prevent accidental erasure.
The SD card slot is also right there on the back of the unit. It really can’t be easier to pop and insert cards. The BlackVue has its SD card slot stashed behind a finicky pivoting panel facing the far side of the car and you have to unplug the rear camera cable to even move that. It’s ridiculously inconvenient by comparison and your passenger is stuck looking at the ends of those cables all the time.
Software and App
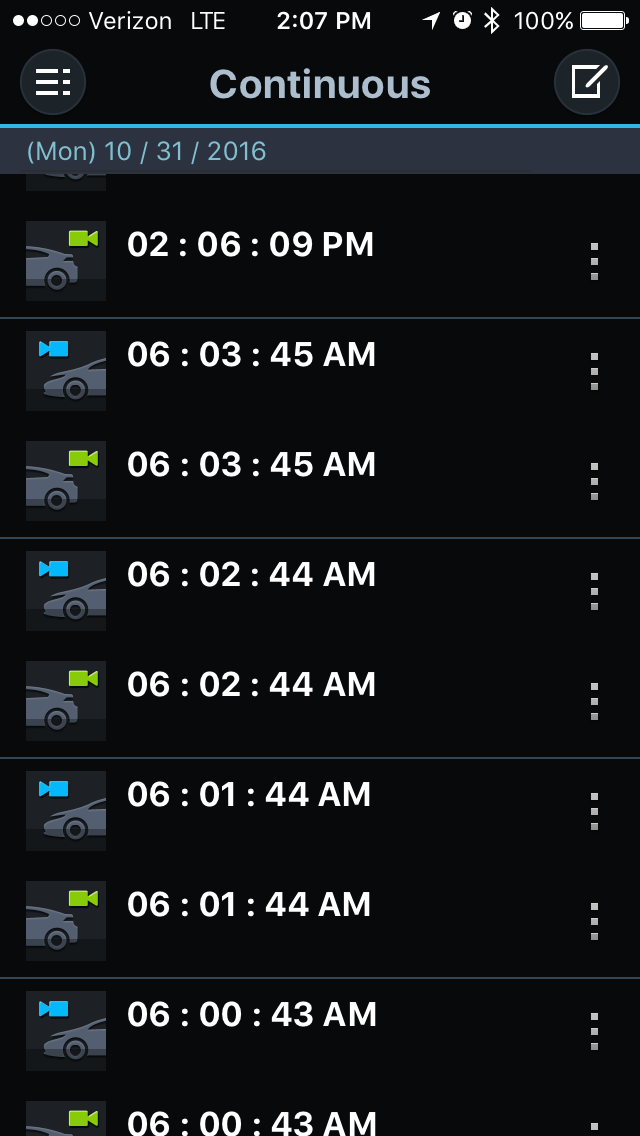
Captured video is only useful if it can be easily accessed. BlackVue and Thinkware both have dedicated software available in the form of desktop viewers and smartphone apps. The desktop viewers require you to pull the SD cards– which again, is much easier on the Thinkware– and import or map to those files. Secondary data files will correlate the front and rear views along with maps and shock/g-sensor graphs– it’s really all quite impressive. The map views are completely dependent on how quickly the GPS sensors locate the camera. Thinkware seems generally faster at this, but the delay can vary wildly from a few seconds to more than 10 minutes sometimes, depending on coverage.
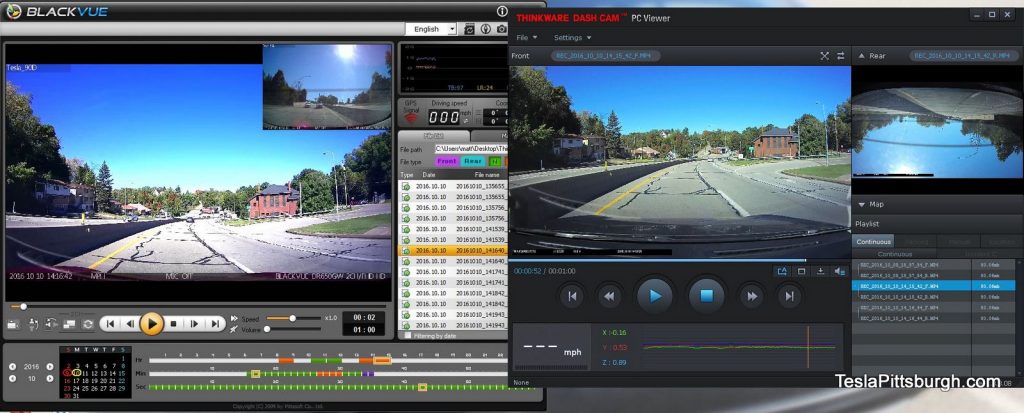
The user interfaces are, overall, essentially the same– but BlackVue has the distinction of offering a software fix for rear cameras that have been inadvertently mounted upside down. The lack of this function on Thinkware’s viewer is really inexcusable considering how contrarily marked the rear camera housing is.
The smartphone apps for both cameras are equally similar and vital for changing functions and settings– in fact, I’m not sure you can alter either of them without using the app, so keep that in mind you happen to not have a smartphone. Both apps will let you see a live view of both cameras and to see video files currently stored on the camera. You can also download those files to your smartphone (creating a duplicate) and edit them like any other video file.
One of the amusing settings for the Thinkware involves a plethora of options for the front security lights. Clearly someone was sucking up the programming boss. Though oddly there is a complete lack of options for the rear camera’s tally light. Like any unwanted light on a car, it can be fixed with a well placed strip of black tape.
While the appearance of the apps do vary slightly, all the actual capabilities are basically the same– with one big difference: The Thinkware can change configuration settings on the fly but the BlackVue has to be rebooted by yanking the power cable, waiting for the camera to power down and then plugging it back in. This is quite time consuming and cumbersome compared to the Thinkware, especially when you’re dialing in your initial settings or if you are prone to tinker and change them frequently. As mentioned before, that even applies to turning the microphone on and off reliably. For all practical purposes, only the Thinkware can change settings casually.
Safety Features
I saved the worst features for last, even though Thinkware seems very proud of them. The F770 is branching out into some driver assistance features that have their heart in the right place, but I hope didn’t consume too many hours to program! Once properly calibrated, the Thinkware will monitor your position in the lane and then alert you when you depart the lane, EVEN IF THAT IS YOUR INTENTION. Alas, it can’t see turn signals and doesn’t much care about ever turning off the road you’re already on, so the panic becomes tiresome.
Thinkware will also apply some kind of discernment to the traffic situation ahead of you and then go freaking nuts whenever it thinks your closing speed is alarming. That forward collision warning would be great, but even on its least sensitive setting I was getting alerts for very routine stops. The camera would also beep when I changed lanes– even with lane keeping alerts disabled– to pass on the highway, misreading the vehicle beside me as in front, since it’s only watching the closing speed. Parked cars would also foretell of impending doom. I kept these features on just long enough so I could complain about them accurately because they’re very annoying. They’re also totally outclassed by any Tesla with Autopilot, which does these functions better. If you really need this kind of auditory intervention you’d be better off with a nervous passenger instead. At least then you’d get the amusement of seeing them stomp on the imaginary brake pedal and pawing hopelessly for the hand bars Elon forgot to install.
Conclusion
Overall, the Thinkware and BlackVue are very close rivals. Since both are using the same Sony sensors, it comes down to the processing of those images that makes the biggest difference.
Thinkware touts a wider dynamic range and superior night video– and we’ve validated that assertion in our tests. The BlackVue was definitely more hindered by the strong dappled sunlight and by the dark country roads. The higher grade rear camera on the Thinkware is a major plus as well. But the software suite for the BlackVue is far superior as long as you’re not changing settings on the camera itself, which is more cumbersome than the Thinkware… so that’s really a wash.
Video
The BlackVue appears to be a slightly smaller main unit but considering all the dedicated buttons on the main Thinkware camera, and the more discreet cabling, I think the Thinkware has superior functionality. The larger footprint also accommodates additional built-in internal memory that “Dual Saves” in addition to writing files to the microSD card. In the event of a major accident, that could be the difference between having evidence or having just a broken camera with corrupted files. A BlackVue’s backup requires a WiFi hotspot and sufficient time to upload the data to the cloud, but accidents happen fast.
The “driver aids” on the Thinkware are complete fluff, especially for Autopilot-equipped cars and completely annoying for everyone else. Thanks, but no thanks.
All that aside– though I think it’s already a compelling case for getting the Thinkware– the biggest functional difference is how the two companies treat parking security. I’d venture that most people won’t be wiring up their cameras for continuous power, but if you do, then weighing how each camera treats that situation might be a deciding factor.
It’s quite regrettable that our privacy has become so infiltrated by cameras, but lawsuits and false accusations predate them all. Now that the technology has become affordable to put in our cars, you’d be foolish not to have a these silent witnesses there to protect you from scams, misapplied blame and frivolous lawsuits. You can’t really go wrong with either camera– and sure, you could get a cheap one, but these offer better quality and reliability at a reasonable upcharge. At the time of this review, the price difference between them is about $50 with the Thinkware F770 shipping for about $400 total. For that modest premium, the camera delivers a more compelling overall package, better video, easier programming and it deserves a chance to become the new standard for Tesla owners.
More Tesla Dashcam


Back in 2019, YouTuber Simone Giertz, the self-proclaimed “Queen of Sh*tty Robots,” created a one-off Tesla Model 3 build that took the automotive world by storm. Fondly dubbed as “Truckla,” Giertz noted that the vehicle was actually her dream car — as crazy as that may sound.
Now almost four years later, the YouTuber posted an update on Truckla. And just like every other big project that one probably started, Giertz stated that she actually stopped working on Truckla when the vehicle was about 80% complete. The car is driving though, but a lot of stuff was not really working very well.
Thus, for her Truckla update, Giertz shared how most of her Model 3 pickup truck conversion was essentially completed. Truckla got a lot of detailing done, she got a slight lift, and she now has a functional tailgate. One has to admit, Truckla’s tailgate is pretty darn cool.
The “Queen of Sh*tty Robots” also opted to give Truckla a friend in the form of an automatic robot charger. Unlike Tesla’s rather interesting snake charger from years past, Truckla’s charger would come in the form of a rover, thanks to her friends at robotics platform Viam. Giertz aptly named Truckla’s robot charger friend “Chargela,” which is an appropriate name for such an invention.
Also true to form for Giertz, Chargela’s first encounter with Truckla was just a tiny bit awkward. One could say that Chargela may have just been a little bit nervous on his first try without human hands helping him. Most importantly, the system did work, so Giertz would likely keep using Chargela for her Model 3 pickup.
Teslas are very tech-heavy vehicles, so projects like Giertz’s Truckla are always remarkable. The fact that the Model 3 works perfectly fine despite having a good chunk of it cut off and turned into a pickup truck bed is mighty impressive any way one looks at it. Overall, Truckla will always be one of the coolest Tesla DIY projects to date, so any updates about the vehicle are always appreciated.
Truckla’s nearly four-year update can be viewed below.
Don’t hesitate to contact us with news tips. Just send a message to simon@teslarati.com to give us a heads up.
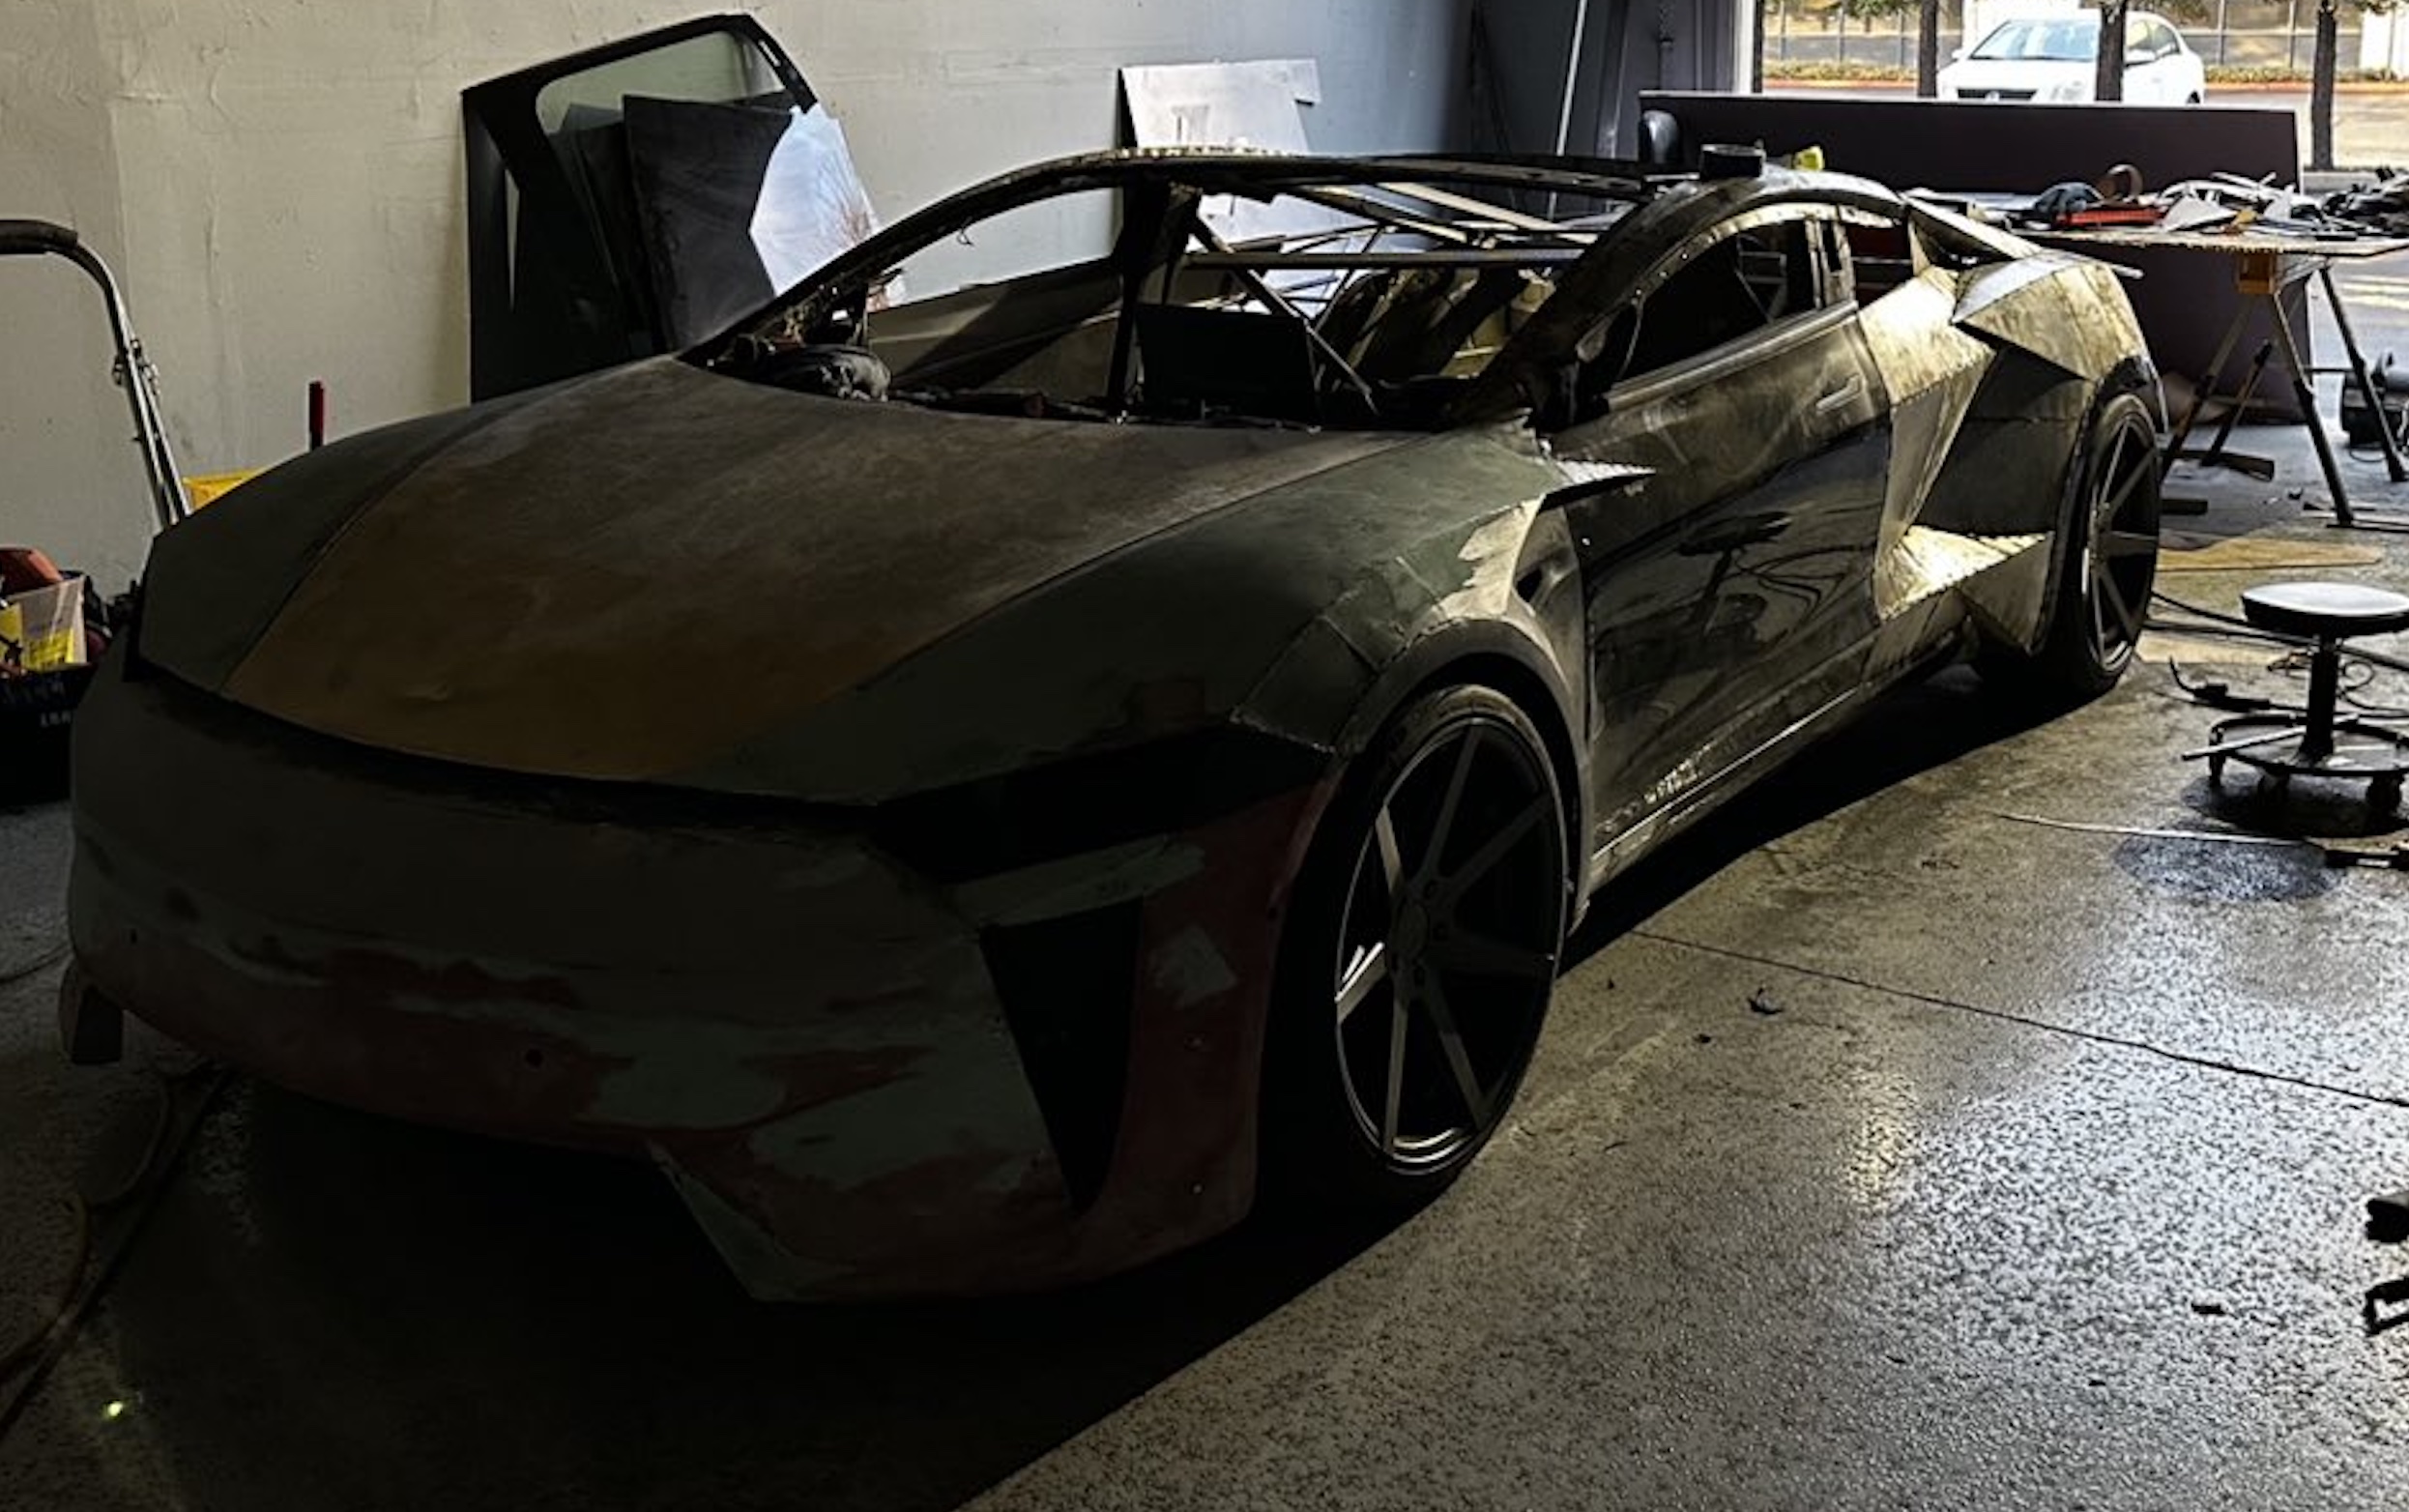
A Tesla owner is taking his hobby and love for electric vehicles to new levels by creating what could only be described as one of the coolest EV-related DIY projects to date. The idea for the project is simple: what happens when you cross a supercar with the Cybertruck? You end up with a two-seater CyberRoadster.
Tesla owner David Andreyev, who goes by the username @Cyber_Hooligan_ on Twitter, has spent the last few months creating a Cybertruck-inspired version of the next-generation Roadster made from a salvaged Model 3 Performance. Starting with a Model 3 Performance is an inspired choice, considering that it is Tesla’s first vehicle that has a dedicated Track Mode.
A look at Andreyev’s YouTube channel, which can be accessed here, shows the meticulous build that the Tesla owner has implemented on the project car. What’s particularly cool about the CyberRoadster is the fact that it’s being built with parts that are also from other Tesla vehicles, like its front bumper that came from a new Model S. Recent videos suggest that the project car’s rear bumper will be from a new Model S as well.
The journey is long for Andreyev, so the completion of the CyberRoadster will likely take some more time. Despite this, seeing the Tesla owner’s DIY journey on such an epic build is more than satisfying. And considering that the CyberRoadster is evidently a labor of love from the Tesla owner, the final results would likely be extremely worth it.
There’s a lot of crazy Tesla modifications that have been done as of late. But some, as it is with a lot of things on the internet these days, have become more silly gimmicks than serious automotive projects. Fortunately, car enthusiasts like Andreyev, who just happen to also love electric vehicles, are taking it upon themselves to create one-of-a-kind EVs that would surely capture the attention of anyone on the road.
Check out the latest video in the CyberRoadster’s creation below.
Don’t hesitate to contact us with news tips. Just send a message to simon@teslarati.com to give us a heads up.
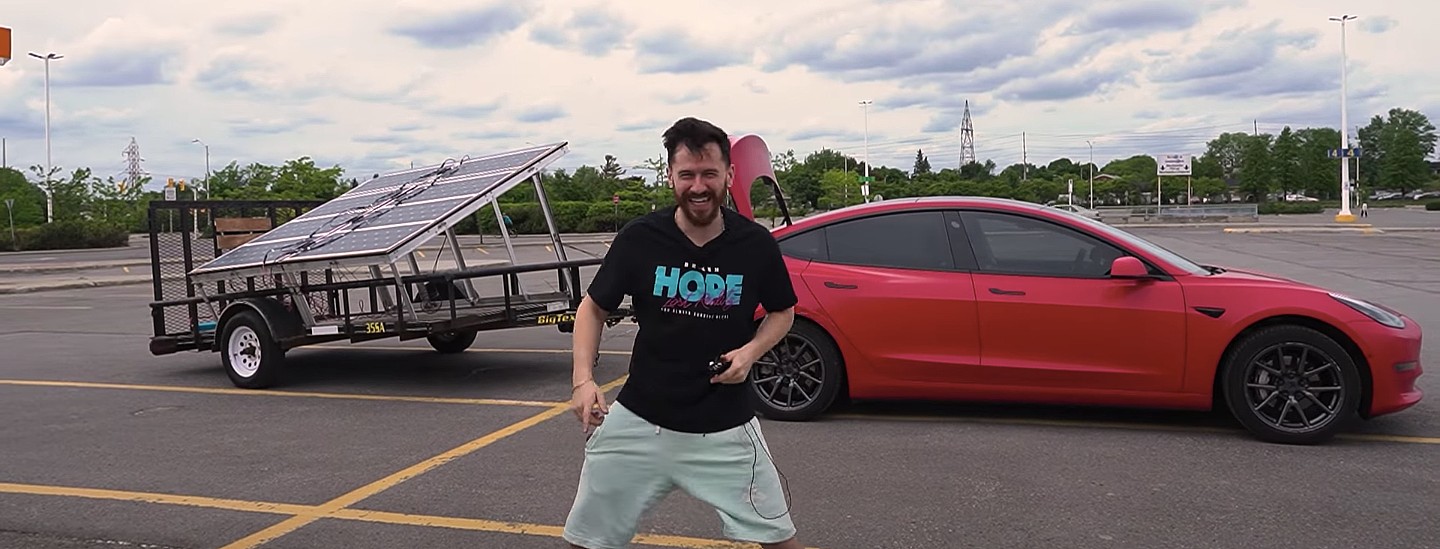
A Tesla owner has demonstrated a rather novel way to charge his Model 3. In a recent video, Sean Callaghan of the ItsYeBoi YouTube channel opted to use a series of off-the-shelf solar panel sheets onto a towable trailer to create a mobile charging unit for his all-electric sedan.
Callaghan planned to use only the sun and the solar sheets purchased from e-commerce platform Wish to charge his Model 3. The solar panel sheets would collect energy from the sun and transfer it to a control panel. The control panels were connected to batteries that would hold the energy—the batteries connected to an inverter, which would then charge the Tesla Model 3.
The entire assembly would provide the Model 3 with about 800 watts of energy on a completely sunny day. However, Callaghan shot the video when weather was overcast, so the entire solar panel trailer build only managed to provide around 300 watts throughout the YouTube host’s test.
To put this into perspective, a 100 volt home wall outlet provides 1.4 kilowatts of power, or 1,400 watts. Therefore, the 300-watt solar panel assembly built by Callaghan was producing less than 25% of the energy of a typical wall outlet. This is pretty marginal compared to Tesla’s 250-kilowatt V3 Superchargers, which provides 250,000 watts, or about 833 times as much power as the makeshift solar panel build.
However, Callaghan’s goal was not to charge the vehicle quickly. He explained the idea came from a previous video where he used a $5,000 Wish-purchased wind turbine to charge his Model 3. He wanted to test the effectiveness and efficiency of the system, which was questionable due to the time it would take to charge the battery fully.
The Model 3 battery pack is 78 kWh, and with Callaghan’s 300-watt system charging his electric vehicle, it would take 260 hours to supply the Tesla’s battery to full capacity.
In the past, electric vehicle enthusiasts have asked Tesla CEO Elon Musk why the company’s vehicles do not contain solar glass roofing, which would charge the car while the owner is driving. Musk has explained that the efficiency of this idea is challenging and likely would not provide an ample amount of range.
When asked about the idea of putting solar panels on the top of Tesla’s vehicles in 2017, Musk responded that the idea was “Not that helpful, because the actual surface of the car is not that much, and cars are often inside. The least efficient place to put solar is on the car.” It also would not be cost-effective for Tesla because “the cost of the panels and electronics, R&D and assembly would never pay for itself in the life of the vehicle, compared to charging from the wall in your garage,” Quartz noted.
That being said, Tesla plans to implement solar panels onto the motorized tonneau of the upcoming Cybertruck. The idea was discussed on Twitter when Musk stated that the optional feature would add “15 miles per day, possibly more” when parked in the sunlight. Also, fold-out solar wings could help capture enough solar energy for 30 to 40 miles a day.
Watch Sean Callaghan’s video of his makeshift solar panel trailer below.

Armored Tesla Cybertruck “War Machine” debuts at Defense Expo 2025

Tesla Megapacks chosen for 548 MWh energy storage project in Japan


