Hammer drawing, often perceived as a primitive or straightforward art form, actually encapsulates a complex blend of technique, understanding of form, and strategic application of shading and composition. When beginners approach the craft of hammer drawing, they typically focus on the basic outline or silhouette; however, mastering this discipline involves a progressive understanding of spatial relationships, texture, and dimensionality. As an expert in artistic techniques and visual arts education, I aim to offer a detailed, step-by-step guide that breaks down the essential tips and methods that will elevate a novice’s approach to hammer drawing from simple sketching to sophisticated illustration.
Understanding the Fundamentals of Hammer Drawing

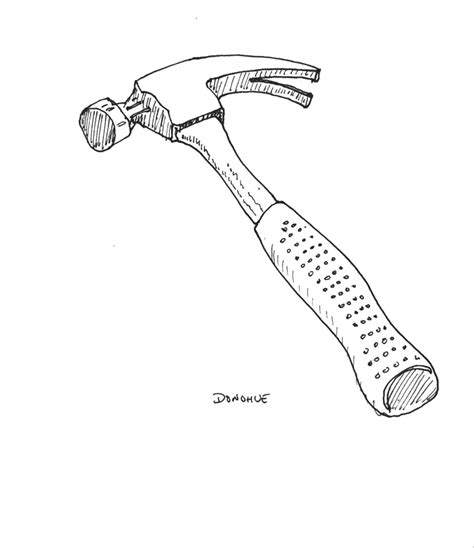
Before diving into specific techniques, it is crucial to establish a foundational understanding of what constitutes effective hammer drawing. At its core, it’s about capturing the volume, weight, and texture of a hammer, along with integrating perspective and light sources to create a believable, realistic representation. This involves a fusion of observational skills and technical proficiency in shading, contouring, and composition. Recognizing the different components of a hammer—the head, handle, nails, and surface details—enables artists to scale their work accurately and imbue it with a sense of authenticity.
The Essential Components and Their Visual Characteristics
A hammer typically consists of the head, which is often metallic with reflective qualities, and the handle, which could be wooden, rubberized, or composite. Each component requires distinct rendering techniques: the metallic surface necessitates precise highlights and shadows to evoke its reflective nature, while the handle demands texture detail, illustrating grain or material finish. Observing real-world hammers or reference photographs enhances an artist’s ability to interpret these features convincingly.
| Relevant Category | Substantive Data |
|---|---|
| Number of Essential Components | 4 main parts: head, handle, nails, surface details |
| Average Weight Range | Depending on size, typically 0.5 to 2 kg (1.1 to 4.4 lbs) |

Step-by-Step Guide to Mastering Hammer Drawing

For consistent improvement, approaching hammer drawing methodically ensures progress. Below is a structured process to guide beginners through each stage, focusing on accuracy, shading, and composition.
Step 1: Gather Accurate Reference Materials
Start with high-quality photographs or real hammers to study the details, proportions, and material qualities. Capture different angles to understand the three-dimensional form. Use grid overlays or measurement tools to assist in translating the object onto paper with proper scale. Remember, accurate observation is the bedrock of realistic rendering.
Step 2: Sketch the Basic Outline and Proportions
Using a light pencil, sketch the overall silhouette and major components—this includes the shape of the head, the curvature of the handle, and the placement of any nails or surface textures. Focus on getting the proportions right before adding details. Employ geometric shapes—cylinders for the handle, a rectangle or oval for the head—to simplify complex forms for initial placement.
Step 3: Add Structural Details and Contours
Refine your sketch by defining the contours and surface features. Indicate the edges where different materials meet, like the transition from metal to wood or rubber. Pay special attention to the curvature of the handle and the beveled edges of the hammerhead. Using subtle line weight variation emphasizes depth and dimensionality, guiding the viewer’s eye through the composition naturally.
Step 4: Establish Light Source and Basic Shading
Select a consistent light source—such as top-left—to inform shadow placement. Begin blocking in shadowed areas with softer pencils or shading tools, like blending stumps or tortillons. Don’t rush; initial shading creates the foundation for more detailed highlights and midtones. Consider the reflective qualities of metal, which require stark contrast, and softer shading for textured wood or rubber parts.
| Relevant Category | Data Point |
|---|---|
| Typical Light Source Direction | Top-left |
| Shading Techniques Used | Hatching, cross-hatching, blending |
Advanced Techniques for Realistic Hammer Rendering
Progressing beyond basic sketching involves integrating more sophisticated shading and texture work, understanding reflective surfaces, and developing a keen sense of material differentiation. The techniques outlined below serve as advanced steps that refine technical competence and artistic expression.
Layered Shading and Texture Creation
Build depth by layering multiple shades, starting with light tones and gradually progressing into darker hues. Use varied tools—graphite pencils of different hardness, charcoal, or digital brushes in digital mediums—to simulate metallic sheen, wood grain, or rubbery surface textures. Incorporating cross-hatching in layers can add nuanced tone variation and subtle surface imperfections, enriching realism.
Highlighting and Reflective Surface Rendering
Highlights on metal require pinpoint precision. Use kneaded erasers or white gel pens to lift graphite for bright spots, imitating reflective glare. Observe real metal objects to notice how reflections distort and merge with surrounding colors. Applying a thin white accent often makes metallic surfaces appear brighter and more convincing.
Material Differentiation and Detailing
Different materials interact with light uniquely. Wooden handles exhibit grain patterns, knots, and surface scratches, which can be depicted with fine lines or stippling. Rubber or plastic surfaces demand smooth shading with soft transitions and sometimes glossy reflections. Nail details—like their heads and the grooves—can be accentuated using sharp pencil strokes or fine liners for dimensional accuracy.
| Relevant Category | Specific Technique |
|---|---|
| Simulating Metal | Sharp highlights, gradient shading, reflection mimicry |
| Texturing Wood | Fine lines, stippling, visible grain patterns |
| Surface Glossiness | Consistent soft blending with strategically placed highlights |
Common Pitfalls and How to Avoid Them
While the techniques outlined are effective, beginners often encounter recurring pitfalls—overly uniform shading, inconsistent light sources, exaggerated proportions, and a lack of texture variation. Recognizing these challenges early helps in developing a more refined skill set.
Inconsistent Light and Shadow
Solution: Always select a single, clear light source and stick to it throughout the rendering. Use shading maps or guides to track shadow placement and edge highlights.
Proportion Discrepancies
Solution: Employ measurement tools and grid systems to maintain scale accuracy, especially when translating references onto paper.
Lack of Texture and Material Differentiation
Solution: Study real objects or high-resolution images to memorize surface details. Use varied shading techniques to distinguish materials clearly.
Integrating Composition Techniques for Effective Hammer Drawings

Technical skill alone cannot guarantee impactful artwork. Composition plays a vital role in engaging viewers and communicating the subject effectively. Consider framing, depth, and focal points when planning your piece.
Choosing the Right Perspective
Experiment with different angles—such as a three-quarter view or an eye-level shot—to add dynamism and perspective depth. Foreshortening can exaggerate or diminish proportions, producing more compelling visual narratives.
Creating Visual Balance and Focus
Use contrast, placement, and detail emphasis to draw attention to specific parts, such as an impressive nail detail or shiny metal head. Leaving negative space or incorporating background elements can add context and enhance storytelling.
Color Considerations
While classic hammer drawings are monochromatic, applying subtle color tints—achieved through colored pencils or digital overlays—can invoke mood or realism. Metallic hues, earthy tones for handles, or background shading all contribute to a cohesive piece.
Key Points
- Observation accuracy: The cornerstone of realistic hammer drawing; use detailed references.
- Layered shading: Builds depth and material differentiation effectively.
- Material mastery: Understanding how light interacts with different surfaces enhances realism.
- Composition strategies: Framing, perspective, and focal points elevate artwork impact.
- Consistent practice: Regular exercise refines skill and sharpens perceptual acuity.
What tools are best for beginners in hammer drawing?
+Start with basic graphite pencils (HB, 2B, 4B), blending stumps, and erasers. As skills develop, incorporate charcoal, colored pencils, or digital tools to expand your techniques.
How can I improve the realism of my metallic surfaces?
+Focus on capturing sharp highlights, subtle gradations, and reflections. Practicing observation of real metal objects and experimenting with highlight placement significantly enhances realism.
What common mistakes should I watch out for in hammer drawing?
+Avoid inconsistent light sources, distorted proportions, and flat shading. Use references and measurement tools consistently to maintain accuracy.