DIY
Building a Tesla UMC Wall Mount for Under $10
Everyone likes a bargain, even owners of (relatively) expensive EVs. The first question a new Tesla owner must address is: “how do I charge my car at home?” Almost immediately you’re down to two options, the extra cost Tesla High Power Wall Charger (HPWC) or the included Universal Mobile Connector (UMC).
 If you, like most owners, opt for the included UMC, you’ll find that Tesla has left you hanging. Literally. The UMC packs quite a bit of weight into its charging brick and it dangles precariously cantilevered on an adapter. Over time this weight can weaken the connections between the car and the plug, leading to the risk of overheating, arcing or a short circuit. To eliminate this problem you need to support the weight of the UMC. But can you do it cheaply?
ALSO SEE: Should You Leave Your Tesla UMC Plugged In?
I’m happy to report that “post-purchase money-pit creep” need not apply to this particular problem! There are various clever solutions to be found on the internet ranging from water bottle holders intended for bicycles to a very nice 3-D printed bracket.
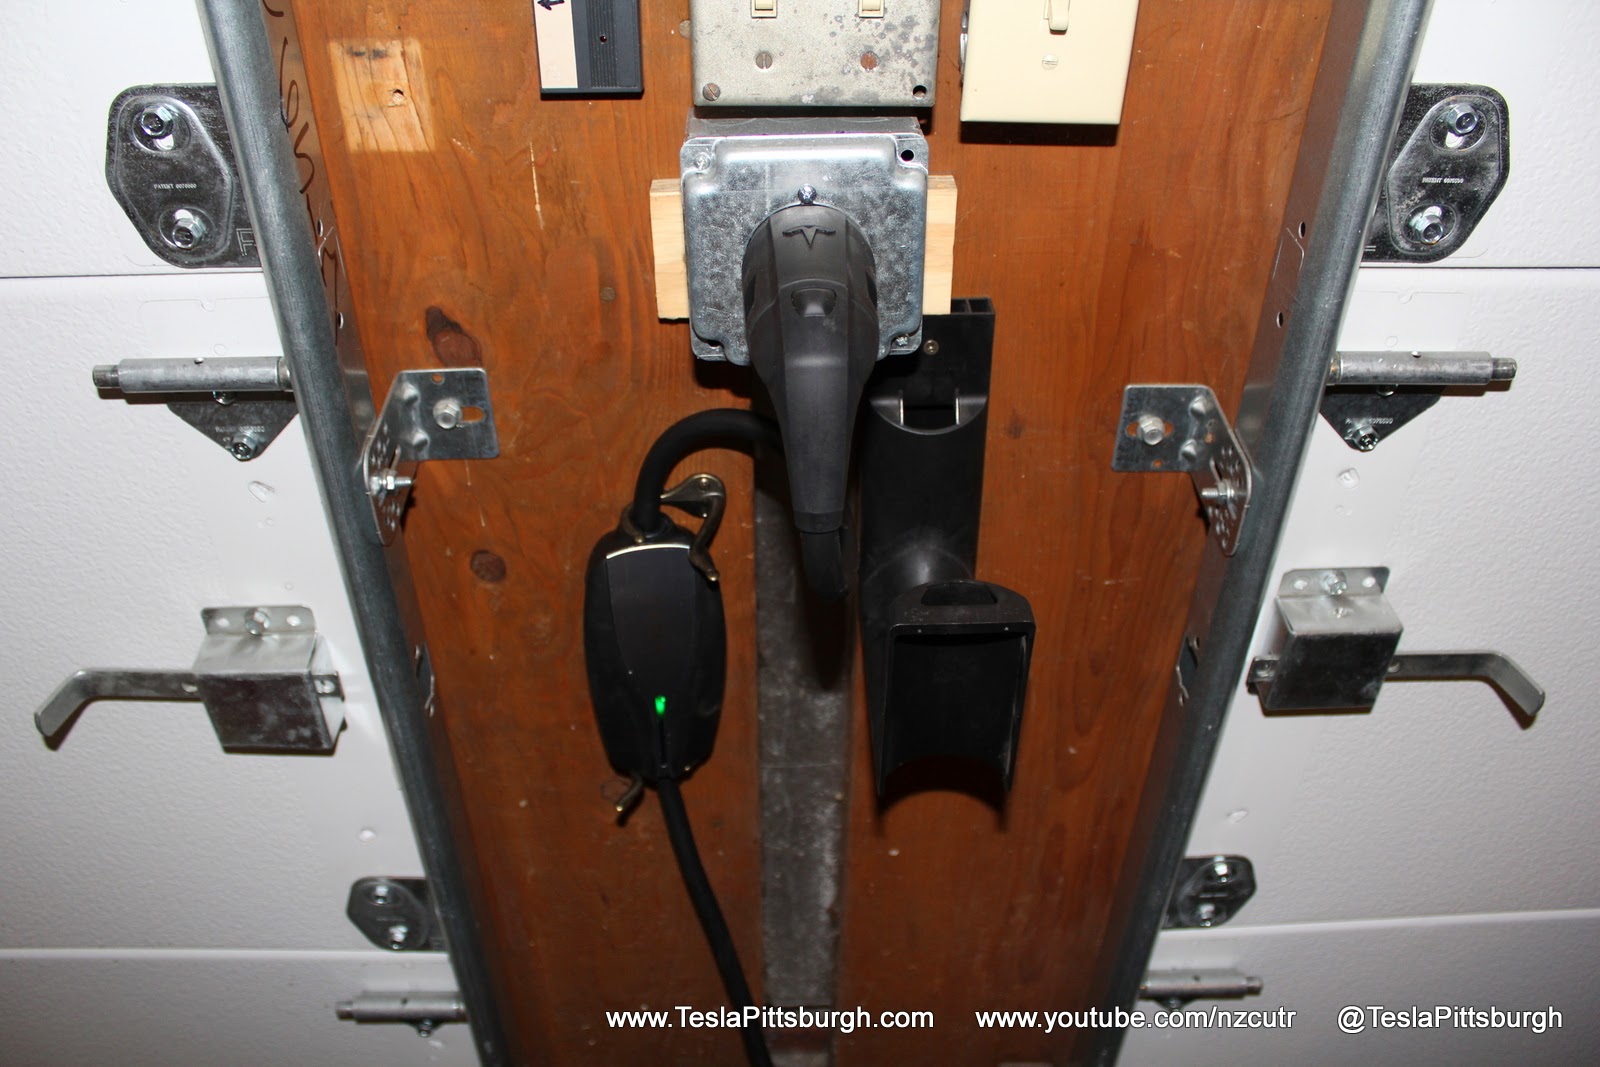
Tesla UMC Wall Mount for Under $10
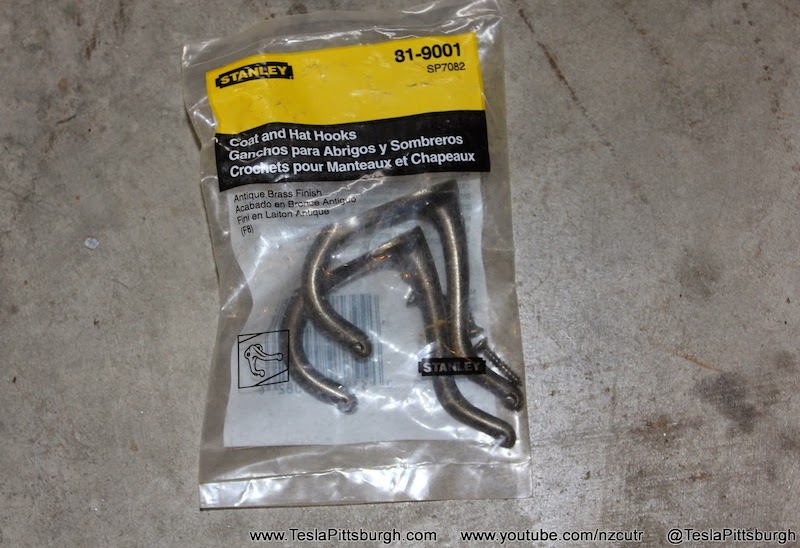
 I stumbled across my own solution right after I parked Serena in the garage for the first time, using the cheapest of cheap coat hooks leftover from a project I never started in the house we’d just moved away from. That’s right, kiddies, my procrastination had saved me a cool 100 cents, plus tax. I think the setup is pretty elegant in its simplicity and ease of use and you can’t hardly beat the price! Frankly, the only thing more impressive than the price is the availability (any hardware store) and the ease of installation (under 5 minutes).
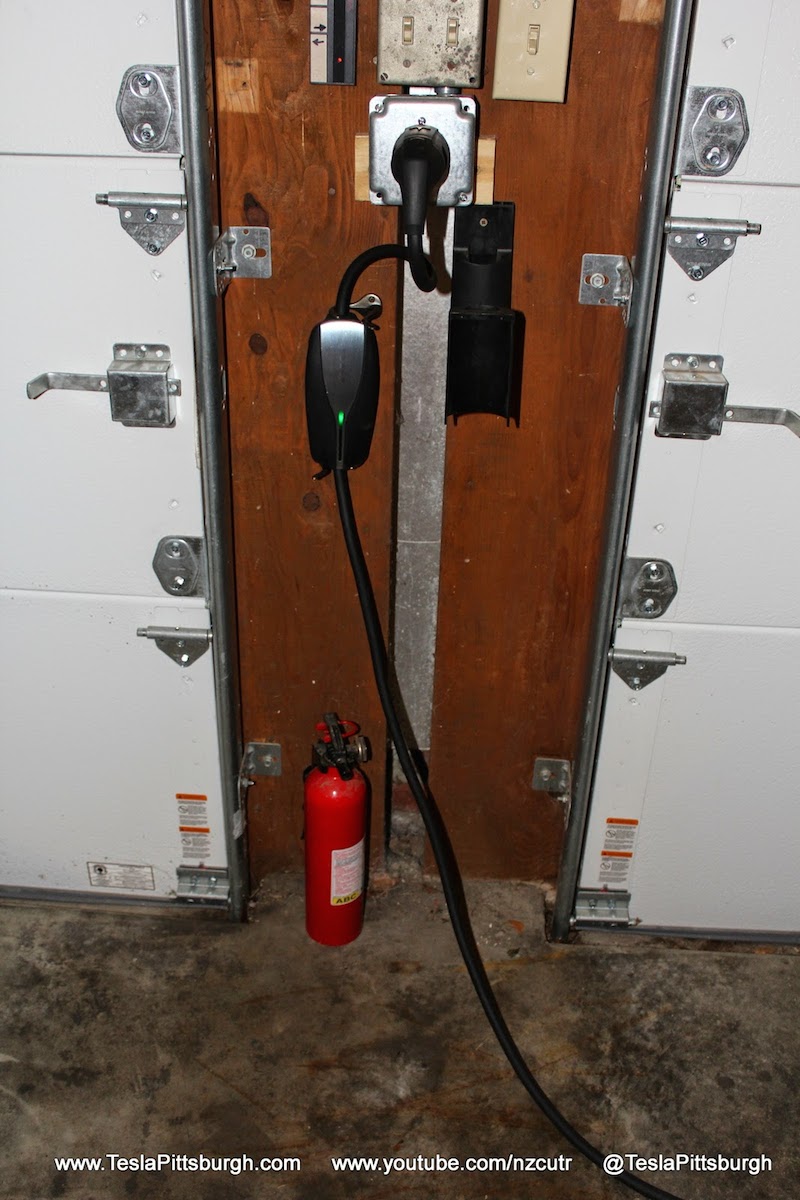
 I chose to locate the plug and UMC in between our two garage doors. Serena has never actually parked on the other side of the garage but I wanted to have the option. I also chose the door end of the garage because our garage layout guarantees this area won’t ever be obstructed or blocked and it is a lot closer to our main electrical box. My wife just pulls in forward but I like to back in (because no exhaust = no fumes = NEENER, NEENER because I CAN). If you’d ever backed a cold-started Subaru into your garage in the middle of Winter, you’d appreciate how much better it is to do that with a Tesla. “Lesson learned!” I said to myself when I regained consciousness…
Trying to save everyone some trouble I did a search online for these coat hooks and found a few being sold on Amazon. They can also be found at any local Home Depot or Lowes store, usually in the Hardware aisle.
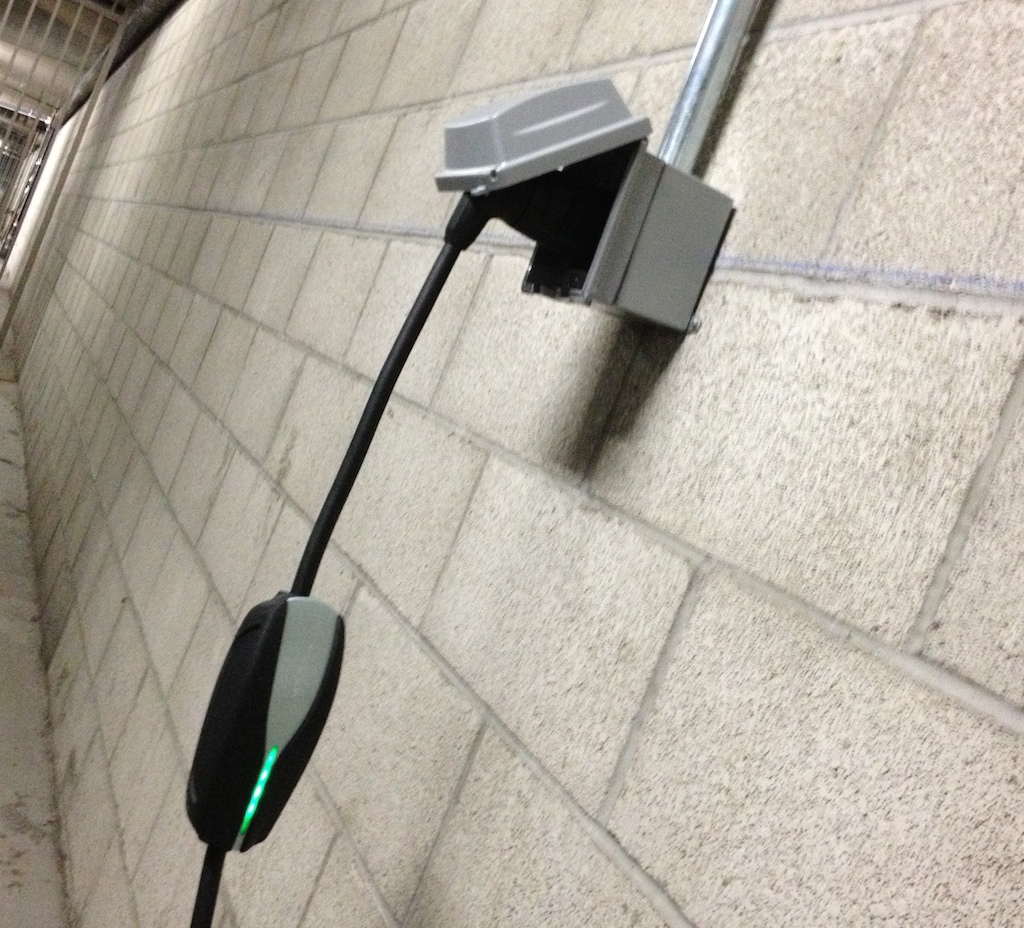
A closer look at the installation reveals how the hooks are mounted. The bottom hook supports the weight of the UMC and the top hook is mounted facing the other way to “lock in” the top of the UMC. The UMC is under very slight pressure by the hooks and that keeps it from being knocked out the setup by kids tripping over the charger’s cord or other handling mishaps. When not in use the charger cord is just looped over the big black bracket on the right side.
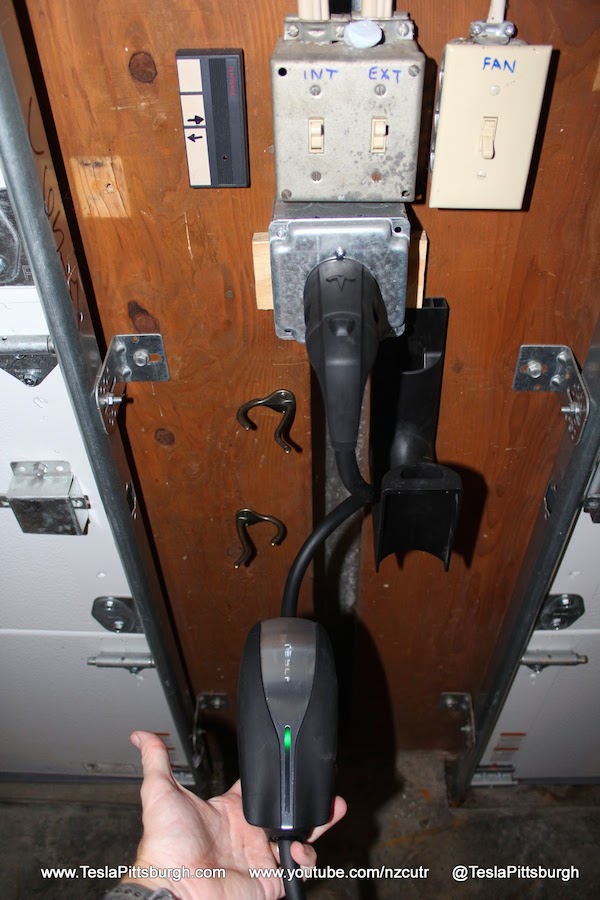

When traveling outside your normal routes, the UMC can be easily removed from the mount by simply popping the top out the hook and then lifting it. If you’re in a real hurry, just twist and yank (insert The Office joke here). Very simple, fast and easy, just like every other DIY project you will attempt in your life ever. Okay, not really. It is true that driving a Tesla makes your daily life better but even Elon can’t make home DIY projects run smoothly. This one, however, is as close as you’ll get to a guarantee and a total slam-dunk if you’re trying to prove to your wife how skilled you are with a screwdriver.
How-to Video
Are you more visually oriented, like me? Check out the video version of this post that I made to show off how cluttered my garage is:
Thanks for visiting us here. CLICK to read more at www.TeslaPittsburgh.com and check out the videos on our YouTube channel at www.YouTube.com/NZCUTR.


Back in 2019, YouTuber Simone Giertz, the self-proclaimed “Queen of Sh*tty Robots,” created a one-off Tesla Model 3 build that took the automotive world by storm. Fondly dubbed as “Truckla,” Giertz noted that the vehicle was actually her dream car — as crazy as that may sound.
Now almost four years later, the YouTuber posted an update on Truckla. And just like every other big project that one probably started, Giertz stated that she actually stopped working on Truckla when the vehicle was about 80% complete. The car is driving though, but a lot of stuff was not really working very well.
Thus, for her Truckla update, Giertz shared how most of her Model 3 pickup truck conversion was essentially completed. Truckla got a lot of detailing done, she got a slight lift, and she now has a functional tailgate. One has to admit, Truckla’s tailgate is pretty darn cool.
The “Queen of Sh*tty Robots” also opted to give Truckla a friend in the form of an automatic robot charger. Unlike Tesla’s rather interesting snake charger from years past, Truckla’s charger would come in the form of a rover, thanks to her friends at robotics platform Viam. Giertz aptly named Truckla’s robot charger friend “Chargela,” which is an appropriate name for such an invention.
Also true to form for Giertz, Chargela’s first encounter with Truckla was just a tiny bit awkward. One could say that Chargela may have just been a little bit nervous on his first try without human hands helping him. Most importantly, the system did work, so Giertz would likely keep using Chargela for her Model 3 pickup.
Teslas are very tech-heavy vehicles, so projects like Giertz’s Truckla are always remarkable. The fact that the Model 3 works perfectly fine despite having a good chunk of it cut off and turned into a pickup truck bed is mighty impressive any way one looks at it. Overall, Truckla will always be one of the coolest Tesla DIY projects to date, so any updates about the vehicle are always appreciated.
Truckla’s nearly four-year update can be viewed below.
Don’t hesitate to contact us with news tips. Just send a message to simon@teslarati.com to give us a heads up.
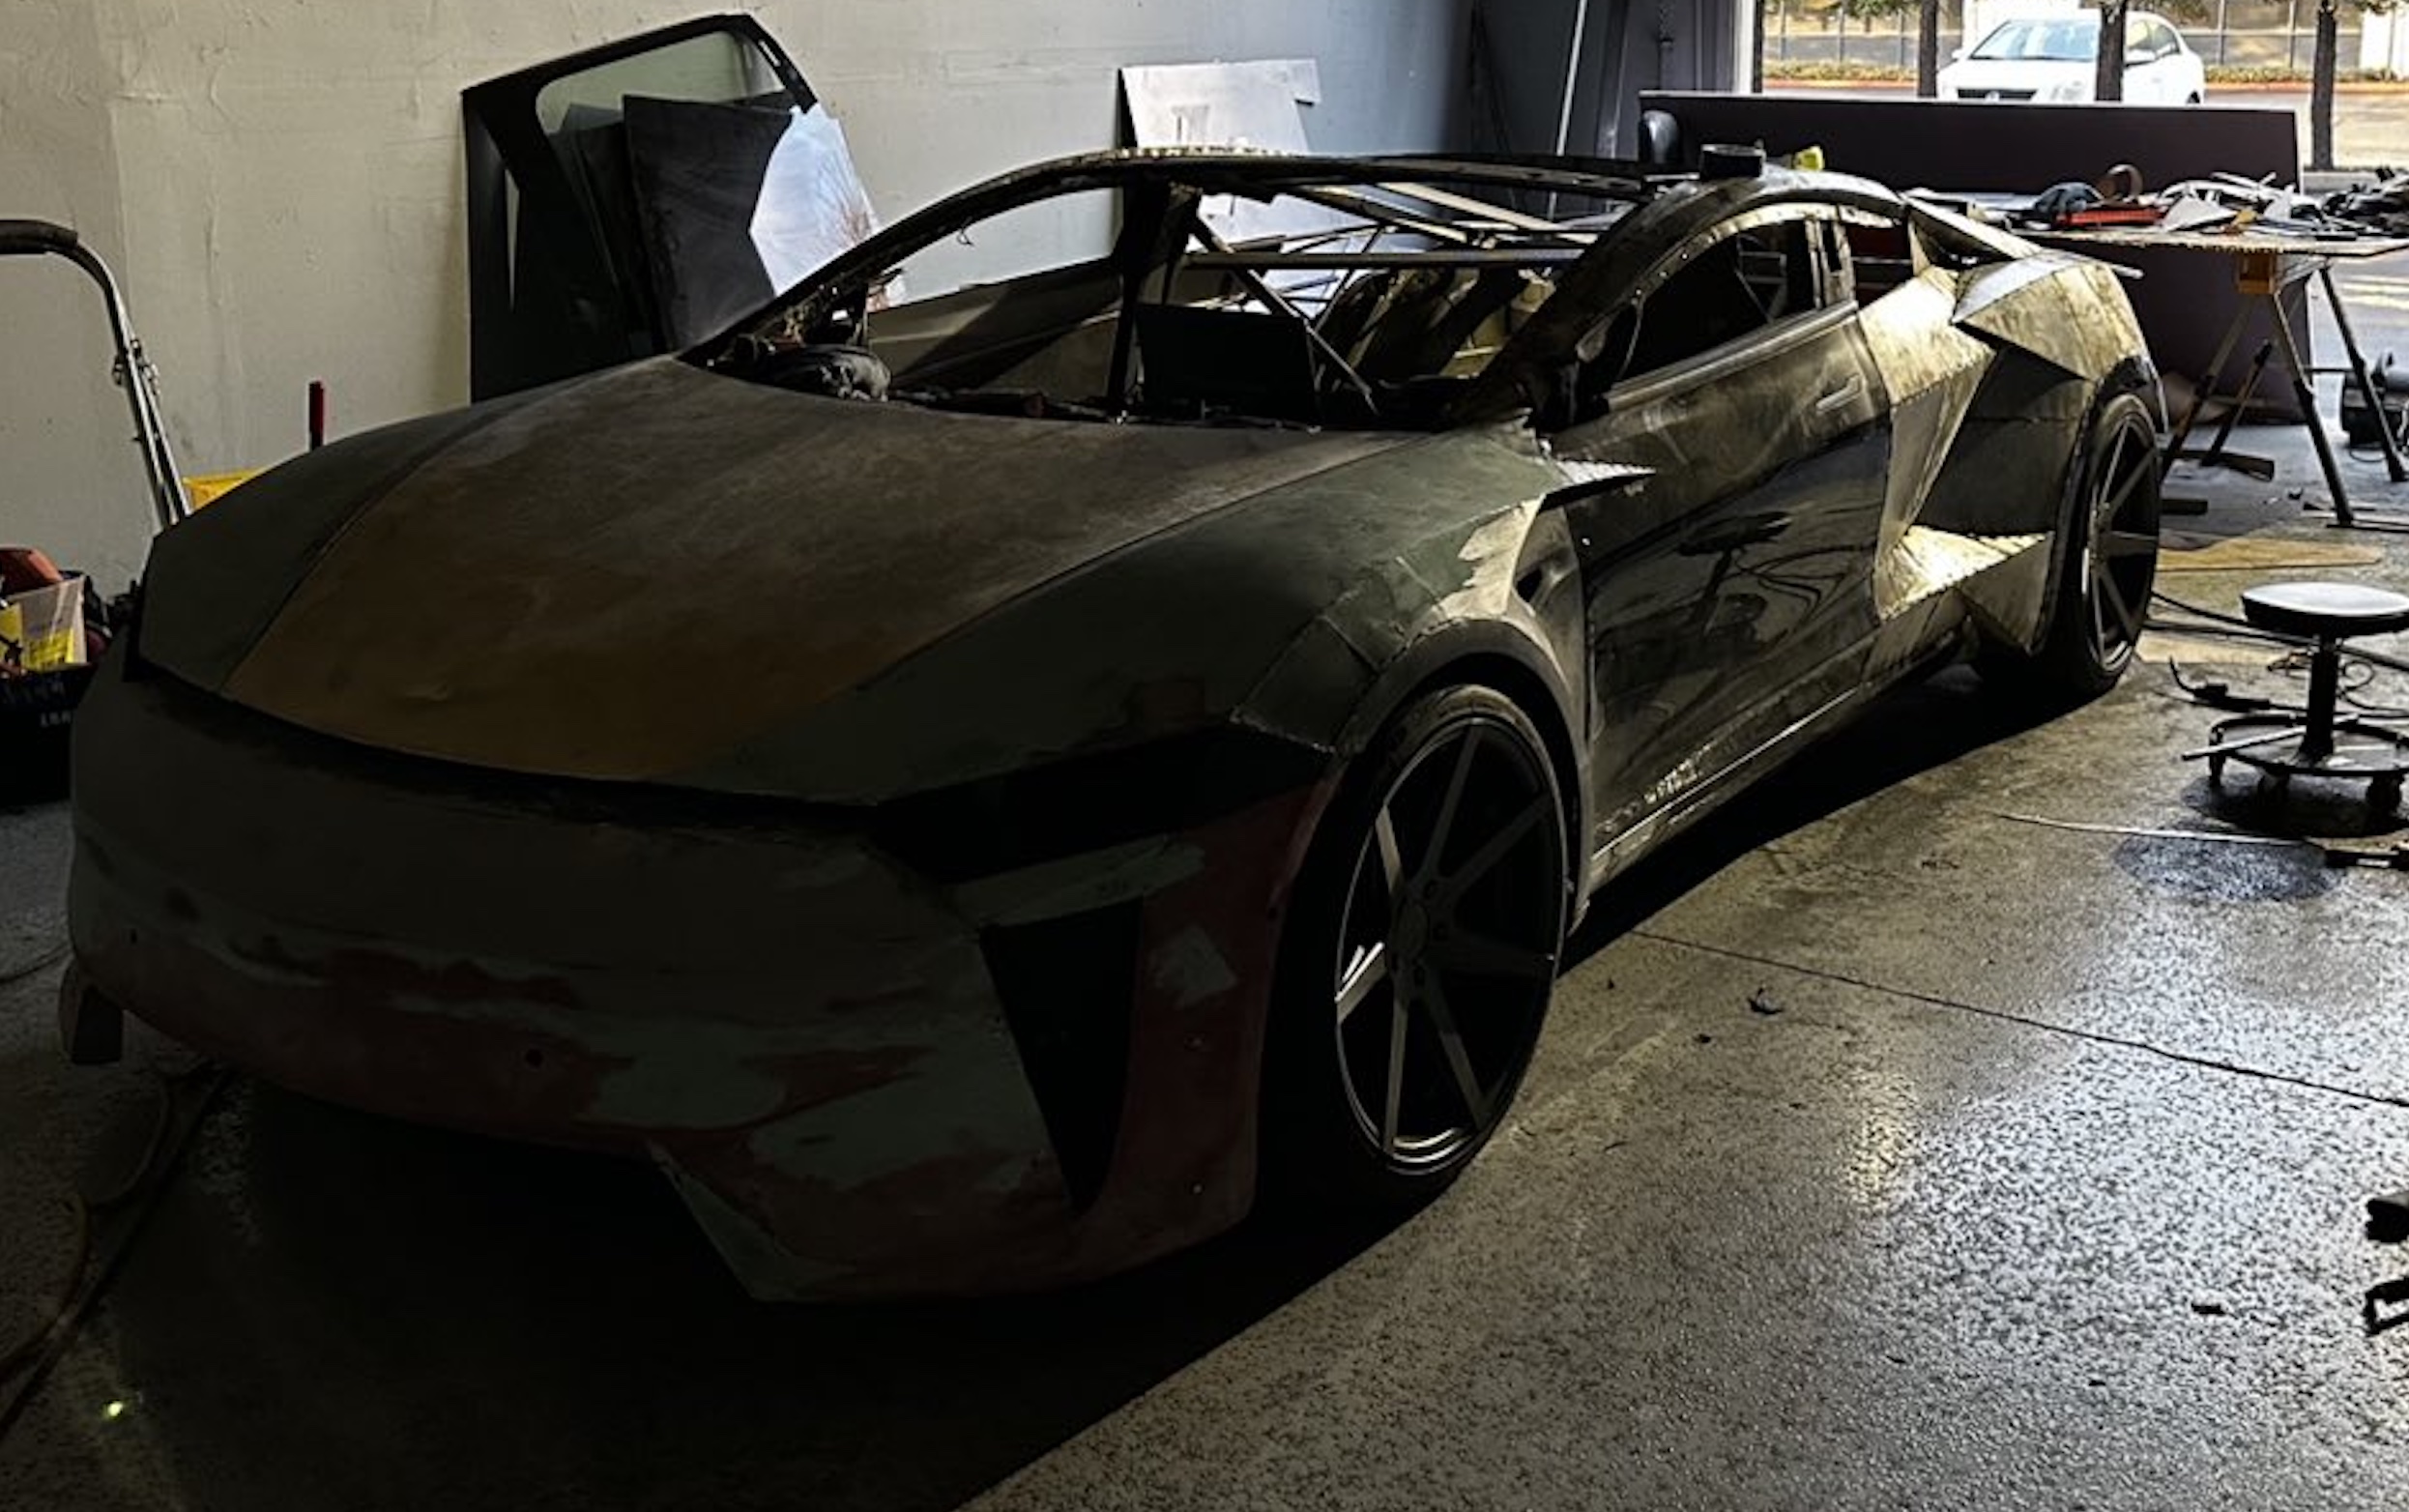
A Tesla owner is taking his hobby and love for electric vehicles to new levels by creating what could only be described as one of the coolest EV-related DIY projects to date. The idea for the project is simple: what happens when you cross a supercar with the Cybertruck? You end up with a two-seater CyberRoadster.
Tesla owner David Andreyev, who goes by the username @Cyber_Hooligan_ on Twitter, has spent the last few months creating a Cybertruck-inspired version of the next-generation Roadster made from a salvaged Model 3 Performance. Starting with a Model 3 Performance is an inspired choice, considering that it is Tesla’s first vehicle that has a dedicated Track Mode.
A look at Andreyev’s YouTube channel, which can be accessed here, shows the meticulous build that the Tesla owner has implemented on the project car. What’s particularly cool about the CyberRoadster is the fact that it’s being built with parts that are also from other Tesla vehicles, like its front bumper that came from a new Model S. Recent videos suggest that the project car’s rear bumper will be from a new Model S as well.
The journey is long for Andreyev, so the completion of the CyberRoadster will likely take some more time. Despite this, seeing the Tesla owner’s DIY journey on such an epic build is more than satisfying. And considering that the CyberRoadster is evidently a labor of love from the Tesla owner, the final results would likely be extremely worth it.
There’s a lot of crazy Tesla modifications that have been done as of late. But some, as it is with a lot of things on the internet these days, have become more silly gimmicks than serious automotive projects. Fortunately, car enthusiasts like Andreyev, who just happen to also love electric vehicles, are taking it upon themselves to create one-of-a-kind EVs that would surely capture the attention of anyone on the road.
Check out the latest video in the CyberRoadster’s creation below.
Don’t hesitate to contact us with news tips. Just send a message to simon@teslarati.com to give us a heads up.
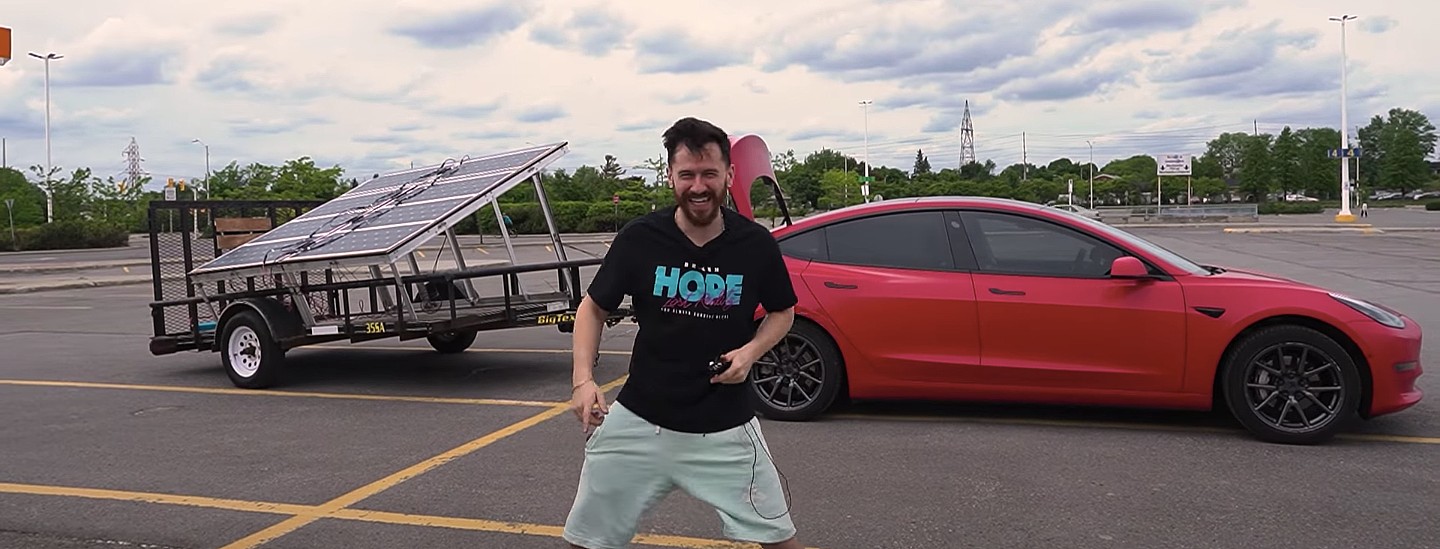
A Tesla owner has demonstrated a rather novel way to charge his Model 3. In a recent video, Sean Callaghan of the ItsYeBoi YouTube channel opted to use a series of off-the-shelf solar panel sheets onto a towable trailer to create a mobile charging unit for his all-electric sedan.
Callaghan planned to use only the sun and the solar sheets purchased from e-commerce platform Wish to charge his Model 3. The solar panel sheets would collect energy from the sun and transfer it to a control panel. The control panels were connected to batteries that would hold the energy—the batteries connected to an inverter, which would then charge the Tesla Model 3.
The entire assembly would provide the Model 3 with about 800 watts of energy on a completely sunny day. However, Callaghan shot the video when weather was overcast, so the entire solar panel trailer build only managed to provide around 300 watts throughout the YouTube host’s test.
To put this into perspective, a 100 volt home wall outlet provides 1.4 kilowatts of power, or 1,400 watts. Therefore, the 300-watt solar panel assembly built by Callaghan was producing less than 25% of the energy of a typical wall outlet. This is pretty marginal compared to Tesla’s 250-kilowatt V3 Superchargers, which provides 250,000 watts, or about 833 times as much power as the makeshift solar panel build.
However, Callaghan’s goal was not to charge the vehicle quickly. He explained the idea came from a previous video where he used a $5,000 Wish-purchased wind turbine to charge his Model 3. He wanted to test the effectiveness and efficiency of the system, which was questionable due to the time it would take to charge the battery fully.
The Model 3 battery pack is 78 kWh, and with Callaghan’s 300-watt system charging his electric vehicle, it would take 260 hours to supply the Tesla’s battery to full capacity.
In the past, electric vehicle enthusiasts have asked Tesla CEO Elon Musk why the company’s vehicles do not contain solar glass roofing, which would charge the car while the owner is driving. Musk has explained that the efficiency of this idea is challenging and likely would not provide an ample amount of range.
When asked about the idea of putting solar panels on the top of Tesla’s vehicles in 2017, Musk responded that the idea was “Not that helpful, because the actual surface of the car is not that much, and cars are often inside. The least efficient place to put solar is on the car.” It also would not be cost-effective for Tesla because “the cost of the panels and electronics, R&D and assembly would never pay for itself in the life of the vehicle, compared to charging from the wall in your garage,” Quartz noted.
That being said, Tesla plans to implement solar panels onto the motorized tonneau of the upcoming Cybertruck. The idea was discussed on Twitter when Musk stated that the optional feature would add “15 miles per day, possibly more” when parked in the sunlight. Also, fold-out solar wings could help capture enough solar energy for 30 to 40 miles a day.
Watch Sean Callaghan’s video of his makeshift solar panel trailer below.

Armored Tesla Cybertruck “War Machine” debuts at Defense Expo 2025

Tesla Megapacks chosen for 548 MWh energy storage project in Japan


